


Two years later and I still barely feel the tip of my right thumb.
I was milling a table leg for an entryway table — but I wasn’t thinking about the 28 carbide blades spinning at 5000 RPMs.
My mind was elsewhere (on dovetail jigs, of all things). And before I knew it, my thumb made contact with the cutterhead of my jointer.
I’m no stranger to shop injuries. Cuts, knicks, slices. I single handedly prop up the Band-Aid industry. And I’ve had enough stitches to hold together Frankenstein’s monster.
But this was different. My brain turned off. I froze. Just a breathing, bleeding hunk of meat standing alone in my shop.
Luckily, it turned out ok. I got myself to the hospital, and my thumb’s now only ⅛” shy of its original glory.
I’m not telling you this morbid story to scare you (ok, maybe a little).
I’m telling it to you to show that jointers must be respected — and approached with a healthy dose of terror.
But staying safe while using a power jointer is easy if you follow a few protocols — which I’m laying out for you in this blog.
Jointers are incredibly useful tools and I recommend every woodworker get one if they can.
But make sure to follow these safety rules… and don’t think about dovetail jigs while milling lumber.
(If you want tips on how to prepare for a potential shop injury, make sure to watch this).
1. SET THE RIGHT CUTTING DEPTH
Jointers are big, powerful tools. But that doesn’t mean you should take off a lot of material all at once.
Small bites are key to safety and good results. I recommend taking off no more than 1/16” at a time. 1/32” might even be best.
If the cutting depth is set too deep, it’s harder to push the board through the cutterhead. And that means higher chances of kickback or your hands slipping.
Not to mention tearout and excessive strain on the motor.
Change the cutting depth by adjusting the height of the infeed table (the right side of the jointer bed).
You can use the depth gauge on your jointer, or even just a straightedge and a square.
Multiple small passes will end up saving you time — and help you avoid chipped out boards or a trip to the hospital.
2. KEEP THE BEDS WAXED
You want boards to slide over your jointer bed as freely as Yoshi sliding over a rogue banana peel on Rainbow Road.
The less resistance the better. Obviously, you’ll still need significant pressure to slide a board through the cutterhead — but it shouldn’t feel like a workout.
Periodically rub down the jointer beds with paste wax. Slather a healthy amount on both the infeed and outfeed table, then buff it out to a thin layer.
Make sure you do a good job buffing. If thick globs of wax dry, it’ll actually make it harder to push boards through.
You don’t need to do this every time you use your jointer. Once a month is plenty (depending on how much you use it). But it’s better to wax too often than not enough.
3. ADJUST THE FENCE POSITION FOR NARROWER BOARDS
Just because your jointer has 8” of cutting capacity doesn’t mean you should always leave the entire cutterhead exposed.
Adjust the position of the fence depending on the width of the board.
For example, if your face jointing a 4” wide board, move the fence back so only around 4 ½” of the cutterhead is exposed.
The less of the blade exposed, the better.
If I’d done this while jointing the leg for my entryway table, my thumb might have been saved from the harassment.
It isn’t absolutely essential if you're using push paddles and the blade guard. But if you want to be as safe as possible, it’s a great protocol to follow.
4. ALWAYS USE THE BLADE GUARD
This kind of goes without saying — but you should always keep the blade guard on while using your jointer.
The only time you’d ever need to remove it is if you're using the rabbeting ledge or jointing boards wider than your cutterhead capacity.
Otherwise, keep the guard on. It keeps the cutterhead from being overly exposed — meaning your fingers can’t find their way down into the blades from above.
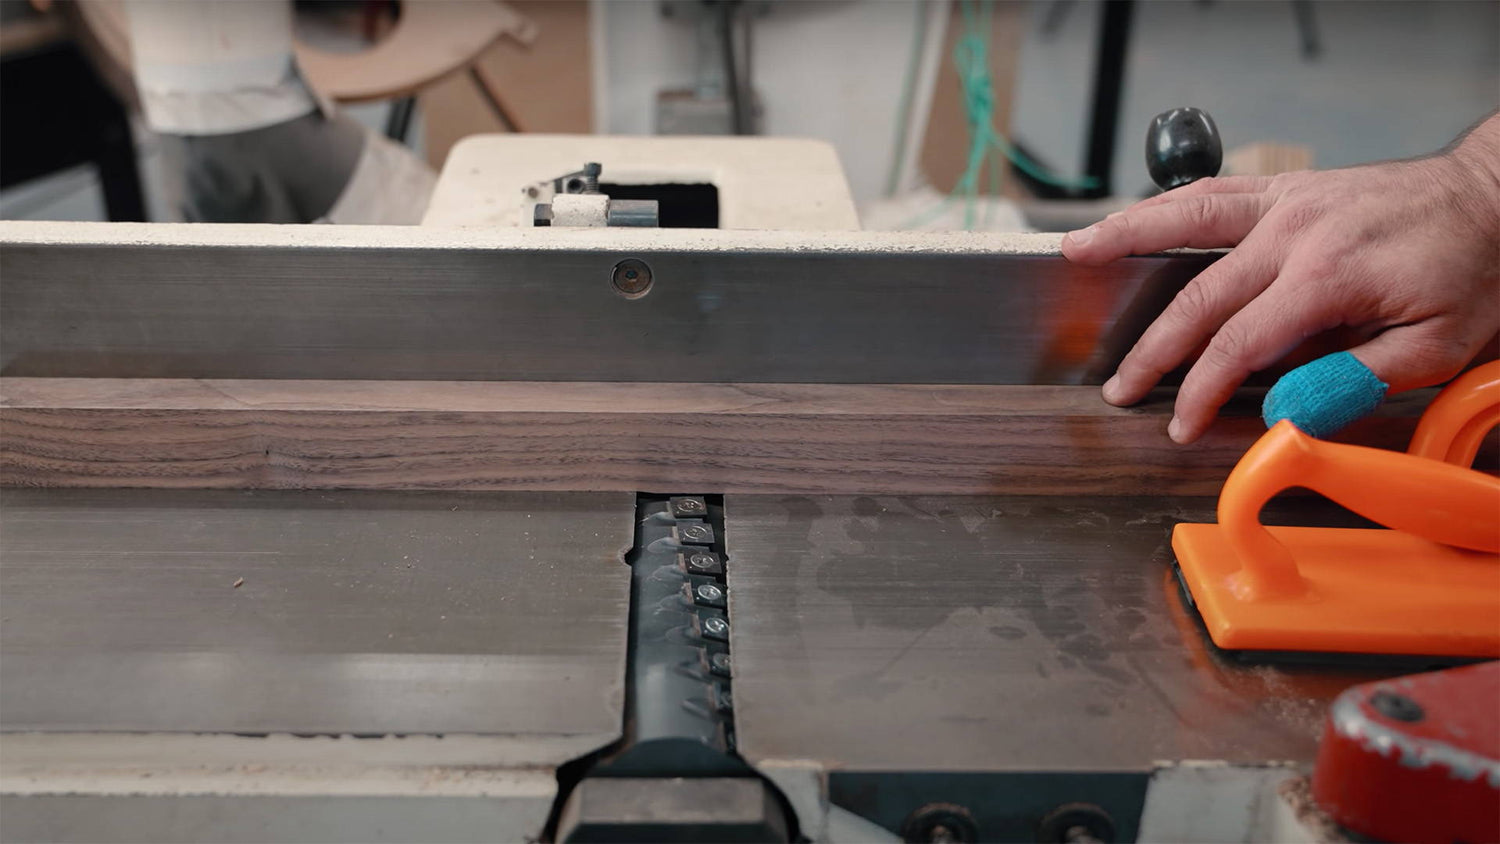
5. USE PUSH PADDLES
I keep two push paddles by my jointer at all times.
They not only help keep boards flat as you push them through. They’re also an extra line of defense between the cutterhead and your fingers.
Make sure to use TWO push paddles — one for each hand.
As the blade passes through the cutterhead, you want to put all the pressure on the outfeed table as soon as possible. Two paddles make it easy.
I don’t recommend the long double-handled long push paddles. They don’t let you transfer the pressure to the outfeed side soon enough.
Edge jointing is a little different.
I use one push paddle to keep the board flat against the fence, and my hand on the top edge of the board to push it through and keep it flat on the outfeed table.
One safety tip for this paddle-less hand is to run a finger or two along the top of the fence.
If you slip for any reason, you’ll have those fingers to catch the fence and keep them from going towards the cutterhead.
6. DON’T PUSH FROM THE BACK OF THE BOARD
This is really about creating good habits.
With well-waxed jointer beds, decent push paddles, and small enough of a cutting depth, you shouldn’t have to push a board from the back.
Sometimes you might need to at the very beginning of a cut — but use a push paddle and make it quick.
If you get used to pushing a board with your thumb, you’re doing yourself a disservice.
Your thumb will pass way too close to the cutterhead with nothing between. Don’t put yourself in this position. There’s no good reason to.
7. KNOW WHEN A JOINTER IS NOT THE BEST CHOICE
If you’ve got a thick piece of lumber that needs to be milled, a power jointer is ideal.
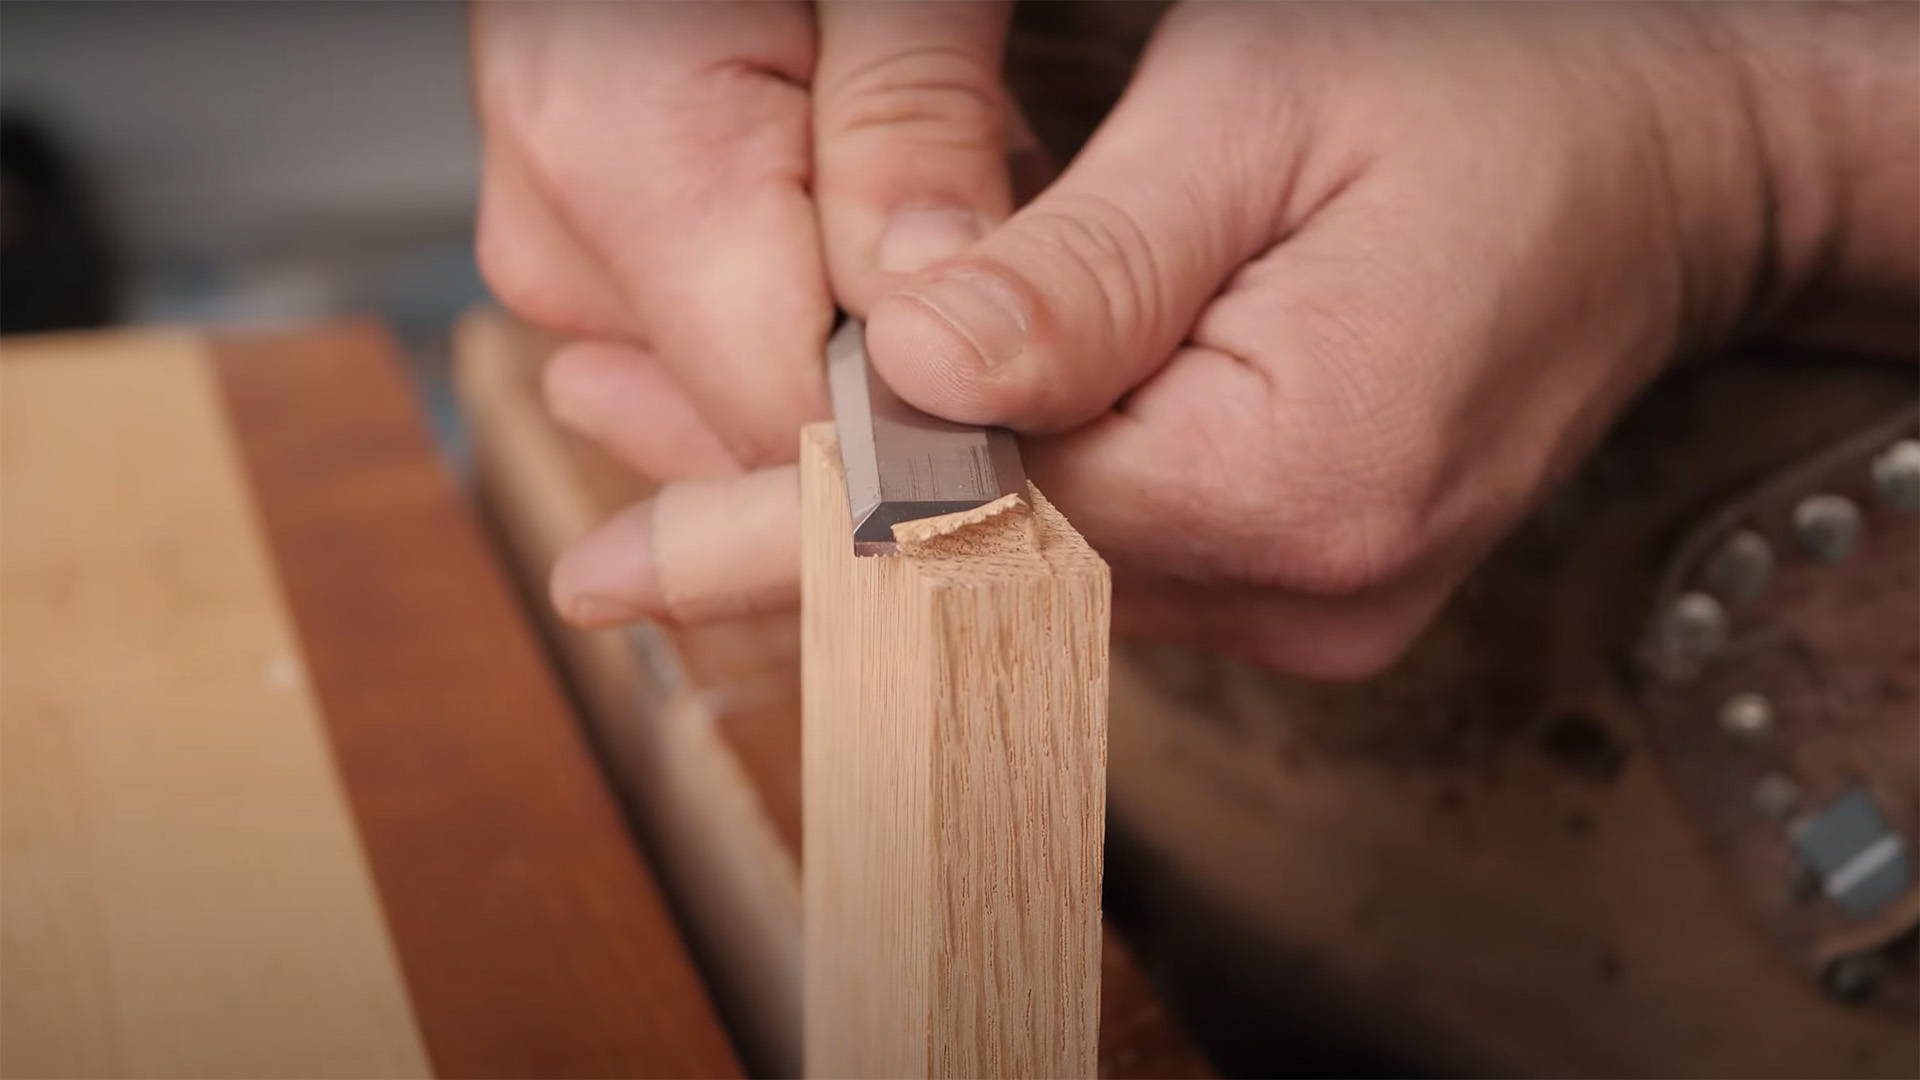
But if you need to flatten an extra thin board — grab a hand plane instead.
As a general rule, don’t take boards under ½” thick to the jointer.
Material that thin could break under the pressure of the cutterhead. And you don’t want your hand to be there if it does.
For thin cupped boards, use a hand plane to flatten out one side until it doesn’t rock. From there, just run it through a planer.
8. FOCUS
The most important part of using any power tool is paying attention.
When you’re at the jointer, be at the jointer.
Your mortgage, obligations, that mean thing your crush said to you in 2nd grade — set it all aside and focus on the machine in front of you.
Think about how you’ll make a cut before you hit the on switch. Listen to how the board passes through and kill the power if it doesn’t sound right.
Staying focused can save you from making a completely avoidable mistake.
It’s incredible the amount of zen that can be found in spinning blades.
JOINT BOARDS, NOT YOUR FINGERS
Jointers are tremendously useful — and need to be treated with a tremendous amount of respect.
Always use them with caution and avoid putting yourself in dangerous situations.
Luckily, it’s not hard to stay safe. Just follow the guidelines above, take your time — and above all else, focus on the task at hand.
Got any other jointer safety tips, or warning tales of what not to do? Share them in the comments below!
Follow us on Instagram @katzmosestools, on TikTok @katzmoseswoodworking, and check out my YouTube channel for more great woodworking content...
And as always, STAY SAFE IN THE SHOP!

21 comments
Nadia Kyrylova
2 time Jointer incident victim here. Three fingertips total one year apart. Currently in wound dressing, awaiting my finger to regenerate. I can say that I am mentally scarred for life, and will never approach a joint, without an added level of vigilance and anxiety.
Thank you for these tips, it really does help knowing that someone I look up to has also experienced this type of lesson. It also really sucks to know that you will be changed forever in someway. People wear their perfect unharmed hands as a badge of honor in this craft – something to strive for.
dog
hi my 10 sooooooooo yay
hi my 10 sooooooooo yay
J Scott Bell
A good friend of mine far more experienced than me and has his own wood trim company got in a bit of a hurry on his planer and lost two joints off a right finger last year. Just a finger tip caught the cutter head but grabbed and pulled his finger down into gap on the in feed side. Get the shuddering Heebee Jeebies just thinking about it and never use my hands or fingers without the safety equipment. We are also both guitar players although I play mostly bass guitar so I need all fingers on both hands. Thanks for the reminder!
A good friend of mine far more experienced than me and has his own wood trim company got in a bit of a hurry on his planer and lost two joints off a right finger last year. Just a finger tip caught the cutter head but grabbed and pulled his finger down into gap on the in feed side. Get the shuddering Heebee Jeebies just thinking about it and never use my hands or fingers without the safety equipment. We are also both guitar players although I play mostly bass guitar so I need all fingers on both hands. Thanks for the reminder!
Andrew W
Such a timely blog for me personally, as I just put a new jointer in the shop. I was using a cutech benchtop carbide tip (not full helical) for a few years and I was probably too cavalier with it. Now that I have a full helical Jet (probably the same model as you have there) I am going to be much more diligent about push paddles. I always give my table saw full respect. Time to be proactive with the jointer too
Such a timely blog for me personally, as I just put a new jointer in the shop. I was using a cutech benchtop carbide tip (not full helical) for a few years and I was probably too cavalier with it. Now that I have a full helical Jet (probably the same model as you have there) I am going to be much more diligent about push paddles. I always give my table saw full respect. Time to be proactive with the jointer too
Cameron
This is true of all power tools, but always wear well fitted clothes.
I was jointing a board for a dining table about a year ago, using push pads and all appropriate PPE and focusing on the task at hand, but it was chilly in my unheated garage, so I was wearing a well fitted but UNBUTTONED and slightly overlong flannel shirt. I noticed just in time that the bottom of the front of the flannel was on top of the jointer bed and headed right for the cutter head. I was able to change position to get the fabric off of the bed, and chances are if it’d caught, it would have torn that but of the shirt right off, but I shudder to think what could have happened if the fabric had held and pulled me ass first into the cutter head.
Jeremiah
One thing I would add is to be aware of the things you’ve been doing and “getting away with” as a warning sign against a future accident. I had been using a cove bit in a router table to create sliding grooves for an end vise and, wanting to make the grooves a bit wider than the size of bit, advanced the fence toward me, resulting in the bit grabbing the piece and shooting it off the table, something that happened one time in the 8-9 times I did it. That one time should have been a hint for me to look into why that happened. But being in a rush, I did it again. This second time the piece was pulled with my hand into to the bit. Like Jonathan, it wasn’t as bad as it could have been, but it’s been almost a year and I still have a dead spot at the tip of my right thumb. It took me a couple of hours (after the incident) on YouTube to discover exactly what happened, but there it was. Don’t chalk up “near misses” to chance.
One thing I would add is to be aware of the things you’ve been doing and “getting away with” as a warning sign against a future accident. I had been using a cove bit in a router table to create sliding grooves for an end vise and, wanting to make the grooves a bit wider than the size of bit, advanced the fence toward me, resulting in the bit grabbing the piece and shooting it off the table, something that happened one time in the 8-9 times I did it. That one time should have been a hint for me to look into why that happened. But being in a rush, I did it again. This second time the piece was pulled with my hand into to the bit. Like Jonathan, it wasn’t as bad as it could have been, but it’s been almost a year and I still have a dead spot at the tip of my right thumb. It took me a couple of hours (after the incident) on YouTube to discover exactly what happened, but there it was. Don’t chalk up “near misses” to chance.
Mike
As a person with 11 fingernails from a short discussion with a chainsaw, I’m not terrified of power tools, but I’m very aware of how quickly and hard they can bite. Standard procedure now is to pause and THINK about what I’m about to do and how, before powering up the tool.
As a person with 11 fingernails from a short discussion with a chainsaw, I’m not terrified of power tools, but I’m very aware of how quickly and hard they can bite. Standard procedure now is to pause and THINK about what I’m about to do and how, before powering up the tool.
Joe
Thank you for this article. I only wish I had it back in august when I cut off a piece of my ring finger trying to joint a small board on my jointer trying to go fast and not using my push paddles. Dumb dumb dumb. So I’ve had to endure countless hand therapy and drs appointments and finally surgery coming up next week to try and fix some nerves and remove some scar tissue from my finger tip ( horrible when you play guitar and can no longer press down the strings)
So please everyone heed Jonathan’s advice and follow his tips. It can for real save your fingers.
Bruce
Great blog and useful comments! I think the key to woodshop safety is SHEER TERROR! Be afraid. Not only the jointer, but also the router, the table saw, the band saw, etc. We all end up trying to solve some problems by doing non-standard procedures. I’ve done some lulus and lucked out without an injury. With age you get smarter. Do atypical procedures only with great care, or better, don’t. As a physician-hobbyist, I have established over the years some policies to avoid injury: (1). Stay alert and don’t do stupid things. And don’t work when you are tired, at least us hobbyists (2). Purchase any safety accessories that keep your hands away from a spinning blade. I love the Magswitch featherboards, almost the whole line, and use them all the time on the table saw, jointer and bandsaw. (3). Use a push stick. Don’t allow hands to even come within a foot of the spinning blade. Using hold downs, the work piece needs only to be pushed through the blade. You won’t lose fingers if they are not near or pressing toward the blade; avoid kickback by standing to the side of the trajectory of an accident (4). I had a great Delta Unisaw for decades. At a Fine Woodworking workshop, at the completion of a lecture where the presenter had a SawStop on stage, I asked what did he recommend for increased safety with the Unisaw. He screamed back “Get a SawStop!!” And I did. I have the luxury of doing woodworking for fun, and time is not critical. I am certain that those who make a living building furniture may not have the luxury of time that us hobbyists have. But you are talented, practiced and skilled.
Great blog and useful comments! I think the key to woodshop safety is SHEER TERROR! Be afraid. Not only the jointer, but also the router, the table saw, the band saw, etc. We all end up trying to solve some problems by doing non-standard procedures. I’ve done some lulus and lucked out without an injury. With age you get smarter. Do atypical procedures only with great care, or better, don’t. As a physician-hobbyist, I have established over the years some policies to avoid injury: (1). Stay alert and don’t do stupid things. And don’t work when you are tired, at least us hobbyists (2). Purchase any safety accessories that keep your hands away from a spinning blade. I love the Magswitch featherboards, almost the whole line, and use them all the time on the table saw, jointer and bandsaw. (3). Use a push stick. Don’t allow hands to even come within a foot of the spinning blade. Using hold downs, the work piece needs only to be pushed through the blade. You won’t lose fingers if they are not near or pressing toward the blade; avoid kickback by standing to the side of the trajectory of an accident (4). I had a great Delta Unisaw for decades. At a Fine Woodworking workshop, at the completion of a lecture where the presenter had a SawStop on stage, I asked what did he recommend for increased safety with the Unisaw. He screamed back “Get a SawStop!!” And I did. I have the luxury of doing woodworking for fun, and time is not critical. I am certain that those who make a living building furniture may not have the luxury of time that us hobbyists have. But you are talented, practiced and skilled.
Randy
When I was in Jr.High School wood shop eons ago our wood shop teacher was giving us a demonstration on proper use of a jointer when he looked up while pushing a board thru it and sliced off his index finger past the 1st joint. He shut the machine off and then retrieved what was left of the joint and said,
Let this be a lesson to each of you. Don’t be distracted and use proper safety tools." I’ll never forget that.
Stan Krajewski
My mentor’s shop saw many of us in grippy kevlar mesh gloves for ergonomics and abrasion protection. One of us lost several fingers when a joiner helical cutter head sucked in his hand in 1 millisecond. Take off the mesh gloves—pick up the paddles.
My mentor’s shop saw many of us in grippy kevlar mesh gloves for ergonomics and abrasion protection. One of us lost several fingers when a joiner helical cutter head sucked in his hand in 1 millisecond. Take off the mesh gloves—pick up the paddles.
James
And use an outfeed for longer boards. My father saw a guy lose all the meat from the palm of his hand when trying to feed a long board.
And use an outfeed for longer boards. My father saw a guy lose all the meat from the palm of his hand when trying to feed a long board.
Jim Bragg
Great article. I have always tried to use best techniques for safety with all of my power tools, but you have given me some great suggestions and guidance. Thanks!
Great article. I have always tried to use best techniques for safety with all of my power tools, but you have given me some great suggestions and guidance. Thanks!
Bill
Without a doubt the scariest power tool in the shop. I see YouTube videos of people planning with the their hands on top of boards without pads and without a guard. Eventually those poor habits will result in injury. I know, I lost the tip of my left index finger at the age of 14.
Without a doubt the scariest power tool in the shop. I see YouTube videos of people planning with the their hands on top of boards without pads and without a guard. Eventually those poor habits will result in injury. I know, I lost the tip of my left index finger at the age of 14.
Andy Thomson
I have a 6” jointer that I inherited from my father-in-law. It has the English style straight guard on a long rising arm, which I find gets in the way as I have to lift my hands over it rather push straight through as can be done with the US style swinging guard plate. I’m thinking of making my own US style guard. Is there any reason why I shouldn’t do this. I’m not sure why there are these two different guard styles anyway.
I have a 6” jointer that I inherited from my father-in-law. It has the English style straight guard on a long rising arm, which I find gets in the way as I have to lift my hands over it rather push straight through as can be done with the US style swinging guard plate. I’m thinking of making my own US style guard. Is there any reason why I shouldn’t do this. I’m not sure why there are these two different guard styles anyway.
Randy Rotermund
Thank you for sharing. To make you feel better, I made changes on how I use my jointer because of your accident. The true danger is getting false confidence around our tools! We need to take the time to think about the best way to do things not only from a quality perspective, but also AND foremost safety. Nobody likes a nice piece if you’re missing a finger for it.
Thank you for sharing. To make you feel better, I made changes on how I use my jointer because of your accident. The true danger is getting false confidence around our tools! We need to take the time to think about the best way to do things not only from a quality perspective, but also AND foremost safety. Nobody likes a nice piece if you’re missing a finger for it.
Tom
I cringe every time I see a YouTuber flatten a board by laying bare hands on top and pushing it through the planer. An old friend did this and lost three fingers and half of his right hand when he tried to push a knot through. Poor practices combined with dull cutters, wrong setup, sticky bed surfaces and tough wood are all in the recipe for disaster.
I cringe every time I see a YouTuber flatten a board by laying bare hands on top and pushing it through the planer. An old friend did this and lost three fingers and half of his right hand when he tried to push a knot through. Poor practices combined with dull cutters, wrong setup, sticky bed surfaces and tough wood are all in the recipe for disaster.
trevor
Never fall victim to thinking just a quick pass doesn’t need all safety gear. I wanted to run a short piece through one time to clean up the surface. Push paddles were somewhere else. Probably on the table saw. It will only take a second. Not sure what happened but the board kicked back out and i felt my fingers smack down on the blade guard which had done its job and swung back in. My god but that could have been ugly. I now have dedicated paddles that never leave their respective tool.
Never fall victim to thinking just a quick pass doesn’t need all safety gear. I wanted to run a short piece through one time to clean up the surface. Push paddles were somewhere else. Probably on the table saw. It will only take a second. Not sure what happened but the board kicked back out and i felt my fingers smack down on the blade guard which had done its job and swung back in. My god but that could have been ugly. I now have dedicated paddles that never leave their respective tool.
Stephen Osterday
Ha, ha…. Where were you when I needed you? The “Jointer” got me 70 years ago. Yeah, I was 14 at the time. Making a small box to contain my sharpening stone I used for sharpening tools. Probably 2″ × 6″ and decided to push the pieces through he jointer. Got the first 3 fingers of my left hand. The index finger needed some skin from the inside of my leg, middle finger has a barely noticeable scar and the 3rd finger is no longer noticeable. Other than the patch of leg skin you wouldn’t even notice it at all. I was VERY lucky, but learned the very important lesson about jointers.
Ha, ha…. Where were you when I needed you? The “Jointer” got me 70 years ago. Yeah, I was 14 at the time. Making a small box to contain my sharpening stone I used for sharpening tools. Probably 2″ × 6″ and decided to push the pieces through he jointer. Got the first 3 fingers of my left hand. The index finger needed some skin from the inside of my leg, middle finger has a barely noticeable scar and the 3rd finger is no longer noticeable. Other than the patch of leg skin you wouldn’t even notice it at all. I was VERY lucky, but learned the very important lesson about jointers.
Jim White
Not a true horror story, but I have a 6” version of the jointer pictured in your blog. After a couple of moves & recent experience with twisted boards after jointing, I decided that my jointer needed a tune-up. I was shocked by the amount of rust that was hiding underneath the fence mount. The beds are regularly waxed and rust free. After a couple of hours of work, the bed surface under the fence holder assembly was clean and smooth again and ready for being used as a reference surface. Moral: remove the entire fence assembly at least once a year to clean & wax the hidden surfaces.
The really horrifying thing I found was the number of loose clamping nuts I discovered on the knife-holding assembly. Thinking about the consequences of a loose knife blade spinning at 5000rpm coming out of its holder while jointing a board made the hair on the back of my neck stand up straight! Fortunately, I caught it on time. Moral: CAREFULLY check the tightness of your blade holders on a regular basis, like at least every time you wax the table surfaces. Same with helical cutters. The flying shrapnel is just smaller with them…
Ken
Good tips! A couple you can add are:
1) Proper stance or where you place your feet to support your arms guiding the wood over the tables.
2) Added to the FOCUS part is to leave the audio earbuds off. Bopping to that favorite tune means the focus is on the music and not on the piece you are shaping.
Good tips! A couple you can add are:
1) Proper stance or where you place your feet to support your arms guiding the wood over the tables.
2) Added to the FOCUS part is to leave the audio earbuds off. Bopping to that favorite tune means the focus is on the music and not on the piece you are shaping.