


Sharpening a hand plane iron isn’t difficult — but there are a few critical elements for getting it right.
For example, when are you ready to move to a higher grit stone? How flat does the back of the blade need to be?
And what do horse butts have to do with all of it?
Today, I’m giving you 5 Hand Plane Blade Sharpening Tips to help you get the finely honed edge needed for high quality work…
So if you’re ready to cut lingerie-thin shavings, let’s get to it.
1. FEEL THE BURR
When you're grinding or honing a bevel, the most important thing is to create a burr — a tiny amount of steel folded over the back edge.
A burr is the result of sharpening to the very edge of a hand plane.
And even though you can’t see it, it’s the key to knowing when you can move on to a higher grit stone.
After some passes on a stone, lightly slide the tip of your finger up the back of the plane iron’s tip. You should feel the little hook of steel from end to end.
If you don’t feel a burr across the entire edge, keep going on the same stone. Moving to a higher grit too early leads to an unevenly sharp edge.
One technique for beginners is to lightly lap the back of the blade after each grit.
Lay the tip of the back on your stone and give it a few passes to get rid of the burr (you don’t even have to take it out of the honing guide).
When you move to the next grit, you’ll be able to feel when a new burr has formed. Eventually, you’ll get a sense of how long it takes on each stone.
2. EXACT ANGLES DON’T MATTER — CONSISTENCY DOES
Most people grind their hand plane irons to a 25° primary bevel and 30° secondary bevel. But these angles aren’t written in (water)stone.
It doesn’t really matter if your primary bevel is 23° or your secondary bevel 32°. Within a couple degrees is close enough.
What does matter is consistency — meaning that each time you sharpen, it’s at the same angle you sharpened at before.
Consistency leads to less wasted steel and more efficient sharpening.
And that’s why I recommend using a honing guide and setup block.
A setup block helps you clamp the plane iron in your honing guide at the same angle every time. (Matt Estlea has a great video about making your own setup block).
And unless you’re willing to put in the time to master freehand sharpening, a honing guide really is essential.
Freehand sharpening is a difficult skill. And you’re pretty much guaranteed to mess up a lot before you get it right.
That’s a lot of wasted steel and wasted time. Unless you’re a natural, it’ll end up costing you more time and money than just buying a honing guide.
3. JUST THE TIP
After you’ve honed your secondary bevel, the next step is to lap the back of the plane iron to get rid of the burr.
And depending on your approach, it can either take a few seconds — or close to an hour.
Here’s the thing about hand plane blades: The entire back doesn’t need to be flat.
The only part that’s seeing any action is the very tip of the cutting edge. As long as that edge is flattened to intersect with the bevel on the other side, you’re good.
Trying to lap a large portion of the back can take forever. Which is why I like to use the ruler trick. Here’s how it works.
Set a thin metal ruler (or old Dozuki blade) on the edge of your sharpening stone. Then place the plane iron so the back half is resting on the ruler, lifting it at a slight angle.
Put even pressure on the tip of the iron, keeping the cutting edge flat. Then slide it back and forth sideways within ¼” of the edge of the stone.
This focuses the lapping on the back edge — the only place where it actually matters. After just a few back and forth strokes, you’re done.
If you insist on flattening more of the back, draw a line of sharpie on the cutting edge to see when it’s gone.
Repeat until the sharpie comes off evenly — and check the scratch patterns to make sure you’re actually reaching the full edge.
4. ADD A CAMBER
This is the big difference between sharpening chisels and plane irons.
On plane irons, it’s helpful to hone a camber on the secondary bevel — which is a super subtle convex curve on the front of the blade.
The camber has two advantages when you go to use your hand plane:
- With the edges slightly curved up, they won’t dig into your workpiece and leave tracks you have to worry about removing.
- It allows you to focus the cutting action without using your plane’s lateral adjustment. If one side of an edge joint is higher than the other, center the plane blade on that side. The camber will focus the cut there — without having to make any adjustments.
Honing the camber is pretty simple.
I start by honing a straight secondary bevel — usually around 30 strokes on my 1000 grit stone with even pressure on both sides of the blade.
Then I put all the pressure on one side of the blade (while still keeping the full edge flat on the stone) and make five strokes back.
I repeat on the other side, and do the same on all subsequent grit stones I go up to.
Don’t overdo the camber. You want to create a subtle curve — not a scrub plane blade.
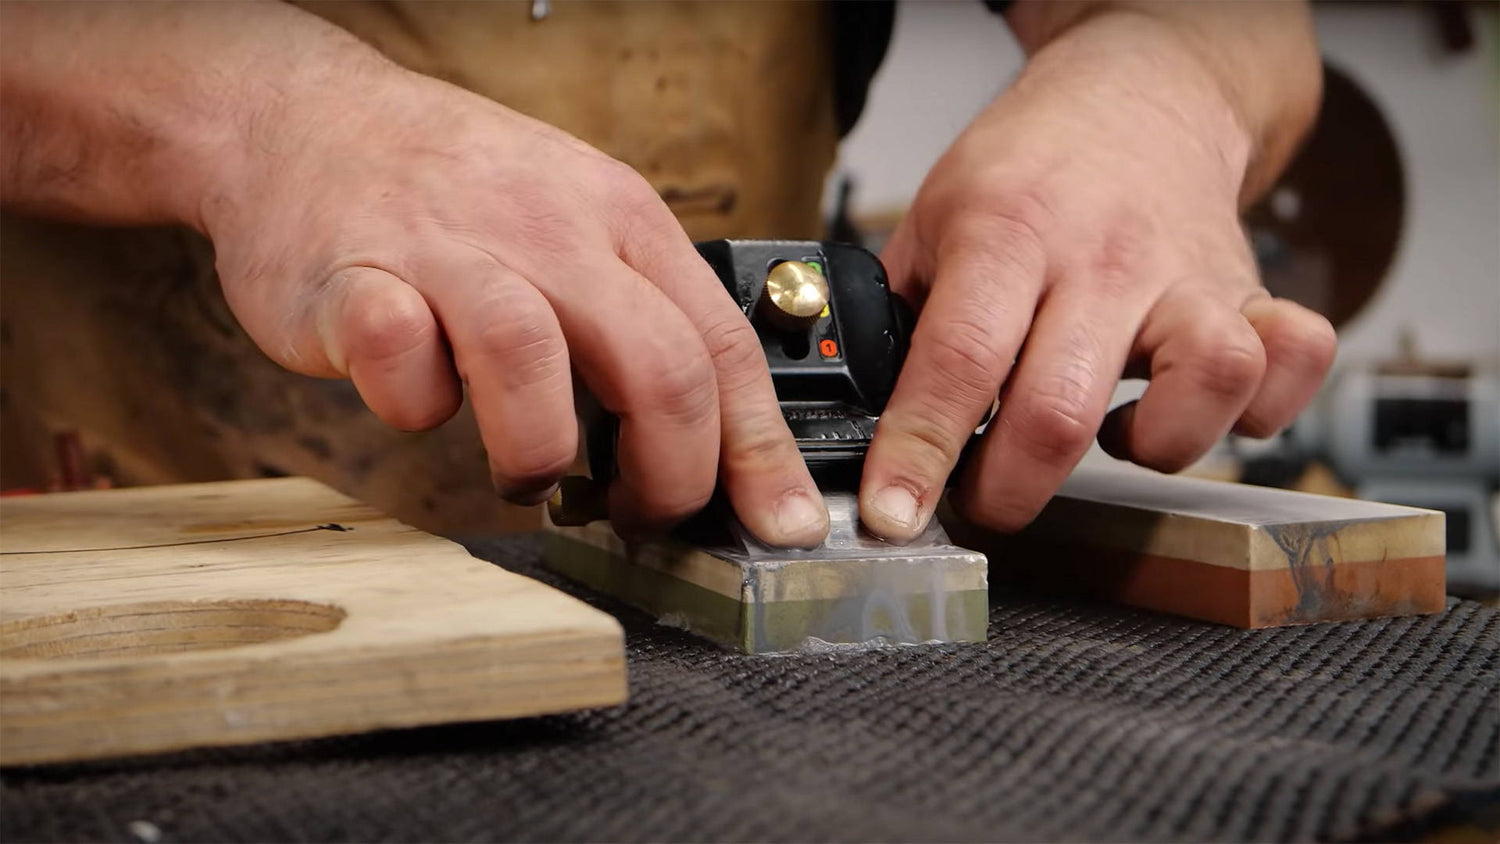
5. DON’T STOP TIL YOU STROP
If you really want to take your plane blades to the next level of sharpness, stropping is a must.
Not only does it polish the edge to a reflective sheen. It also removes any last remnants of a burr so you have a super keen cutting edge.
Add a bit of polishing compound to the surface of the strop (horse butt leather strops are best). A little goes a long way — you don’t want it caked in.
I then set the plane blade down so the primary bevel is flat on the strop. Lift it a fraction so it’s on the secondary bevel, lock your wrists and arm in position, and drag it back.
Repeat this 10 or 15 times, then do the same for the back (make sure to only pull the blade backwards when stropping the back).
Switch between the secondary bevel and back a few times until the edge is polished to a gleam.
Stropping gives you plane irons so sharp they can slice through paper like a pair of scissors.
I’ll sometimes even just touch up my plane irons on the strop instead of pulling out my stones.
Frequent stropping is a great way to extend the time between full on sharpenings.
START SLICING THOSE SHAVINGS
Using a well-sharpened hand plane is one of the greatest joys of woodworking.
And with the tips above, you’ll be well equipped to hone your plane iron to a deadly edge.
Got any plane blade sharpening tips of your own? Share them in the comments below!
Follow us on Instagram @katzmosestools, on TikTok @katzmoseswoodworking, and check out my YouTube channel for more great woodworking content...
And as always, STAY SAFE IN THE SHOP!

3 comments
Alan Schacter
A few questions: For a low angle block plane, you say to sharpen to 25 degrees. But that is the same as the primary bevel. My sharpening guide (and I think most) steps up from 25 to 30 degrees. If I sharpen at 25, there will be no secondary bevel. Is that OK? If not, how do I get a secondary bevel with a guide? Should I grind back to 25? (I’ve been sharpening at 30 degrees). Lastly, I assume this applies to all low angle planes, i.e, both block and low angle jack planes. Please let me know if there is a difference.
A few questions: For a low angle block plane, you say to sharpen to 25 degrees. But that is the same as the primary bevel. My sharpening guide (and I think most) steps up from 25 to 30 degrees. If I sharpen at 25, there will be no secondary bevel. Is that OK? If not, how do I get a secondary bevel with a guide? Should I grind back to 25? (I’ve been sharpening at 30 degrees). Lastly, I assume this applies to all low angle planes, i.e, both block and low angle jack planes. Please let me know if there is a difference.
Dina Madson
In step 4 you emphasis that the camber is the one big difference between sharpening plane blades and chisels. That actually also applies to step 3 with the thin ruler trick on lapping just the essential back of blade. That should ONLY be used with plane blades, not chisels. You want the back plane of a chisel blade absolutely flat – you should lap flat on the stone for chisels.
In step 4 you emphasis that the camber is the one big difference between sharpening plane blades and chisels. That actually also applies to step 3 with the thin ruler trick on lapping just the essential back of blade. That should ONLY be used with plane blades, not chisels. You want the back plane of a chisel blade absolutely flat – you should lap flat on the stone for chisels.
Rick Reid
I ordered a KM-17 Router Plane, any idea when they will ship?
Thanks
I ordered a KM-17 Router Plane, any idea when they will ship?
Thanks