


Simplicity is a strength in woodworking. And that’s definitely true of this one-sided crosscut sled.
It’s probably one of the easiest table saw sleds you can build — with minimal materials.
But it’s also super useful for a ton of operations.
And in fact, this is my go-to sled for trimming perfect miters or cutting joinery with a dado blade.
Today, I’m going to walk you through the step-by-step process for building this sled…
So you can add simplicity and extra functionality to your workflow.
(Want to make this build even easier? Check out our crosscut sled kits.)
PROS AND CONS OF THE ONE-SIDED CROSSCUT SLED
Before we get into the build, let’s look at how this sled compares to its popular two-sided cousin.
PROS:
-
Easy to build: No need for the 5 Cut Method here. A trusted square is all you need to set up the fence.
-
Uses less material: With only 1 fence, 1 runner, and a smaller base, this version of a crosscut sled requires significantly less plywood to build.
-
Great for miters: Because the edge of the base stops at the table saw blade, you can cut miter joints without messing up the sled (I’ve made this mistake with regular crosscut sleds).
- Excellent for dado blades: If you set up this sled on the left side of the blade, you can change the width of your dado stack without losing the zero clearance edge.
CONS:
-
Only supports one side of workpiece: If you're cross cutting a long board in half, the lack of support on one side can lead to some accuracy issues.
-
Greater chance of tearout on offcut: Since the zero-clearance edge of the sled is only on one side, the unsupported offcut might be more susceptible to tearout on the bottom edge.
- Can’t do it all: Unlike a traditional crosscut sled, this version doesn’t work as well for certain joinery operations — like cutting boards held vertically or where you need 2 stop blocks
MATERIALS
Here’s what you’ll need to build this sled.
- Plywood for base (around ¾” thick)
- Plywood for fence (3 pieces around ¾” thick)
- Plywood or hardwood for a runner
- Pennies or small coins that fit in your table saw’s miter slots (4-6)
- Small screws for attaching runner
- Larger screws for attaching fence
- Super glue
- Wood glue (optional)
- 2-3 clamps
- Stop Block and T-track (optional but highly recommended)
STEP 1: GLUE UP THE FENCE
I like to build my crosscut sled fences out of 3 pieces of ¾” thick plywood for extra stability.
The final length is up to you — but it should extend past the zero clearance edge of the sled by around 2”. This helps limit tearout and ensures you have support while cutting miters with the blade angled.
I like to make the final height 3 ⅛” to accommodate the Katz-Moses Stop Block.
But I’ll typically glue the slightly oversized pieces together, then rip them to the final dimensions on the table saw.
The most important thing is that the fence be flat. Here’s a few tips for gluing up flat fences for jigs and sleds.
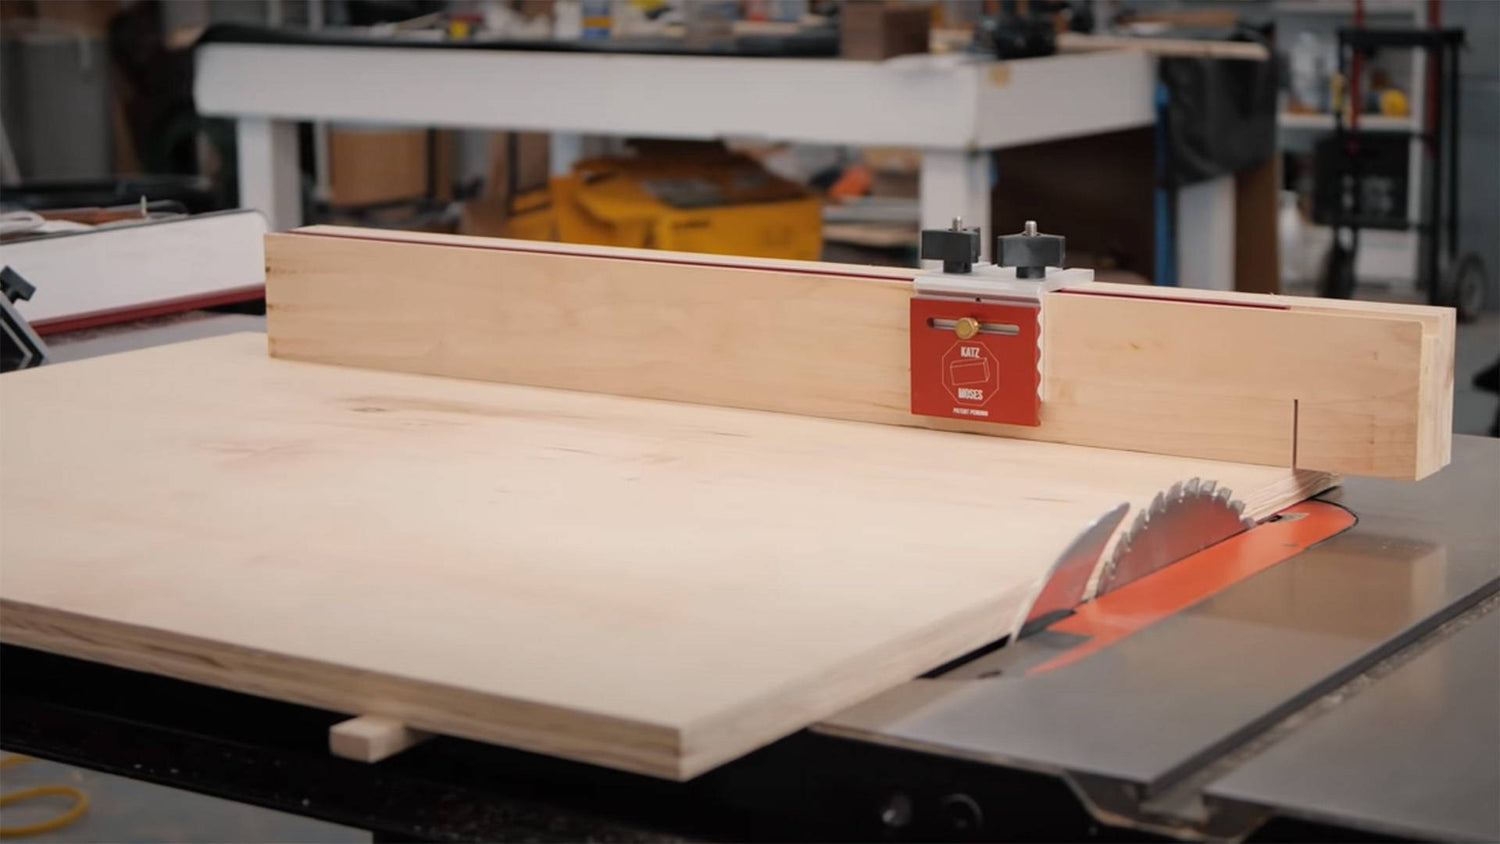
Once it’s glued up and trimmed to its final dimensions, cut a ¾” wide by ⅜” deep groove in the top edge to accommodate t-track (I set it back from the front by around ¼”).
STEP 2: MAKE THE RUNNER
This sled features only one miter slot runner. But that means it needs to be exact.
You don’t have another runner to compensate for any errors. So you need to get this one as close to perfect as possible.
But it’s easier than it sounds.
Standard miter slots are ¾” wide by ⅜” deep (though this might vary slightly).
Start with a piece of plywood or hardwood that less than ⅜” deep. This will ensure the runner has maximum contact in the miter slot without elevating the base above the table saw top.
Then using your rip fence, cut a piece that’s a hair wider than the miter slot. Use a pair of calipers to transfer the measurement.
The runner should be very slightly oversized. Now use a hand plane or sandpaper to start dialing it in — frequently checking the fit.
You want it to fit tight in the miter slot while still being able to slide back and forth.
And remember: Paste wax will let tight fitting runners slide more easily — so err on the side of too tight.
Alternatively, you could use aftermarket aluminum runners. These are obviously more expensive, but they make it easy to dial in a perfect fit and won’t be susceptible to seasonal movement like wood.
STEP 3: ATTACH THE RUNNER TO THE BASE
Now you can cut the base to your (roughly) desired dimensions.
Make sure to leave it slightly wider so you can cut the zero clearance edge in the next step. Then lower the table saw blade all the way down below the table.
Lay down a series of pennies in the miter slot, then set your runner on top. It should sit a hair above the table saw top.
Note: If you plan on using this sled with your dado blade, you might want to set it up to slide in the miter slot to the left of the blade. That way you can use different dado thicknesses. For miters, however, the sled needs to ride in the miter slot to the right of the blade.
Lock your table saw fence so when you bump the sled base against it, the opposite edge extends past the blade (this is critical for the zero-clearance edge).
Once that’s set up, remove the base and lay down a line of super glue on the top of the runner.
Don’t overdo the super glue — you don’t want squeeze out getting into the miter slot.
Finally, bump the edge of your base against the fence and lay it down on top of the runner.
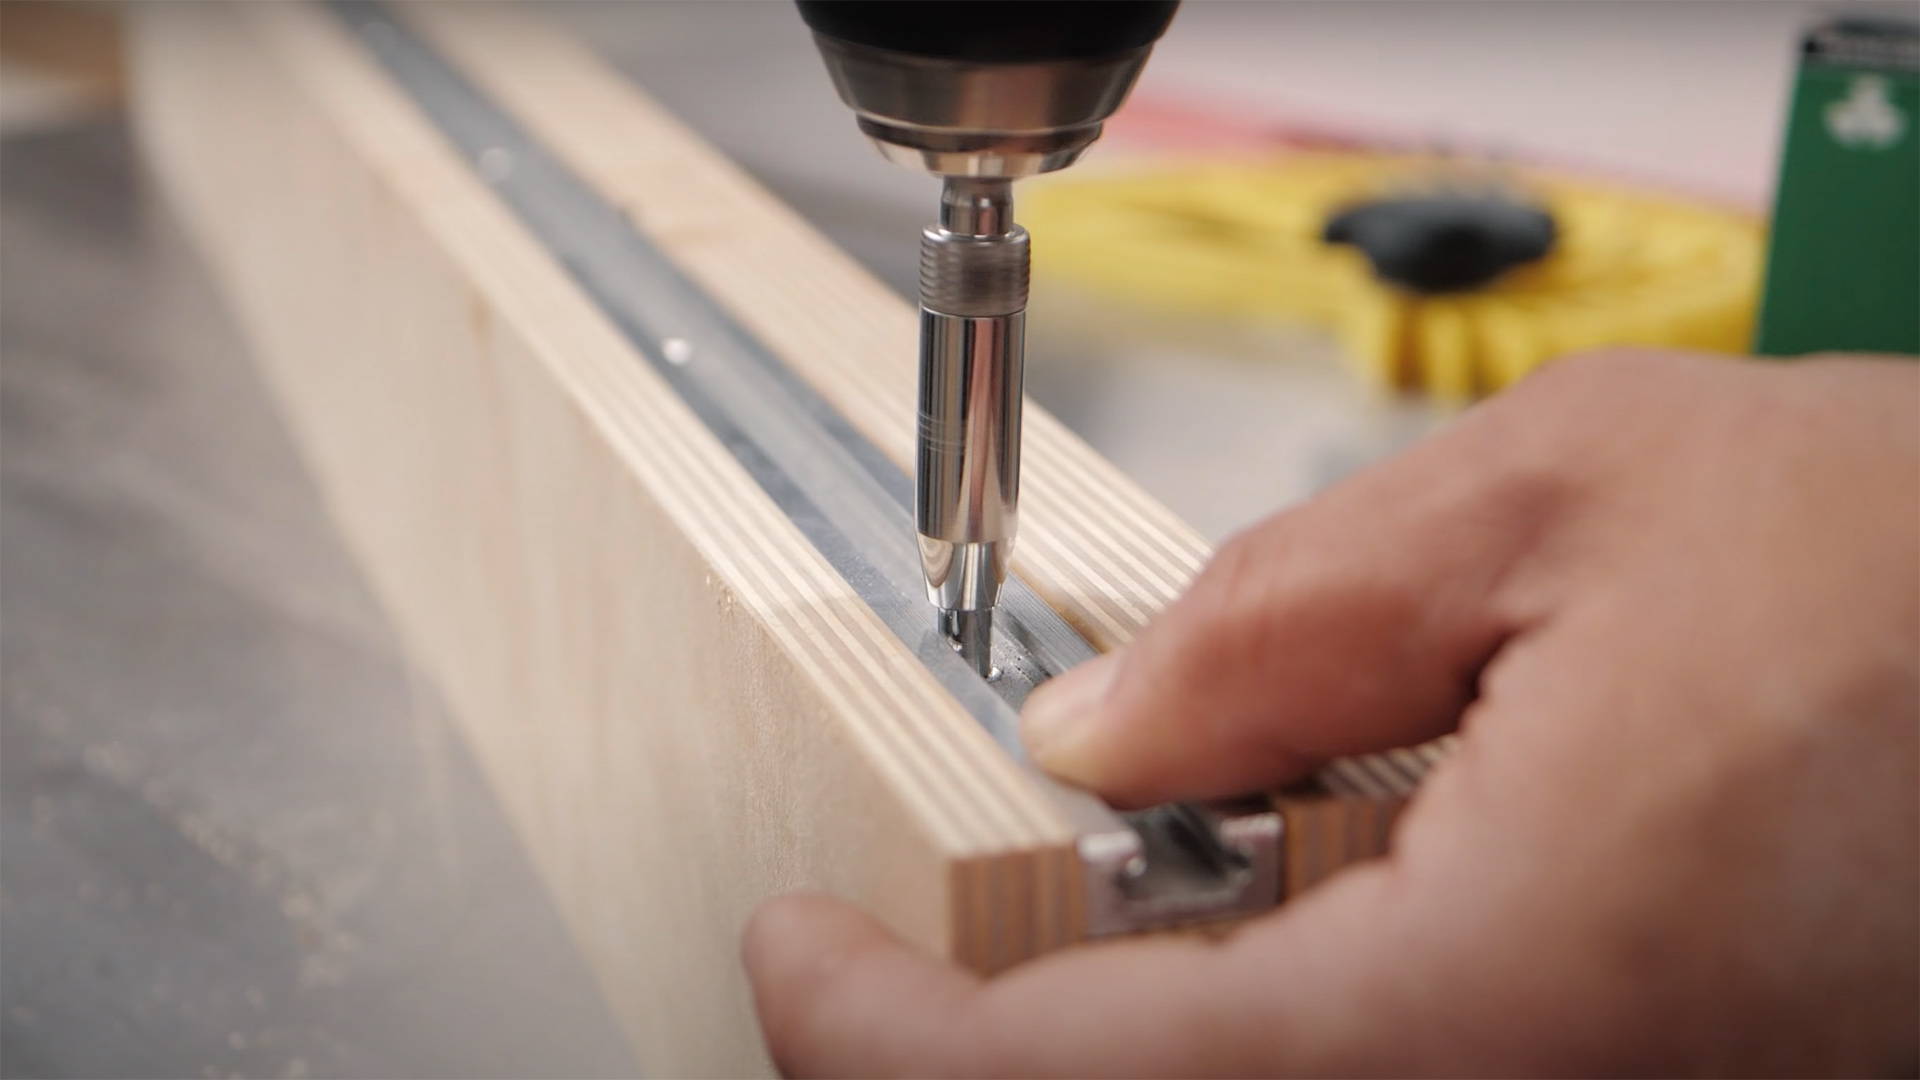
Put something heavy on top until the glue has a chance to dry. Then carefully flip the sled over and drill the runner into the sled.
I recommend drilling pilot holes and countersinks before driving in the screws. Otherwise, the runner can expand and mess up the fit in the miter slot.
STEP 4: CUT THE ZERO-CLEARANCE EDGE
You’ll now cut the zero-clearance edge on the base.
Raise your table saw blade just higher than the thickness of the base. Then turn it on.
Carefully place the front of the runner in your table saw’s miter slot and start pushing the base through the blade. Watch your fingers.
You’ll end up with a clean zero-clearance edge — which makes the next and final step a cinch.
STEP 5: ATTACH THE FENCE
The beauty of this crosscut sled is there’s no need for the 5 cut method.
Because of the zero-clearance edge, all you need to ensure the fence is square… is use a good square.
I like to start by putting a few dabs of super glue on the bottom of the fence.
Then with the fence of your square tightly against the zero clearance edge, position the sled fence so the face is flat against the square’s blade.
(The longer the square blade the better — I recommend a 12” square if you have one).
Once that’s set, carefully tighten a few clamps to secure the fence to the base.
Now just flip the whole thing over and drive in some screws to ensure the fence doesn’t budge.
You’re done! Now just attach a stop block and start using your ultra-simple crosscut sled.
A COUPLE TIPS FOR USE
This sled is pretty self explanatory — but here’s a few extra tips for getting the most out of it.
-
Use a stop block for repeatable cuts: If you need to cut multiple pieces to the same length, a stop block is the only way to go.
-
Add a fresh auxiliary fence for miters: Before cutting miters, add a thin strip of MDF to the front of the fence. Then make a cut to establish a new 45° kerf that makes it easy to line up cuts (here’s more tips for miters).
-
Add hold-down clamps: With a couple lines of t-track in the base, you can use hold-down clamps to secure boards during cuts while keeping your fingers clear.
- Make it into the multi-sled: You can also adapt this build to make the ultra-versatile multi-sled — perfect for crosscuts and tapered cuts alike (here’s how).
SO SIMPLE BUT SO USEFUL
While a standard crosscut sled is my usual go-to, this simple one-sided version really has its place in the shop.
And with how easy it is to build...
There’s no reason you shouldn’t make yourself one today.
Want to build a standard crosscut sled? Here’s 9 tips to make it better.
Any tips for making this build easier? Let us know in the comments below!
Follow us on Instagram @katzmosestools, on TikTok @katzmoseswoodworking, and check out my YouTube channel for more great woodworking content...
And as always, STAY SAFE IN THE SHOP!


3 comments
Matt
I made two of these (one for miters and one for dados) and they work perfectly. The miters are dead on and the KM stop block makes them easy to set up and repeat. Amazing results from something so simple. Thanks for the info Jonathan. I’ve learned a ton from you and always look forward to your posts.
I made two of these (one for miters and one for dados) and they work perfectly. The miters are dead on and the KM stop block makes them easy to set up and repeat. Amazing results from something so simple. Thanks for the info Jonathan. I’ve learned a ton from you and always look forward to your posts.
Jim
I suggested (almost necessary) improvement. Cut a chamfer sawdust edge where the fence meets the plywood for errant sawdust to go. Even a tiny bit can throw your “perfectly square” cuts off by a thou or two.
I suggested (almost necessary) improvement. Cut a chamfer sawdust edge where the fence meets the plywood for errant sawdust to go. Even a tiny bit can throw your “perfectly square” cuts off by a thou or two.
Steve Winslade
Hi I’m going to try this I don’t know how hard this will be as o have severe rheumatoid arthritis and hand’s turn 90 degrees outwards and had 2 small strokes and lost my short term memory so after 3-5 minutes I can’t remember anything. I’m in U.K. and I have a lumberjack ts1800 table saw I think it’s like one of the ridged one you have in America. My main problem is getting the wood / plywood as only have manual wheelchair to get about. I want to build one so I can add your stop I got it’s still in its box as can’t use it At the moment I can’t remember if there a bit on top to add a stop and rail bit. It will take me a while as it’s just me my wife tries to help but hopefully I can do it. I’ve been trying to build benches in my new shed 98% done just tops to go only taken 2 years to do 4 of them 2x 8fr and 2x 3ft 8”. This would be my first and only cross cut sled but will try to follow it.
Many many thanks Steve 👨🏼🦽💨