


A crosscut sled can be the most-used jig in your shop. But for that to be true, you need to trust it.
So what exactly makes for a trustworthy crosscut sled?
It should have no side-to-side play in the miter slots. Not warp out of shape over time. Have a fence that’s accurately square. And it should be well suited to your actual needs.
That can sound like a lot.
But I’m here to help (cross my cut, hope to die, stick a chisel in my eye).
Today, I’m giving you 9 tips for a better crosscut sled — so you can avoid the common pitfalls of making one and have full faith in your jig.
And if you need a walkthrough on how to build a standard crosscut sled, read this guide.
TABLE OF CONTENTS
- Use the Right Material for Runners
- Use Wedges to Make Loose Runners Tight
- Clamp the Fence to a Straight Edge for a Flat Glue Up
- Add T-Track for a Stop Block
- Add a Chamfer to the Fence for Sawdust
- It Doesn’t Need to Be as Big as You Think
- Extend the Fence for More Stop Block Range
- Add Paste Wax for Protection and Performance
- Square the Fence Accurately
1. USE THE RIGHT MATERIAL FOR RUNNERS
The runners are what slide in your table saw’s miter slots and guide the sled through the blade.
And it’s critical they maintain their size to ensure you can keep using your sled for years to come.
In the past, I’ve recommended using a hardwood, like maple, for runners. But this depends on your shop.
If your shop is exposed to the elements, seasonal moisture changes can cause hardwood runners to expand and contract.
That means they can get too tight for you to easily push the sled one season… then get too loose and let the sled wobble from side to side the next. No good.
If you must use hardwood runners, cut them so the grain runs vertically (like in rift sawn lumber). This is more resistant to wood movement.
Instead, I recommend making your runners out of plywood. Plywood is solid, easily available, and resistant to wood movement.
You can also find dedicated aluminum runners. These are more of an investment — but they’ll always stay true to size, usually have threaded pins to get them tight in the miter slot, and can be reused across multiple sleds.
As another option, you can even use aluminum t-track to make crosscut sled runners. And if you use the next tip, they’ll keep your sled extra steady with no play.
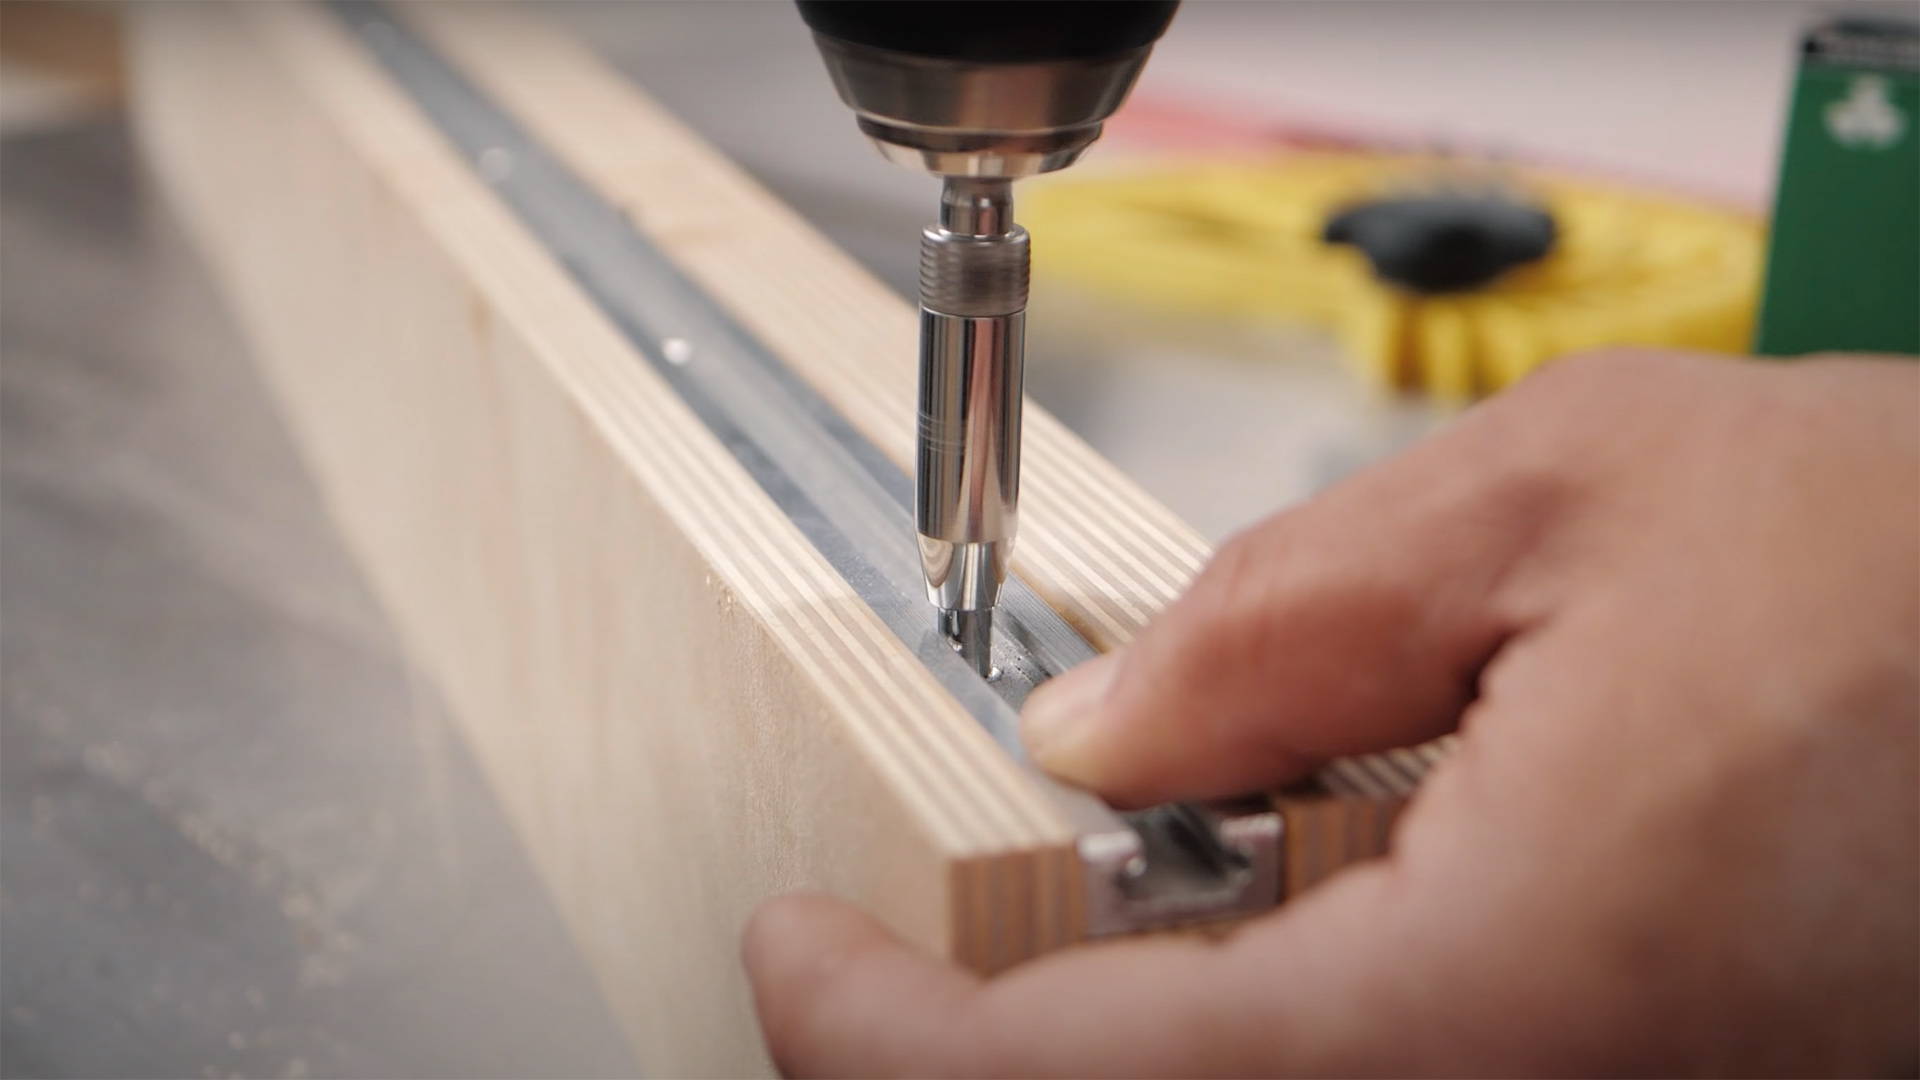
2. USE WEDGES TO MAKE LOOSE RUNNERS TIGHT
Getting runners to fit a table saw’s miter slots exactly is tricky.
They need to be tight enough to not move from side to side… but loose enough to slide easily.
It often takes a lot of fine-tuning with a hand plane — and is important because if they’re too loose, you can’t trust the sled to make precisely square cuts every time.
(And obviously if they’re too tight, you’ll struggle to push the sled through cuts. A recipe for disaster).
Luckily, this trick ensures your runners will have zero play — even if they’re loose in the miter slots. Here’s how it works.
Lay a row of pennies down in each miter slot to elevate the runners slightly, then lay the runners on top.
Now on the left-hand runner, place a small wedge between the right side of the runner and the right wall of the miter slot.
Don’t jam the wedge in there. But insert it in enough that the left side of the runner is pushed against the left side of the miter slot.
Now repeat the process on the right-hand runner, this time inserting the wedge on the left side.
The result is that the ends of the runners (on the user side) will be pushed away from each other.
Add some super glue to the tops of the runners and lay the sled base on top.
Because the ends are pushed away from each other, they work together to always have contact with the miter slot walls.
This eliminates any side to side play — even if they’re undersized — meaning your sled will be ultra stable and true.
3. CLAMP FENCE TO A STRAIGHT EDGE FOR A FLAT GLUE UP
To set up cuts accurately, the face of your crosscut sled fence needs to be flat.
But if you’re building the fence by gluing up multiple pieces of plywood, slight curves can get introduced.
(Just think about some of the hockey stick pieces of plywood around your shop).
To mitigate this, clamp the plywood pieces together against a solid straight-edge during glue up.
This creates a flat reference for them to conform to, ensuring the face of your fence is perfectly straight.
I use a giant aluminum level. But even an accurately jointed board edge can work.
(Credit to Tamar from 3x3 Custom for this tip. It’s a life saver!)
4. ADD T-TRACK FOR A STOP BLOCK
A barebones crosscut sled is useful on its own. But to really elevate its usefulness, you’ve got to add t-track to the fence for a stop block.
Using a stop block will allow you to make supremely repeatable cuts — which is the secret to woodworking accuracy.
Remember, the less you can measure, the better.
Sure, you can just clamp a scrap piece of wood to the fence as a stop block.
But a t-track stop block speeds up your workflow and makes micro-adjustments a cinch.
Obviously, I recommend using a Katz-Moses Universal No Deflection Stop Block. As confirmed by my mother, it’s the greatest thing ever invented.
But even if you don’t opt for mine, add a t-track stop block to your crosscut sled fence.
You’ll be glad you did.
5. ADD A CHAMFER TO THE FENCE FOR SAWDUST
As you make cuts with your crosscut sled, sawdust accumulates.
And if you’re not careful, that sawdust can actually push boards out of square when you lay them against the fence.
There’s an easy way to fix this (and I think I again might have gotten this tip from Tamar Hannah).
Cut a small chamfer on the front bottom corner of your fence.
This creates a little recess for sawdust to pile into… preventing it from pushing the boards you’re cutting away from the fence.
Keep it small — but just big enough to be visible.
I generally do it with a few strokes of a hand plane. But a chamfer bit on your router can work well too (just don’t overdo it or you’ll lose the reference area for thinner pieces).
6. IT DOESN’T NEED TO BE AS BIG AS YOU THINK
One of my first crosscut sleds was an absolute behemoth. I mean, it was massive.
My thought is that the size would make it that much more useful.
Then reality set in.
This thing was a pain to move around. And ridiculously unwieldy.
In the end, I ended up making a smaller crosscut sled just so I wouldn’t have to deal with the big one.
Moral of the story: Your crosscut sled probably doesn’t need to be as big as you think.
Make it big enough to be functional — but not so big that it’s a struggle to put onto and take off of your table saw.
A crosscut sled can do a lot. But it can’t do it all.
You have other tools to rely on. And that’s ok.
7. EXTEND THE FENCE FOR MORE STOP BLOCK RANGE
As an addendum to the previous tip, you can compensate for a smaller crosscut sled base with a longer fence.
Build the fence longer to extend past the base on one side of your sled.
This gives your stop block more range without adding a ton of weight…
So you can still work with bigger pieces of wood and get repeatable cuts.
Also, if you do need to make repeatable cuts beyond the capacity of your stop block, here’s how to safely use your table saw’s fence as a stop block.
8. ADD PASTE WAX FOR PROTECTION AND PERFORMANCE
Once you’re done building your crosscut sled, treat it to a paste wax bath.
I mean absolutely slather it — top, bottom, and sides.
(In fact, the edges are especially important, since this is where moisture from the air is most likely to get in).
The benefits of paste wax are twofold: It protects your sled from moisture that can make it warp, and also lets it slide easily on your table saw.
This is something you should do periodically to maintain your crosscut sled.
Ideally, add more paste wax once a month (especially to the runners). But it again depends on the exposure of your shop to the elements and how often you use the sled.
9. SQUARE THE FENCE WITH THE 5 CUT METHOD OR JIG SQUARE
Of course, the most important thing with a crosscut sled is making sure the fence is square to your table saw blade.
The typical approach is to use the 5 Cut Method. It works really well, but can get a little confusing/infuriating — and can add over an hour to your build.
And to be honest, a lot of people end up chasing an excessive level of square that actually doesn’t make a difference.
(Watch this video to see how square your sled actually needs to be).
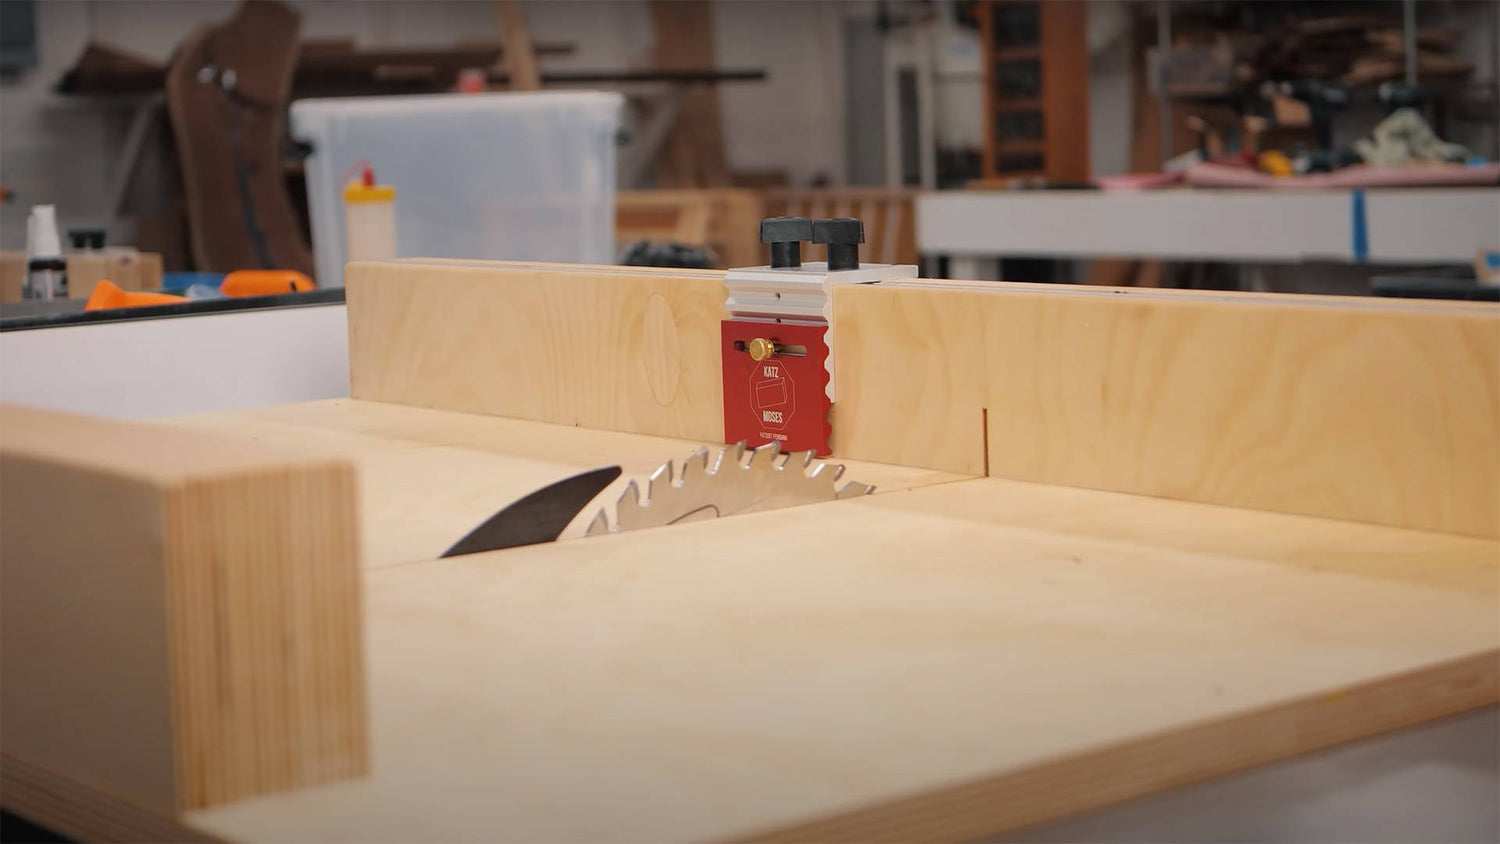
The fastest and easiest way to square your crosscut sled fence is with the Katz-Moses Jig Square.
This bad boy locks into the kerf left by your blade, allowing you to simply push your fence against it, fasten it down, and be done with it.
And with a tolerance of ± 0.03°, it provides a level of squareness that’s more than enough for your woodworking needs.
The Katz-Moses Jig Square cuts one of the most complex parts of building a crosscut sled down to a couple minutes (and can be used to set up other tools as well).
So if you plan on building a few crosscut sleds down the road, it’s a worthy investment.
A SLED YOU CAN RELY ON
A well-made crosscut sled is your trusty companion in the shop.
And with the tips above, you’ll have no problem dialing in your sled for perfection.
Want to learn all the steps for building a crosscut sled? Read this.
What other tips do you have for building a better crosscut sled? Let us know in the comments below!
Follow us on Instagram @katzmosestools, on TikTok @katzmoseswoodworking, and check out my YouTube channel for more great woodworking content...
And as always, STAY SAFE IN THE SHOP!

1 comment
Doug C
Some excellent tips in here! Thank you! I was just lamenting yet another sled that’s close… But just not quite perfect. This will help in the next build!
Some excellent tips in here! Thank you! I was just lamenting yet another sled that’s close… But just not quite perfect. This will help in the next build!