


For how small wooden wedges are, it’s surprisingly tricky to find an efficient way to cut them.
Especially if you need several for a project with wedged joinery.
But the bandsaw wedge-cutting tip below will blow your mind…
And have you turning out a limitless amount of wedges faster than a lumberjack overdosing on maple syrup.
Here’s how it works.
1. PREPARE YOUR STOCK
Mill an offcut to a thickness that matches the width of the wedge you’re after.
It’s important that the piece is longer along the END GRAIN than long grain (which is why offcuts work well).
You might have to use a hand plane to get it to the right thickness.
The offcut’s width from end grain edge to end grain edge will equal the length of your wedges.
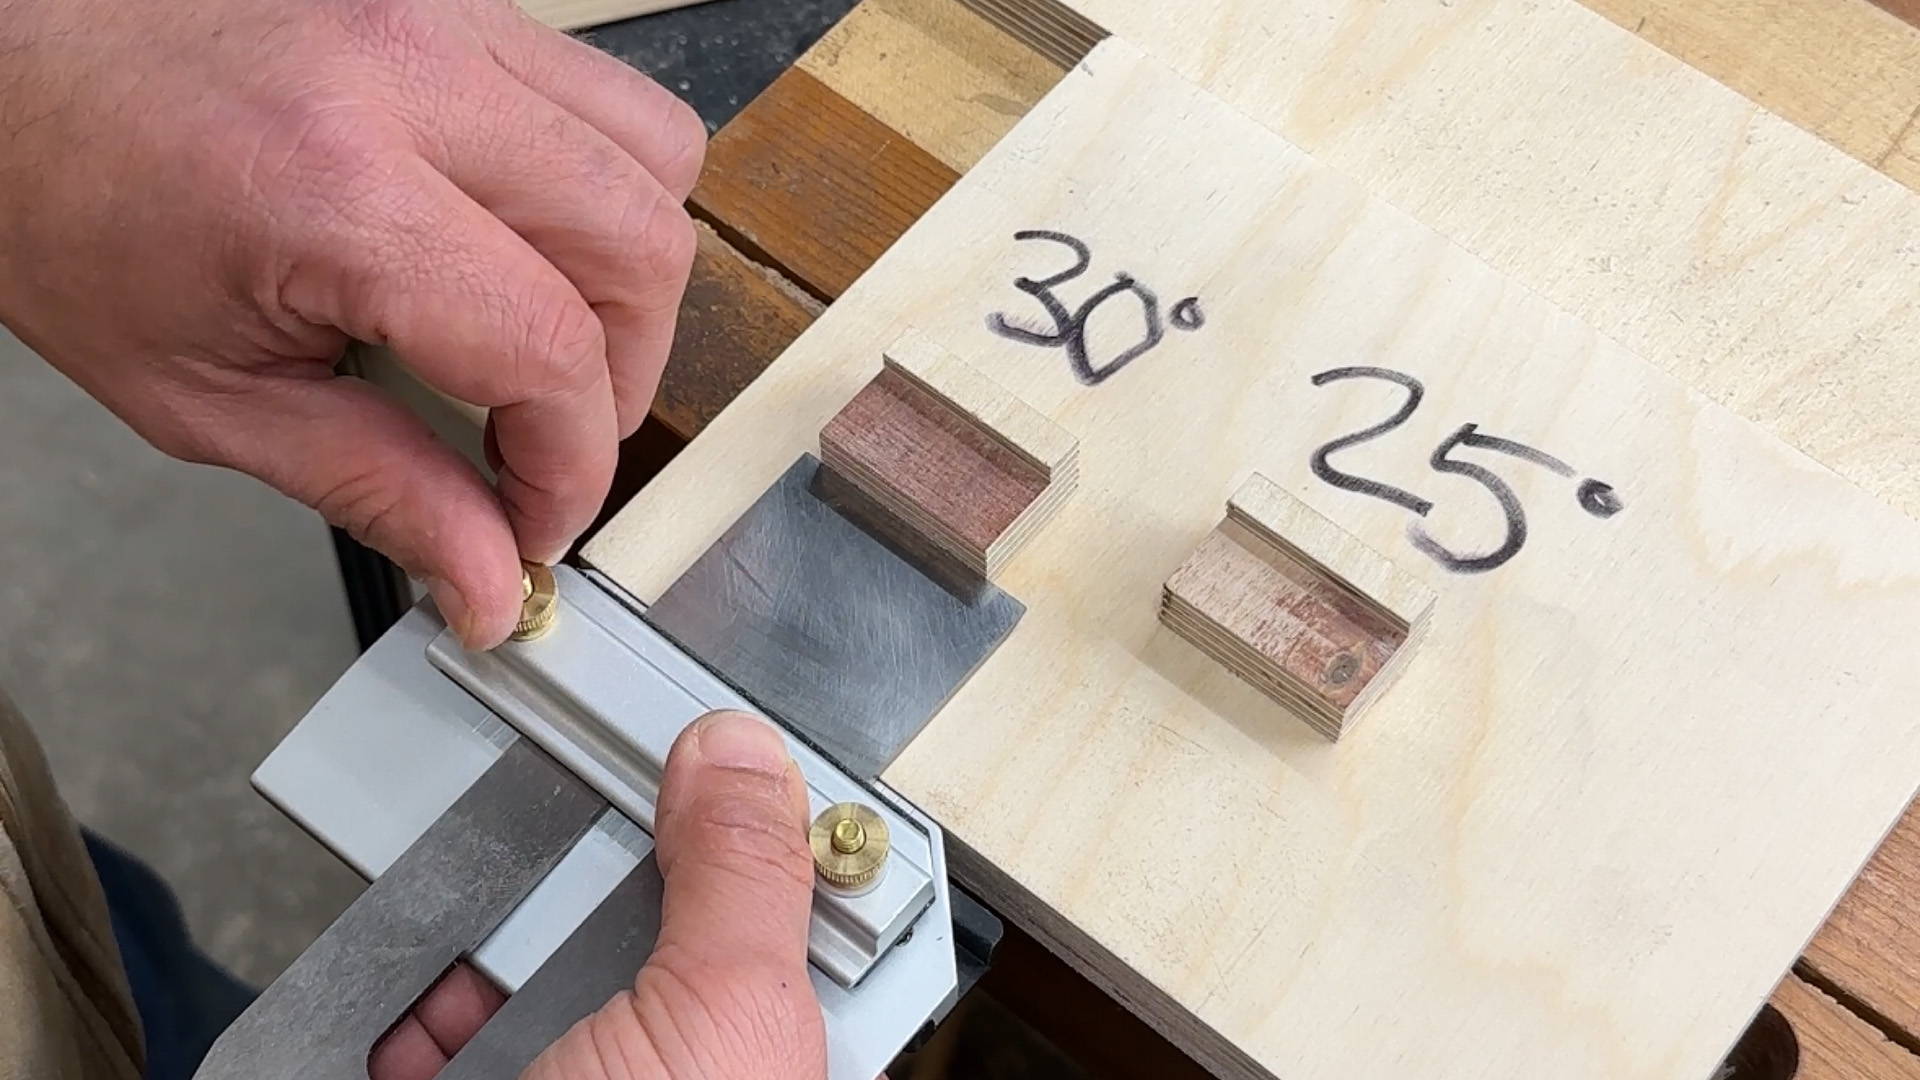
2. SET UP YOUR BANDSAW MITER GAUGE
Set the miter gauge on your bandsaw to around 5° off 90°. It doesn’t really matter which direction.
To make the process easier, I recommend attaching a sacrificial auxiliary fence to the face of the miter gauge.
It'll help with stability in the next step.
3. LINE UP, CUT, FLIP REPEAT
With the piece of stock flush against the miter gauge fence, cut off one end.
Now flip the piece over (over width, not length) and start cutting wedges.
Depending on which way the board is angled, you’ll either want to start with the blade right at the corner of the board or slightly offset to match the width of the end of the wedge.
You can just eyeball it. But consider where the blade will exit.
4. SAND SMOOTH
Use some double stick tape or CA glue to attach a piece of sandpaper to a flat surface (any grit 120 and above should be fine).
Then rub the faces of the wedges over the sandpaper until they’re smooth and feather off to a fine point.
Just like that, you’ve got all the wedges you need for your project — and then some.
Want to see me cut a double-wedged mortise and tenon joint? Watch this.
What’s your favorite way to cut wedges? Let us know in the comments below!
Follow us on Instagram @katzmosestools, on TikTok @katzmoseswoodworking, and check out my YouTube channel for more great woodworking content...
And as always, STAY SAFE IN THE SHOP!

10 comments
John Ford
The folks at Mortise and Tenon shared a slick way to make wedges using a chisel and a simple fixture similar to a miniature workbench with a plane stop. You split the wedge from a board, then shaped it with the chisel using the fixture to brace it.
Yeah, not as uniform as using a bandsaw or tablesaw (or most other machine-based methods). But set-up time is zero so if you only need a few… On the other hand, works best with woods that split easily.
G. M. Coates
Since I have started following you and a lot of your tips , I now need plans to store all of my new jigs !
Sometimes elementary jig- maker and full time wannabe just like Katz.
G. M. C.
Since I have started following you and a lot of your tips , I now need plans to store all of my new jigs !
Sometimes elementary jig- maker and full time wannabe just like Katz.
G. M. C.
Than Orens
Jonathan,
I enjoy seeing the different and more creative ways I can use my tools beyond the obvious use. Keep the ideas coming and I will keep watching!
Thanks!
Jonathan,
I enjoy seeing the different and more creative ways I can use my tools beyond the obvious use. Keep the ideas coming and I will keep watching!
Thanks!
Gary Hillsgrove
Thanks as always for your great tips. Long time supporter of you and your products.
Thanks as always for your great tips. Long time supporter of you and your products.
Al
Thank You for all the great tips!
Thank You for all the great tips!
Alton Bell
I am a retired middle school shop teacher. As such, my curriculum did not involve advanced woodworking skills, and my “shop” had only the basic tools. So for 20-plus years, I did not advance my own skill set or level. In 2005 I built a new house with a basement workshop. I got all new tools and started my self-improvement project for my skills and knowledge. I discovered your (KM Tools) website and have had some great learning experiences. I have also purchased several of your tools etc. I love the Orange table saw blades. They go well with my new Sawstop table saw. Thanks for being an inspiration.
I am a retired middle school shop teacher. As such, my curriculum did not involve advanced woodworking skills, and my “shop” had only the basic tools. So for 20-plus years, I did not advance my own skill set or level. In 2005 I built a new house with a basement workshop. I got all new tools and started my self-improvement project for my skills and knowledge. I discovered your (KM Tools) website and have had some great learning experiences. I have also purchased several of your tools etc. I love the Orange table saw blades. They go well with my new Sawstop table saw. Thanks for being an inspiration.
Don
I agree that using the bandsaw to cut wedges is “a way” but disagree that it is “the best” way. Since you suggest it as a time saving approach but then follow up with a bunch of [necessary] sanding, the time saving vanishes quite quickly.
I made a jig for my table saw 25 years ago for cutting 1/12 stair wedges and it is quick, easy and NO SANDING required. I have another for cutting shorter wedges of a steeper angle as well..
Your approach using a miter gauge on the bandsaw will work just as well on the table saw. AND be far quicker and much smoother. NO sanding required!!
So as not to be a total nay sayer – I have been in the business for more than 50 years and enjoy and often learn some new tricks and approaches that you offer. Thanks for that!!~
However, this is not one of those times!!
John
Great site. Great tips. thanks for sharing.
Great site. Great tips. thanks for sharing.
George DE MERS
Just a note to thank you for sharing your excellent shop tips and tool suggestions! I especially enjoyed “Mastering Accuracy” and the use of calipers and a center punch (purchased yours) Thank you again for your videos! George from York, PA
Just a note to thank you for sharing your excellent shop tips and tool suggestions! I especially enjoyed “Mastering Accuracy” and the use of calipers and a center punch (purchased yours) Thank you again for your videos! George from York, PA
Ralph poppo
Thanks for all you show important to have a reminder of the things learned in the past but not always remembered
Thanks for all you show important to have a reminder of the things learned in the past but not always remembered