


The first thing any table saw owner should build is a crosscut sled.
They make using a table saw safer, easier, and they skyrocket the repeatability and accuracy of your woodworking.
There’s a million and one guides to building this essential jig — some with all the bells and whistles.
That’s not what you’ll find here.
This guide explains how to build a simple and solid crosscut sled that’ll give you dead-nuts accurate cuts time and time again…
Meaning you can build it in a couple hours — and move on to making the fun stuff.
We’ve also created a 5 Cut Method Calculator you can use to dial in your sled to perfection (without having to do any math at all).
WHY YOU NEED A CROSSCUT SLED
Why build a crosscut sled when you already have the miter gauge that came with your table saw?
Here’s a few reasons:
SAFETY
Most miter gauges aren’t big enough to support a board very well. And with the friction of the board moving over the table, it’s even harder to keep it steady.
This increases the chances of kickback — especially with bigger boards.
With a good crosscut sled, the board is fully supported and there’s virtually no risk of kickback.
ACCURACY
Since crosscut sleds keep boards steady as they pass through the blade, cuts stay right on your line.
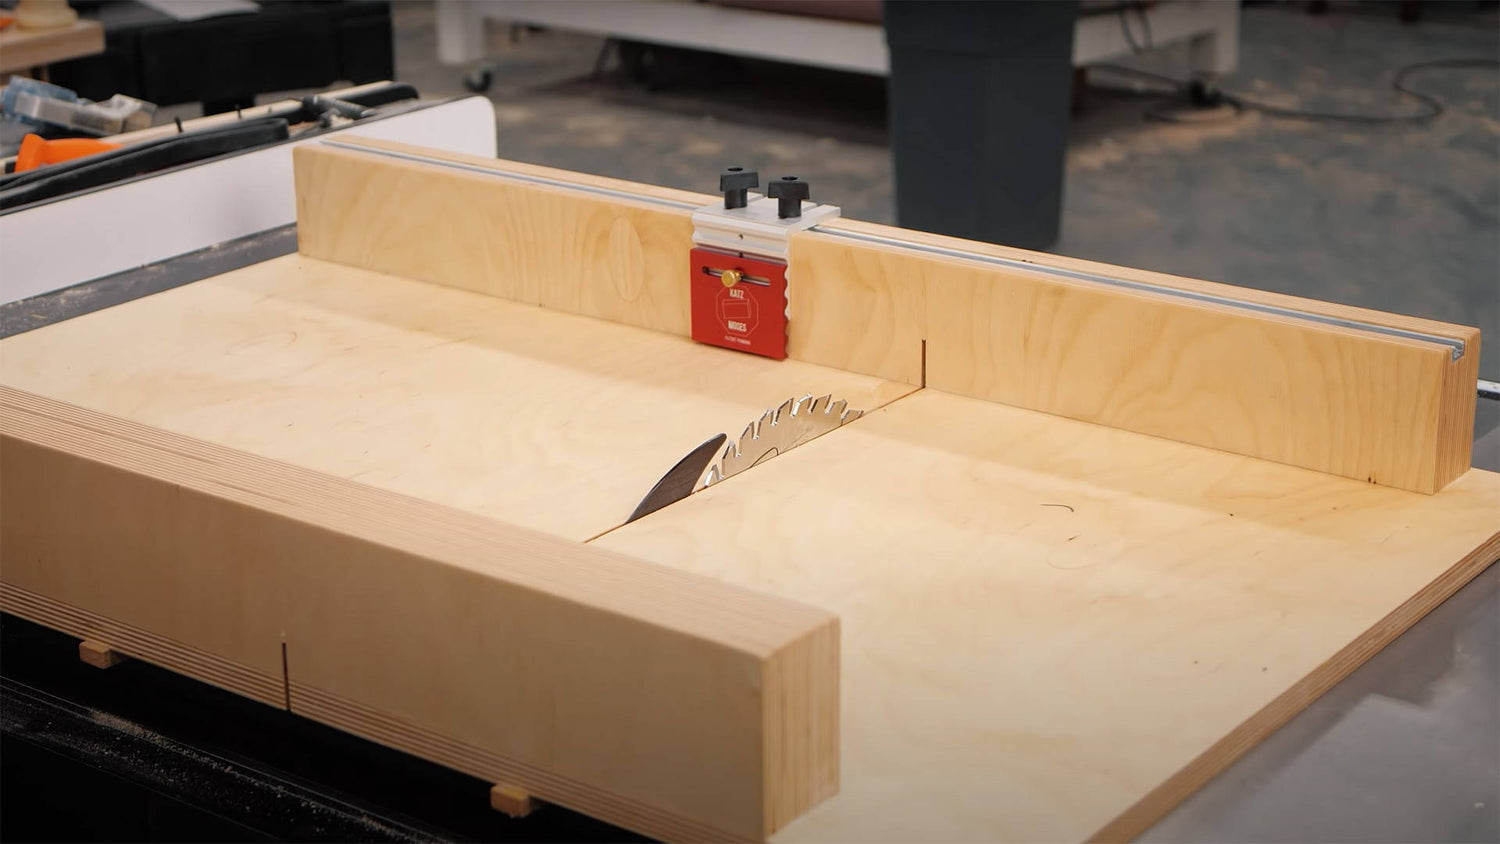
The cut in the base of the sled (which is exactly the kerf of your table saw blade) also makes aligning cuts a breeze. Just slide your marking line up to the kerf cut and you're set.
REPEATABILITY
Crosscut sleds allow you to use stop blocks — meaning you can cut multiple pieces to the same length without measuring.
A stop block can be as simple as a square piece of scrap and a clamp. But for real accuracy and efficiency, I recommend the Katz-Moses No Deflection Stop Block.
No deflection means it doesn’t budge once it’s locked down — even if you’re slamming 8/4 boards up against it.
CLEANER CUTS
A crosscut sled that extends past both sides of your table saw blade supports your stock on both sides of a cut.
That support reduces tearout on your workpiece and offcut, saving you from extra cleanup or wasted wood.
A FEW TIPS FOR SUCCESS
The more care you take building your sled, the longer it’ll serve you.
Take the time to make sure your pieces come out square, straight, and flat.
Before cutting anything, make sure your table saw blade is at exactly 90°.
And be modest with the size of your sled.
I once made an enormous crosscut sled I thought would be great — but it was way too heavy and the long fence changed shape over time.
Modify the size to your needs. But I recommend matching your sled to the dimensions of your table saw top.
MATERIALS AND TOOLS
- ¾ inch plywood: Choose something with smooth surfaces, like baltic birch. You can use MDF, but plywood’s my preferred jig material. Steer clear of melamine — it’s super heavy and chips out a ton.
- Hardwood for Runners: I prefer maple, but any solid hardwood works. You can make runners out of other materials too, like HDPE plastic or aluminum.
- Wood glue and CA glue
- Clamps
- Screws: #6 x ⅝ inch for runners, bigger ones for attaching fences to base
- Digital Calipers: A must-have for the 5 cut method.
- Feeler Gauge: You can also use strips of paper.
- T-Track and Stop Block: These are optional — but hardly. Having a good stop block on your sled makes it so much more useful.
HOW TO BUILD A CROSSCUT SLED
You don’t have to follow these instructions in this exact order, but I find it to be the most efficient process (accounting for glue dry time).
1. ROUGH CUT YOUR PIECES
I cut my base to about 24 x 38 inches to fit my table saw top.
Since the fences will stand on their edges, the width of the pieces equal the fence height.
If you’re planning to use my stop block, plan to make your fence a hair over 2 ¾”, 3”, 3 ¼”, or 3 ½” tall. This ensures the stop block can reach the base of your sled.
Cut your fence pieces oversized at first. You’ll trim them down to their final dimensions later.
The length of the fences is up to you.
The back fence (furthest from the user) just holds the two sides of the base together, so length isn’t too important.
For the front fence (closest to the user), I generally make it as long as the base.
I like to make my fences with 3 pieces of plywood. It creates a big bottom that guarantees the fence will sit at a perfect 90° to the base.
SAFETY TIP:
Unless you know exactly what you’re doing, I don’t recommend taking a 4x8 sheet of plywood straight to your table saw.
It’s too heavy and unwieldy, and can easily lead to a kickback.
Use a track saw or circular saw with a straight edge to cut your board into more manageable pieces. Then trim them up on the table saw.
2. GLUE UP THE FENCES
What matters here is that your fences dry flat.
Look down the length of your plywood pieces. If they bend a certain direction, alternate how you glue them up so their opposing forces pull them flat.
You can also clamp the pieces against a sturdy level as they dry (thanks, Tamar).
Make sure the faces have glue from corner to corner and edge to edge, and clean up any squeeze out with a wet rag as soon as it’s clamped up.
3. MAKE THE RUNNERS
The runners should be snug but slide easily in the miter slots.
Once you add paste wax they’ll run more freely, so err on the tight side
Use a pair of calipers to measure the exact width of your miter slots. Cut two strips of hardwood a hair wider than that measurement and dial them in with a planer or hand plane.
They should sit around 1/10 inch lower than the table top when resting in the miter slots.
This doesn’t need to be exact. You just don’t want them dragging on the bottom when attached to the base.
4. ATTACH THE RUNNERS TO THE BASE
Lay down a line of 5 or 6 coins or washers in the bottom of each miter slot, then lay the runners on top of them.
I run a line of wood glue along the tops of the runners and spread it evenly. You don’t need to use wood glue — but it will increase the longevity of your sled.
Then run a bead of CA glue over the runners (it’ll still work on wood glue).
TIP:
This trick makes sure your sled has almost zero play — even if your runners aren’t perfect.
Use a sliver of wood or paper to shim both runners either away from or towards each other.
This pushes the runners tight against the miter slot walls before you lay down the base.
Use the table saw fence as a reference for laying down the base onto the runners.
Then put something heavy on the base over the runners until the CA glue dries. About 5 minutes should do. Make sure there’s weight on the ends as well.
Once the glue’s dry, flip the sled over with the runners facing up. Lift straight up so you don’t snap them off with the miter slots.
I put 5 to 6 screws through the runners to make sure they never budge. And make sure to drill pilot holes and countersink the screws.
Trim off any excess that extends past the base and you’re good to go.
5. FINISH UP THE FENCES
Now that the fences have dried, it’s time to clean them up.
Rip a thin strip off one side to get a clean edge. Then flip the fence over and rip it down to its final height (I do about 3 ½ inches).
TIP:
If the edges are too uneven or covered with dried glue to rip safely (I told you to clean it up), tape a straight edge to the top and ride that along the table saw fence.
Make the thin rip on one side, then use that as a reference edge for the other side.
Just make sure your straight edge won’t go into the blade and stand clear in case of kickback.
Now cut your two fences to their final length.
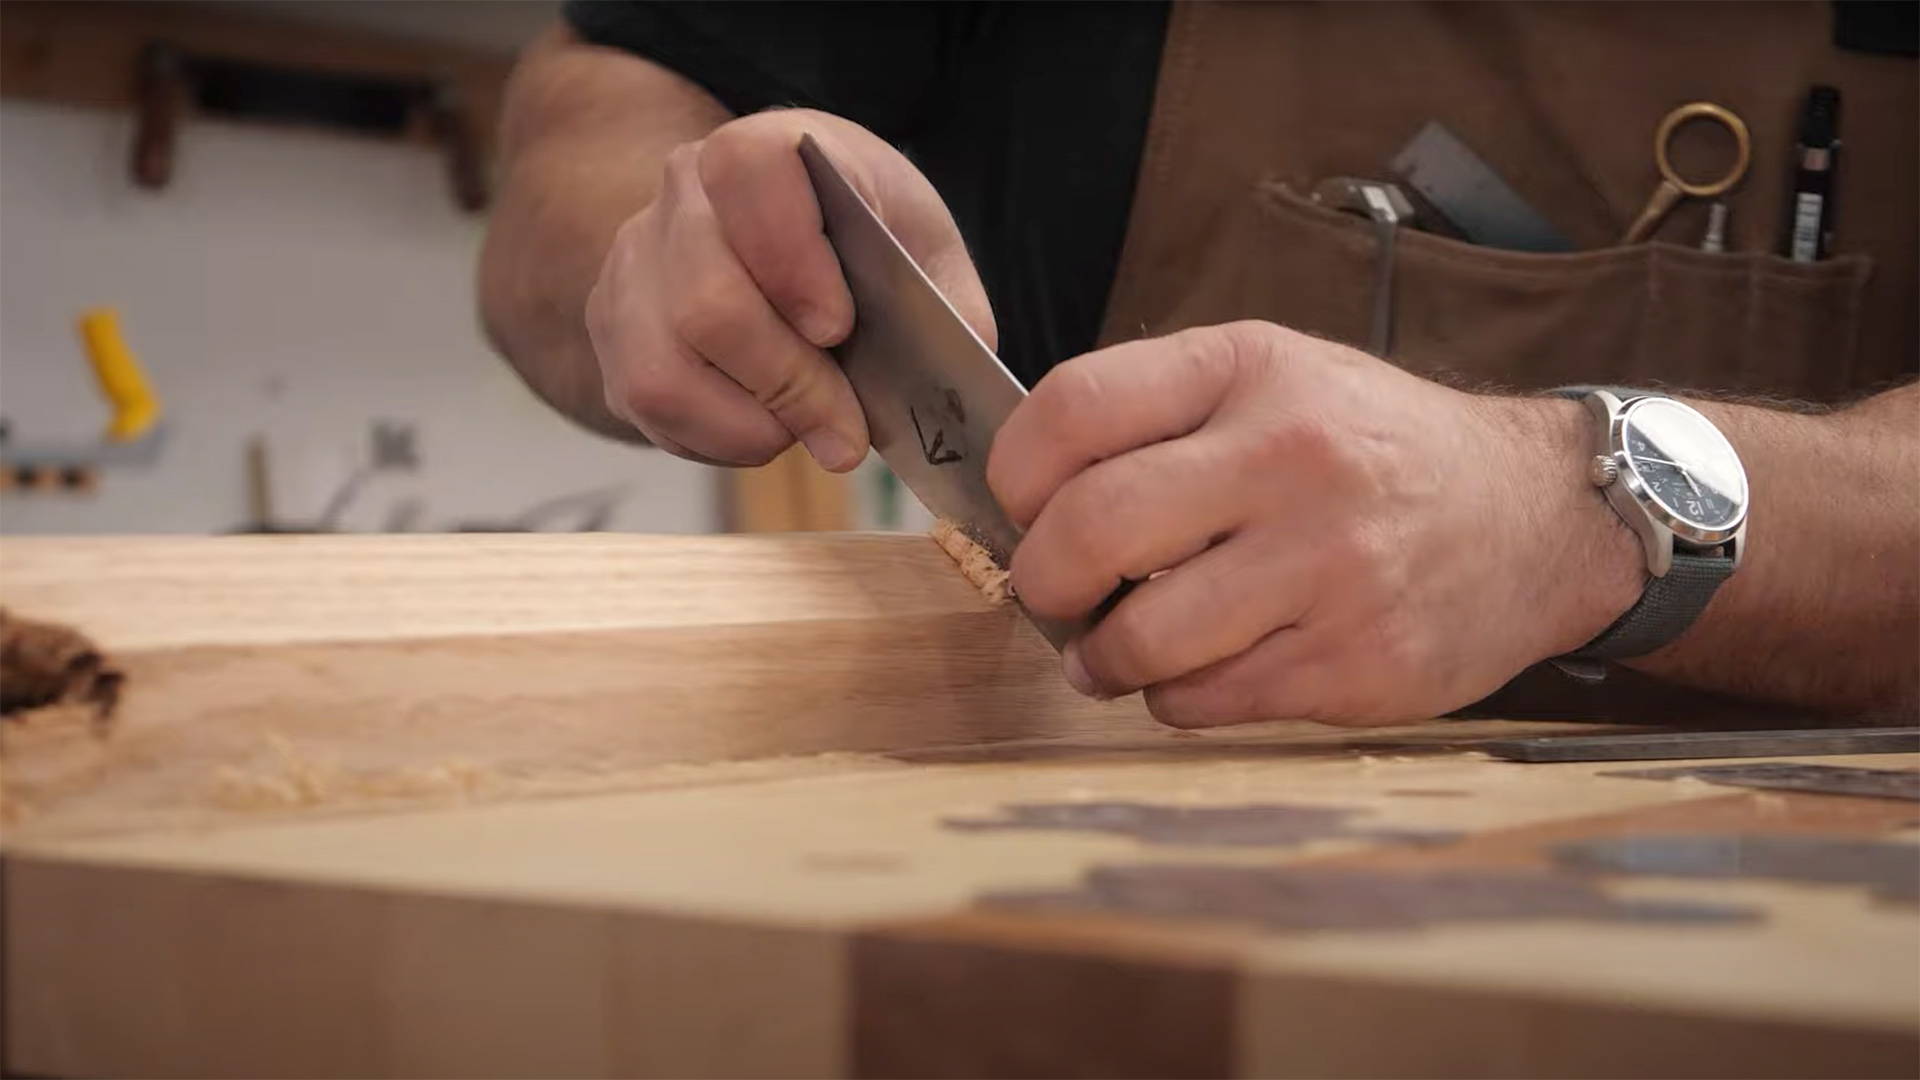
If you like, use a block plane to put a small chamfer on the front bottom edge of the front fence. This keeps sawdust from getting in the way of your stock while you’re making cuts.
ADD T-TRACK FOR THE STOP BLOCK
I seriously recommend adding t-track for a good stop block to your fence.
It simplifies making accurate, repeatable cuts — and is quicker and more reliable than clamping a piece of wood.
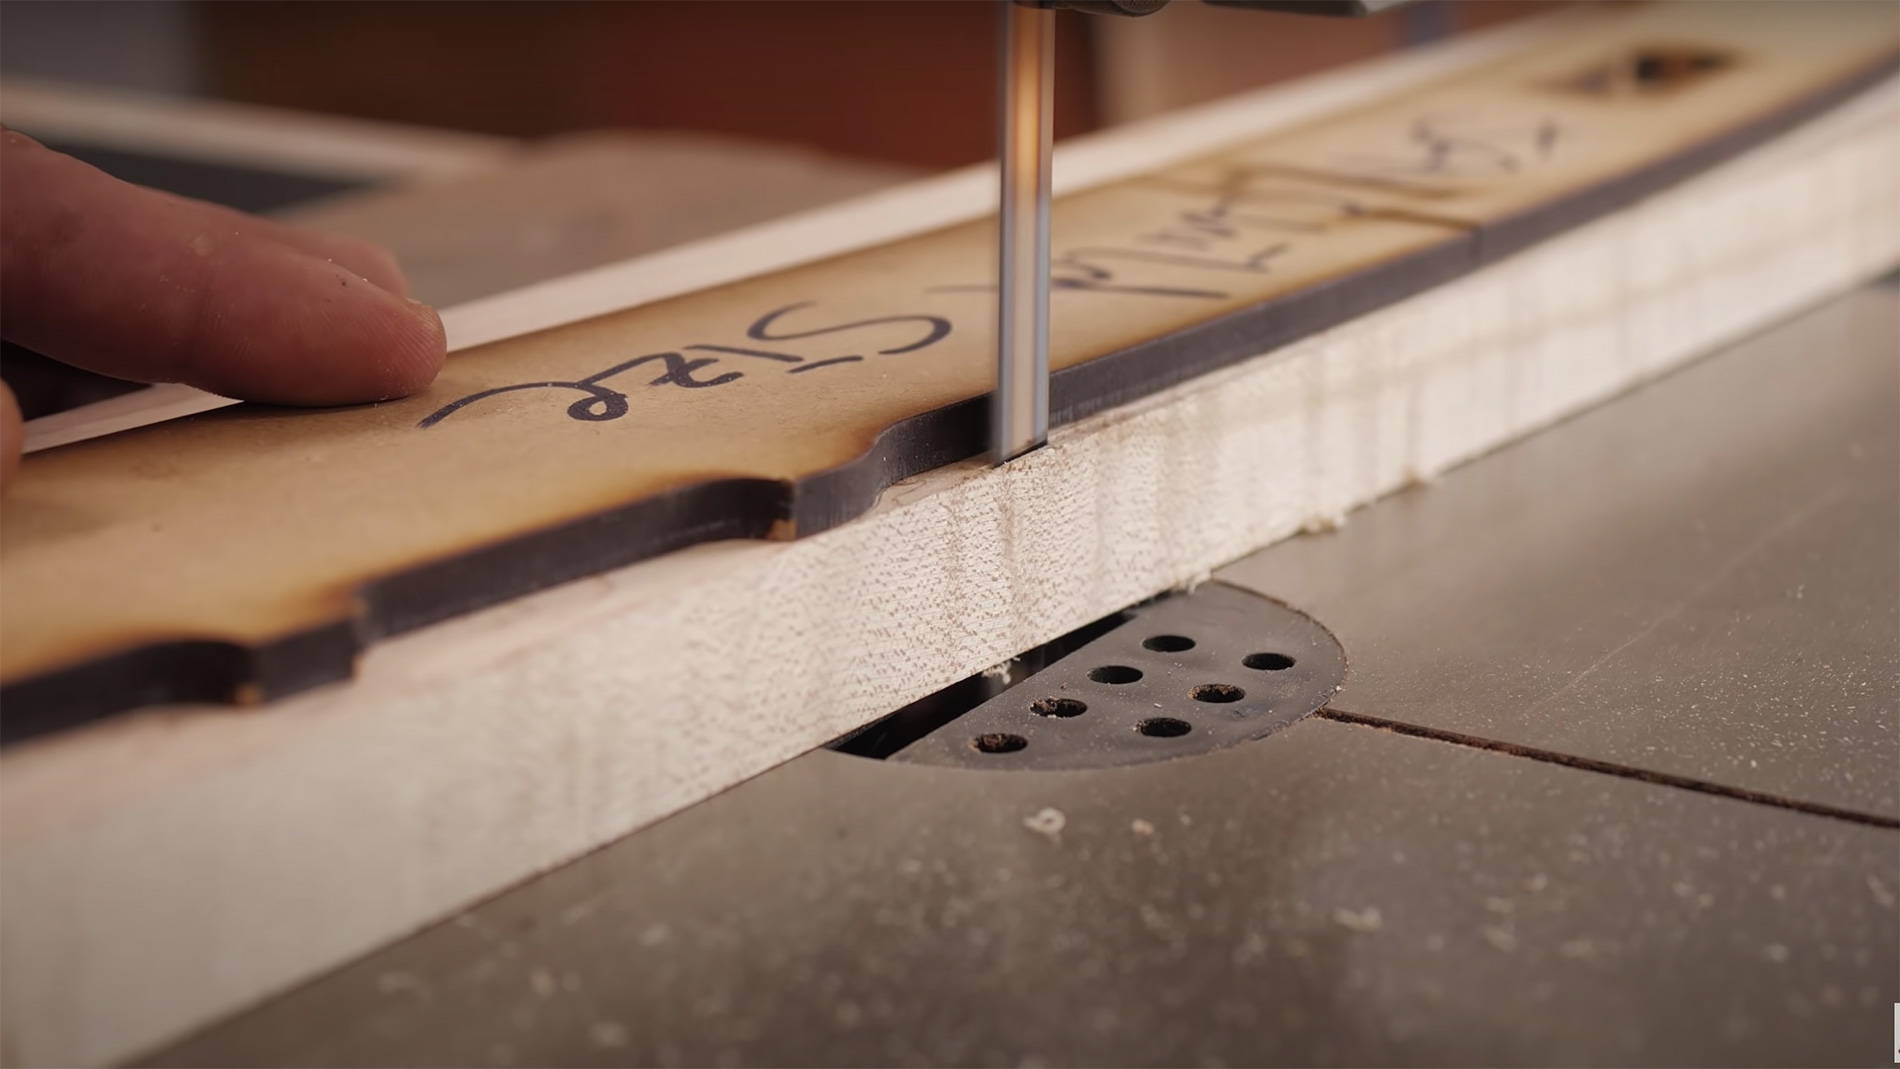
Use a dado stack or router to cut a groove through the top of the fence. Make it around ½ inch from the front, and just a hair deeper than the height of the t-track.
Once the grooves cut, lay in the t-track and mark where to cut.
You can cut aluminum on pretty much any woodworking tool. I use an angle grinder myself, then file down the rough edges.
SawStop NOTE:
If you’re using a SawStop table saw, make sure you put it in bypass mode before cutting aluminum.
Otherwise, bye bye blade.
Fasten the t-track in the grooves with screws. You can also add some 5 minute epoxy for extra bonding strength.
6. ATTACH THE FENCES
Attach the back fence to the base by screwing through the bottom of the sled. Make sure to countersink the screws so you don’t scratch up your table.
The placement isn’t critical as long as it reaches past both sides of the blade.
Now this is where things start to matter.
ATTACHING THE FRONT FENCE
You’re only going to use two screws to attach the front fence at first:
A pivot screw on one end (which will NEVER MOVE) and a second screw somewhere on the other side (which will move).
TIP:
Measure from where you’ll place the pivot screw to the opposite side of the fence. Use a square to mark a few alignment lines to get it right.
Write down this distance. It’s a variable in the 5 cut method equation — and doing it now is a lot easier than trying to measure from the bottom of the sled later.
Pull the sled back and raise the blade to just higher than the base. Turn on the table saw and run the sled through the blade.
SQUARING YOUR SLED: THE 5 CUT METHOD
Congratulations, you’ve built a crosscut sled. But it won’t give you dead-nuts square cuts right off the bat.
That’s where the 5 cut method comes in. It can seem intimidating, but I promise it’s actually really easy.
And to make it even easier, check out our 5 Cut Method Calculator that tells you exactly how much to adjust your fence to bring it into square.
WHAT IS THE 5 CUT METHOD?
The five cut method is a formula that helps you calculate the error per inch of your crosscut sled.
It uses one piece of wood to compound the error of your sled — and help you get that error down to a tiny fraction of an inch.
HOW TO USE THE 5 CUT METHOD
Grab a scrap board that has one flat-ish side. Anything semi-rectangular will do.
The dimensions don’t matter. It just needs to fit in your crosscut sled and not be so small that you can’t make significant cuts.
Rest the board on your crosscut sled with one side resting against the fence.
For the sake of clarity, let’s say it’s on the right side of the crosscut sled (meaning the left edge will be cut from the user’s perspective).
Label the top left corner (furthest from you and closest to the blade) with an A. Label the bottom left corner (closest to you and closest to the blade) with a B.
You can also number each side clockwise from 1 to 4 for clarity — side 1 being the left side closest to the blade (labeled with an A and B), and side 4 resting against the fence.
Start by taking a thin cut off side 1.
Rotate the board counter-clockwise so the freshly cut edge is resting against the fence and make a similar cut on side 2. Repeat this process for sides 3 and 4.
After you cut side 4, rotate it counter-clockwise one last time so side 4’s against the fence like how you started.
CUT 1
CUT 2
CUT 3
CUT 4
You’ll now take a final 5th cut off the side marked with an A and B. Make this offcut about ½ inch. It doesn’t have to be exact — you just don’t want it too thin.
SAVE THIS OFFCUT — it’ll give you the variables for the 5 cut method formula.
Just make sure you know which is the A side (furthest from user) and B side (closest to user).
THE 5 CUT METHOD FORMULA
You’re going to measure 4 variables:
- Width of side A
- Width of side B
- Length of the 5th offcut
- Distance from pivot screw to end of fence
Use a pair of digital calipers to measure the width of side A and side B, then measure the length of the offcut. Try to get precise measurements — down to 2 or 3 decimal places is good.
Here’s the two-part formula:
- [(A–B) ÷ 4] ÷ Length of 5th offcut = Error per inch (EPI)
-
EPI x Distance from pivot screw to end of fence = Distance to move fence
- If result is positive, move fence away from user (forward)
- If result is negative, move fence towards user (backwards)
For example…
Let’s say you get the following variables (in inches):
- Width of side A: 0.59
- Width of side B: 0.52
- Length of 5th offcut: 5.73
- Distance from pivot screw to end of fence: 20
First, you’d subtract side B from side A:
- 0.59 – 0.52 = 0.07
Divide the result by 4 (for the 4 sides of the board):
- 0.07 ÷ 4 = 0.0175
Then divide by the length of the 5th offcut:
- 0.0175 ÷ 5.73 = 0.003
Your error per inch is 0.003 inches. It doesn’t sound like a lot — but I promise you can do better.
Now to calculate how much to move the fence, multiply the EPI by the distance from the pivot screw to the end of the fence.
- 0.003 x 20 = 0.061
Since this number is positive, you’d move the end of your fence furthest from the pivot screw away from you 0.061 inches.
If the result were negative, you’d move it the opposite way towards you.
But how can you reliably adjust the fence by such a small amount?
ADJUSTING YOUR FENCE WITH THE 5 CUT METHOD
You’ll need a piece of scrap wood, a couple clamps, and a feeler gauge.
If you don’t have a feeler gauge, cut several small strips of paper. Use your digital calipers to figure out how big a stack will get you close to your adjustment number (0.061 in our example).
To move your fence forward, place your feeler gauge or paper stack against the end of the fence — and I mean the end.
Move the scrap wood up against the feeler gauge and clamp it in place. Use just the corner of the scrap right at the end of the fence to get super exact.
Clamp the piece of scrap down securely. You don’t want it to shift.
Take out the second screw holding your fence in place (NOT THE PIVOT SCREW), remove the feeler gauge, and push the fence forward until it touches the piece of scrap.
Clamp the fence down in this position, then drill a new hole for the second screw and fasten the fence in place.
NOTE:
Don’t reuse any of these “second screw” holes. If you do, it’ll just pull your fence back into the wrong position.
Mark previous holes so you don’t accidentally use them again. Yes, I’ve messed this up before.
If you need to move your fence back towards the user, first clamp the scrap wood in place with the edge against the fence.
Then remove the second screw, insert your feeler gauge between them, and push the fence against both so the feeler gauge (or paper) is held tight. This is where you’ll refasten the fence.
Now repeat the 5 cut method again. Done properly, you should only have to do it 2 or 3 times.
WHAT’S GOOD ENOUGH?
Woodworking isn’t machining. You want your crosscut sled to cut square — but it doesn’t have to be precise enough to send billionaires to space.
If the final number to adjust your fence gets into the triple digits (i.e. 0.007 inches), take it and run.
You can even just cut a piece of scrap wood on the sled and test it with a good square.
If there’s no light between the edge and the square blade, it’s time to start building.
FINISHING TOUCHES
Once your fence is squared up, throw a few more screws in the bottom to secure it in place. 4 to 30 should do the job.
Break the top corners of the fence with a block plane to make it kinder to your hands.
Then just lightly sand all your surfaces and slather them down with some Katz-Moses goo.
Rub the bottom of the sled and runners with paste wax so it slides easily and doesn’t scratch up the table, and you're good to go.
HOW TO STORE YOUR SLED
Your crosscut sled can basically live on your table saw and be moved to the floor or table when not in use.
It’s best to lay it down flat so it doesn’t warp over time (avoid leaning against anything for a long period of time).
You can also drill a hole in one side and hang it from a wall.
AN ESSENTIAL WOODSHOP JIG
A good crosscut sled will quickly become the most-used jig in your shop.
And even though this is a simple version — it’ll be an absolute workhorse for you.
Afterall, there’s elegance in simplicity.
Have you souped up your crosscut sled with other modifications? Tell us how in the comments below!
Be sure to follow us on Instagram @katzmosestools and check out my YouTube channel…
And as always, STAY SAFE IN THE SHOP!
12 comments
Roy Luft
Your instructions about moving the fence towards you or away from you assume that the pivot screw is to the right when the sled is on the saw ready to make cuts. It would be good to mention that if the pivot screw is to the left, then the fence needs to be moved in the opposite directions depending on having a positive or negative number.
Your instructions about moving the fence towards you or away from you assume that the pivot screw is to the right when the sled is on the saw ready to make cuts. It would be good to mention that if the pivot screw is to the left, then the fence needs to be moved in the opposite directions depending on having a positive or negative number.
Steve
Like some others, I followed the instructions. Positive number; move the fence to the blade (away from the user). After numerous attempts and using a set sq to verify the result something was wrong. Then I noticed that in your video, you cut your test peice on the right hand side of the blade whereas I am cutting on the left hand side. The answer for my test cut method is opposite to what you say as I have to move my fence away from the blade. If I am correct maybe consider mentioning this to your audiance. Please let me know if you disagree.
Like some others, I followed the instructions. Positive number; move the fence to the blade (away from the user). After numerous attempts and using a set sq to verify the result something was wrong. Then I noticed that in your video, you cut your test peice on the right hand side of the blade whereas I am cutting on the left hand side. The answer for my test cut method is opposite to what you say as I have to move my fence away from the blade. If I am correct maybe consider mentioning this to your audiance. Please let me know if you disagree.
Gene
I struggled to get this right using the calculator. I may be missing something, or the calculator is wrong. Using the calculator, I was always getting positive numbers. so, with the pivot screw on my right as I face the saw, the calculator instructed me to move the fence towards the blade (or away from me). Doing so kept making the error worse. Finaly, I reversed the direction and moved the fence towards me (or away from the blase) and it came in within .0022 error. Checking Willame Ng’s video he states, "if it’s a negative number that means the fence is too low (away from the blade) and a positive number it’s too high (towards the blade). So, is the calcofluor wrong?
I struggled to get this right using the calculator. I may be missing something, or the calculator is wrong. Using the calculator, I was always getting positive numbers. so, with the pivot screw on my right as I face the saw, the calculator instructed me to move the fence towards the blade (or away from me). Doing so kept making the error worse. Finaly, I reversed the direction and moved the fence towards me (or away from the blase) and it came in within .0022 error. Checking Willame Ng’s video he states, "if it’s a negative number that means the fence is too low (away from the blade) and a positive number it’s too high (towards the blade). So, is the calcofluor wrong?
Daggers
Thanks so much for this method and the handy calculator. It was clunky the first few iterations but I got in the groove pretty quickly and had an error per cm well within my tolerance and measurement error by the 5th adjustment. Feeler gauge worked really well. Just got to fit the T track. Do you ship your block to the UK?
Thanks so much for this method and the handy calculator. It was clunky the first few iterations but I got in the groove pretty quickly and had an error per cm well within my tolerance and measurement error by the 5th adjustment. Feeler gauge worked really well. Just got to fit the T track. Do you ship your block to the UK?
Leon de Beer
I tried this last night and failed :-( I attached the top fence with multiple screws, attached the bottom fence with two (pivot + temporary screw) then cut through the base in anticipation of the 5-cut process.
The issue I had is that even though the top fence seemed secure, loosening the bottom fence second screw made the two halves of the base move by a mm or so, throwing the whole process out.
Going to fix it by attaching the two halves of the bottom fence with some wood so they don’t move but if I were to start from scratch again: I would not cut all the way through the bottom fence. I would leave it attached so the above can’t happen.
Steven Woodward
I have made some sleds with two runners and made some sleds with one runner. The sleds with one runner do not get stuck as the humidity changes with seasons. I have not noticed any disadvantages with one runner.
I have made some sleds with two runners and made some sleds with one runner. The sleds with one runner do not get stuck as the humidity changes with seasons. I have not noticed any disadvantages with one runner.
Justin
Finished my first sled with this build. I was convinced I wasn’t doing something right. After the VERY FIRST 5cut calculation, I had -.002!! Is that mind blowing to anyone else? Never moved the fence! I still can’t believe it. Had to share that here, my wife just rolls her eyes…
Thanks JKM!
Finished my first sled with this build. I was convinced I wasn’t doing something right. After the VERY FIRST 5cut calculation, I had -.002!! Is that mind blowing to anyone else? Never moved the fence! I still can’t believe it. Had to share that here, my wife just rolls her eyes…
Thanks JKM!
Jon Senior
A simpler version of Fred’s method uses a 3-4-5 triangle rather than a right angle and requires no calculation. By measuring 3 units along one edge (A unit could be 1cm, 10cm, 4in etc) and 4 units along the other (edge 1 might be the kerf, edge 2 the guide) the resulting hypotenuse should be 5 units long. If not… adjust. The other comments regarding this method still apply. Personally I would attempt to trace a perpendicular using basic geometry and then screw my guide provisionally to this line. Then the 5 cut method can be used to verify the accuracy and adjust if necessary.
A simpler version of Fred’s method uses a 3-4-5 triangle rather than a right angle and requires no calculation. By measuring 3 units along one edge (A unit could be 1cm, 10cm, 4in etc) and 4 units along the other (edge 1 might be the kerf, edge 2 the guide) the resulting hypotenuse should be 5 units long. If not… adjust. The other comments regarding this method still apply. Personally I would attempt to trace a perpendicular using basic geometry and then screw my guide provisionally to this line. Then the 5 cut method can be used to verify the accuracy and adjust if necessary.
Johnny Mac
PS. I should have said if you get 84.70 you will have to move the fence AWAY from the blade until you get 84.84.
PS. I should have said if you get 84.70 you will have to move the fence AWAY from the blade until you get 84.84.
Johnny Mac
Caution: I’m thinking there might be a few flaws in Fred’s geometry method.
1) If the pivot screw in the right side is inserted firmly but the fence can still be moved, it might move slightly on that first cut. Probably not a big deal but it could happen.
2) If the pivot screw is at the right end of the fence as instructed above and the sled is centered on the blade, then your geometry will be thrown off. Using Fred’s numbers, measure 60 cm from the fence along the kerf and 60 cm along the fence. Unless your diagonal ends up exactly 84.84 cm on first measurement you’ll have a geometry problem. Say you get 84.70. Now you have to move the fence toward the blade until you get 84.84, but when do the 60 cm along the kerf is no longer 60 cm. It is shorter (because the pivot point is 25 cm to the right of that line).
The only way this method can work correctly as described is if the pivot screw is exactly at the point where the two 60 cm lines meet, right on the edge of the fence where it meets the left.
Finally, Fred is happy with 1 mm accuracy, which equals ~0.0394 inches. The author mentions getting that number down to 0.007 inches. I’d give the 5 cut method a try.
Richard Lotsch
For the pivot screw in the front fence, I drilled the fence bottom and placed a 1/4” threaded brass insert in the fence being careful to get it perfectly perpendicular by use of a drill press Then I drilled and countersank a 1/4” hole in the base to fit a 1/4” Allen head machine screw. This made repeated loosening and tightening of the pivot screw a breeze and the pivot never moved or loosened.
For the pivot screw in the front fence, I drilled the fence bottom and placed a 1/4” threaded brass insert in the fence being careful to get it perfectly perpendicular by use of a drill press Then I drilled and countersank a 1/4” hole in the base to fit a 1/4” Allen head machine screw. This made repeated loosening and tightening of the pivot screw a breeze and the pivot never moved or loosened.
Anonymous
Saw sled
A much easier way to set your fence than the 5-cut method is just to use one simple calculation from geometry. Fix the right side of the fence as close to square as possible firmly but so it can still be moved. Then, push the unadjusted sled through the saw the first time. Mark and measure along the left side of the cut from the fence to as close to the far end as possible. Use centimeters as accurately as you can measure, usually to the mm. Lay out the same distance along the fence to the left and mark that with a point. The distance between the points must be 1.414 the length of the first measurement to set the fence to precisely 45 degrees. Adjust the fence to make this so and fasten.
Using this method to make my sled results in cuts the full depth of my sled to within a mm of square. I used this for a miter sled too. Perfect.
Example: First measurement is 60.0cm, about two feet. Mark the fence to the same 60.0 cm. The calculation is simple: 1.414 × 60 = 84.84. Set the distance between the points as accurately as you can to 84.84 then fasten the fence. Done.
If the fence is too short to mark the second distance, mark the farthest point you can to the left along the fence and transfer that same measurement to the left side of the cut.
You can use multiples of a 3-4-5 triangle to do the same thing. Very easy using centimeters.