


Ever find yourself studying a piece of handmade furniture (of course you do) and you wonder, “how did they get these parts so symmetrical?”
Some woodworking messiahs are just that good.
But for most of us mere mortals, there’s an easy way to create identical parts: Ikea.
Just kidding. I’m talking about woodworking templates.
Templates make repeatability a cinch.
They’re super helpful for parts with curved edges and corners, like the child’s nesting chair I built using templates from my friend Jay Bates (you can get them here).
But they can also be used for single pieces, like the body of a guitar or the jaws of a moxon vise (templates available here).
Afterall, it’s a lot easier to sand ¼ inch MDF down to perfect dimensions versus an 8/4 thick piece of hard maple.
Whether you’ve got a design you want to repeat, or want to build something you otherwise wouldn’t know how, templates should be a part of your woodworking repertoire.
I’m going to explain the whole process for using templates, including making your own, how to do template routing safely, and a few other tips for success.
HOW TO MAKE YOUR OWN TEMPLATES
If you come up with an awesome design you plan on building again, making templates of the more intricate parts is the way to go…
Especially when your family and friends start placing orders
BEST TEMPLATE MATERIALS
I recommend ¼ inch MDF for templates. It’s easy to work with, extremely stable, and cheap.
Just make sure you wear a good dust mask. Not even Tony Montana would want to inhale a line of MDF dust.
Plywood can also work, but you might have a harder time getting clean, tearout-free edges.
It’s best to avoid solid wood templates. Wood movement will make them swell and shrink over the seasons, which sort of does away with the whole repeatability thing.
DESIGNING YOUR TEMPLATE
There’s two basic ways to shape your template.
One is to draw the shape directly on the material.
Rough cut it close to the lines with a bandsaw or jigsaw, then sand down to your final dimensions.
The other is to draw your shape on the computer then print it out full size. Use some spray adhesive to attach the drawing to your template material, and follow the same steps as above.
HOW TO MAKE YOUR TEMPLATES LAST
If you plan on using them again and again, it’s good to give your templates a light finish.
Anything that creates a protective “shell” coat will do, like spray lacquer, shellac, or polyurethane.
PRO TIP:
Drill holes in your templates so you can hang them on the wall like the trophy they are.
Not only does it look cool (look up pics of Sam Maloof’s shop), but it keeps them from taco-ing (bending/warping) over time from leaning against a wall.
ATTACHING TEMPLATES TO YOUR WORKPIECE
This is pretty easy, but needs to be done right.
You don’t want your template shifting while you’re cutting your workpiece — but also don’t want it attached so securely it can’t be removed.
This brings us to the endless debate: double-sided tape vs the “blue tape trick.”
DOUBLE-SIDED TAPE VS THE BLUE TAPE TRICK
If you don’t know, the blue tape trick uses CA glue and painter’s tape to temporarily attach boards together.
You put a strip of blue tape on the bottom of your template and another on the top of the workpiece. Add a line of CA glue to the tape and stick them together.
Don’t get me wrong — it’s a great trick. But it’s not the best for templates.
The strips of blue tape need to be precisely lined up or the CA glue will go where you don’t want it. And that involves a lot of cleanup.
With good double-stick tape, it’s no issue.
Just attach one side to the bottom of your template, then place it wherever you like on the workpiece.
It’s faster and makes it a lot easier to get the exact grain pattern you want.
Just make sure your double-sided tape is thin. If it’s too thick, the template can flex on the workpiece.
And you don’t need to cover the entire template with tape. A strip or two will do.
You can also attach your template with a pin nailer.
The headless nails leave ultra tiny holes that are almost imperceptible — especially in darker woods.
Personally, I don’t like to put holes in my workpiece if I don’t have to. I’m a double-sided tape man all the way.
ROUGH CUTTING TO YOUR TEMPLATE
This is the MOST IMPORTANT PART of using templates. Seriously.
Cut your workpiece as close to the template as possible — within 1/16 inch is ideal. At the least, get within ⅛ inch.
Why is this so important?
Two words: tearout and kickback.
The more material you leave for your router to remove, the higher your chances of encountering either or both of these woodworking disasters (people make this mistake on YouTube all the time).
Template routing often involves lots of curves — which means haphazard grain direction.
And when it comes time to flush trimming, too much material means you’ll have to be extra conscious of how the grain runs.
Point being: Cut as close to your template as possible. It’ll make routing a lot easier and safer.
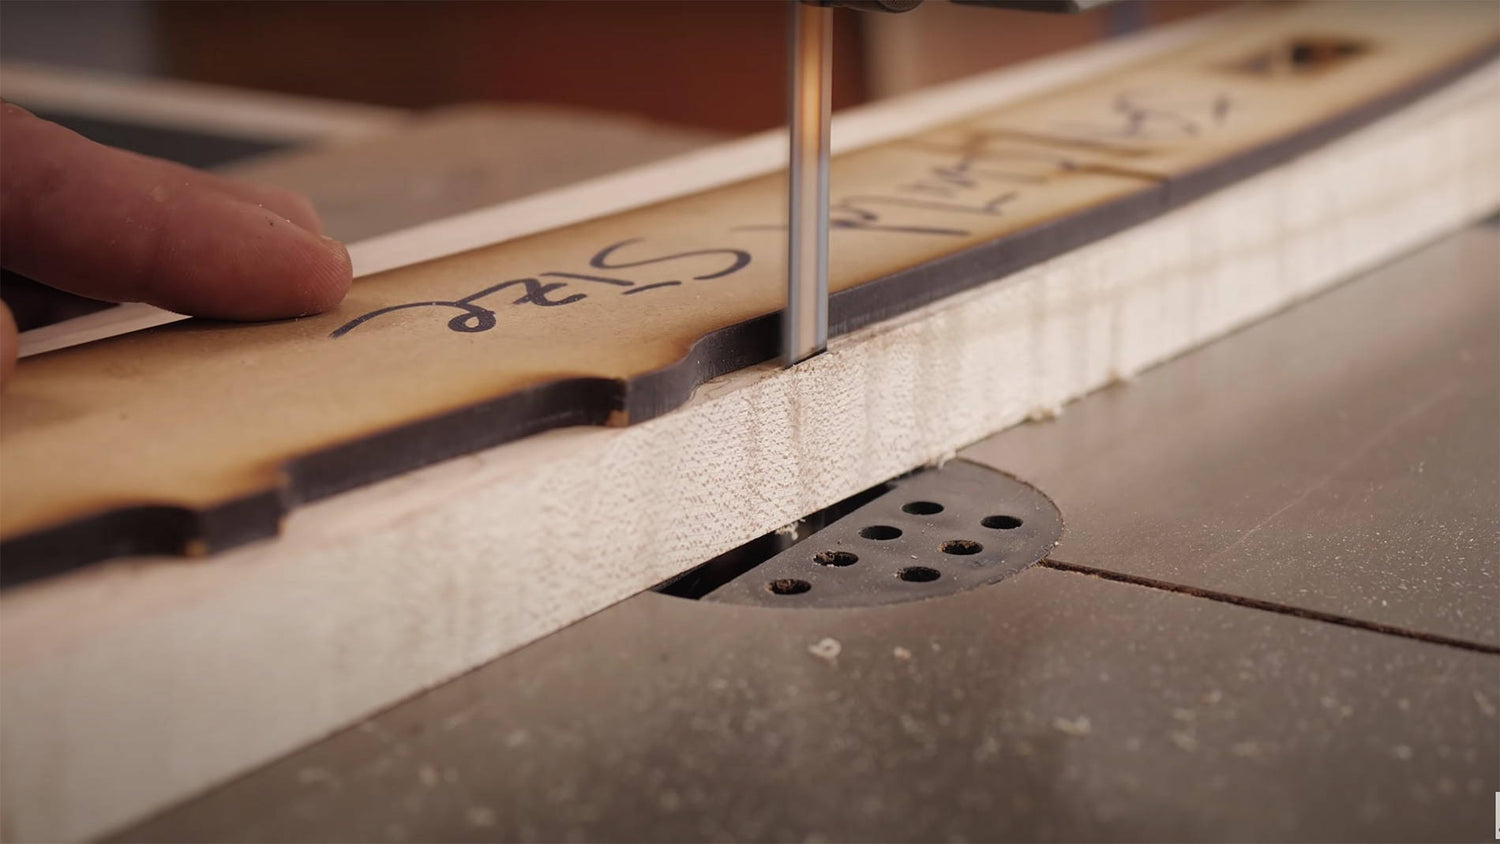
You can leave the template attached to the workpiece and cut it out with a bandsaw or jigsaw.
If you’re nervous about cutting into your template, trace its shape onto your workpiece with a pencil and remove it before cutting.
On a bandsaw, it’s best to use a thinner blade. Something around ⅛ – ¼ inch thick works well for tight curves, but you can get away with bigger blades if it’s all you have.
TIP: CUTTING TIGHT CORNERS
Having a hard time getting into those corners on the bandsaw?
Take straight cuts into the corners until you have enough room to run the blade along the edge again.
It can also help to take a few big chops off your workpiece first so it’s more manageable.
TEMPLATE ROUTING TECHNIQUES
This is the fun part — but also where you need to be the most careful.
Tearout and kickback are real risks of template routing. The three biggest causes are:
- Removing too much material
- Going against the grain
- The size of your bit
We’ve already gone over why you should cut as close to the template as possible. So let’s talk bits.
ROUTER BITS FOR TEMPLATE ROUTING
There’s a few different options for your router set up:
- Flush trim bits with a top and bottom bearing
- Flush trim bits (with bearing on tip)
- Pattern bits (with bearing by the shank)
- Bushings
Any of these can work, but bushings involve adjusting the size of your template for the diameter of the bushing.
That’s why I stick to flush trim bits.
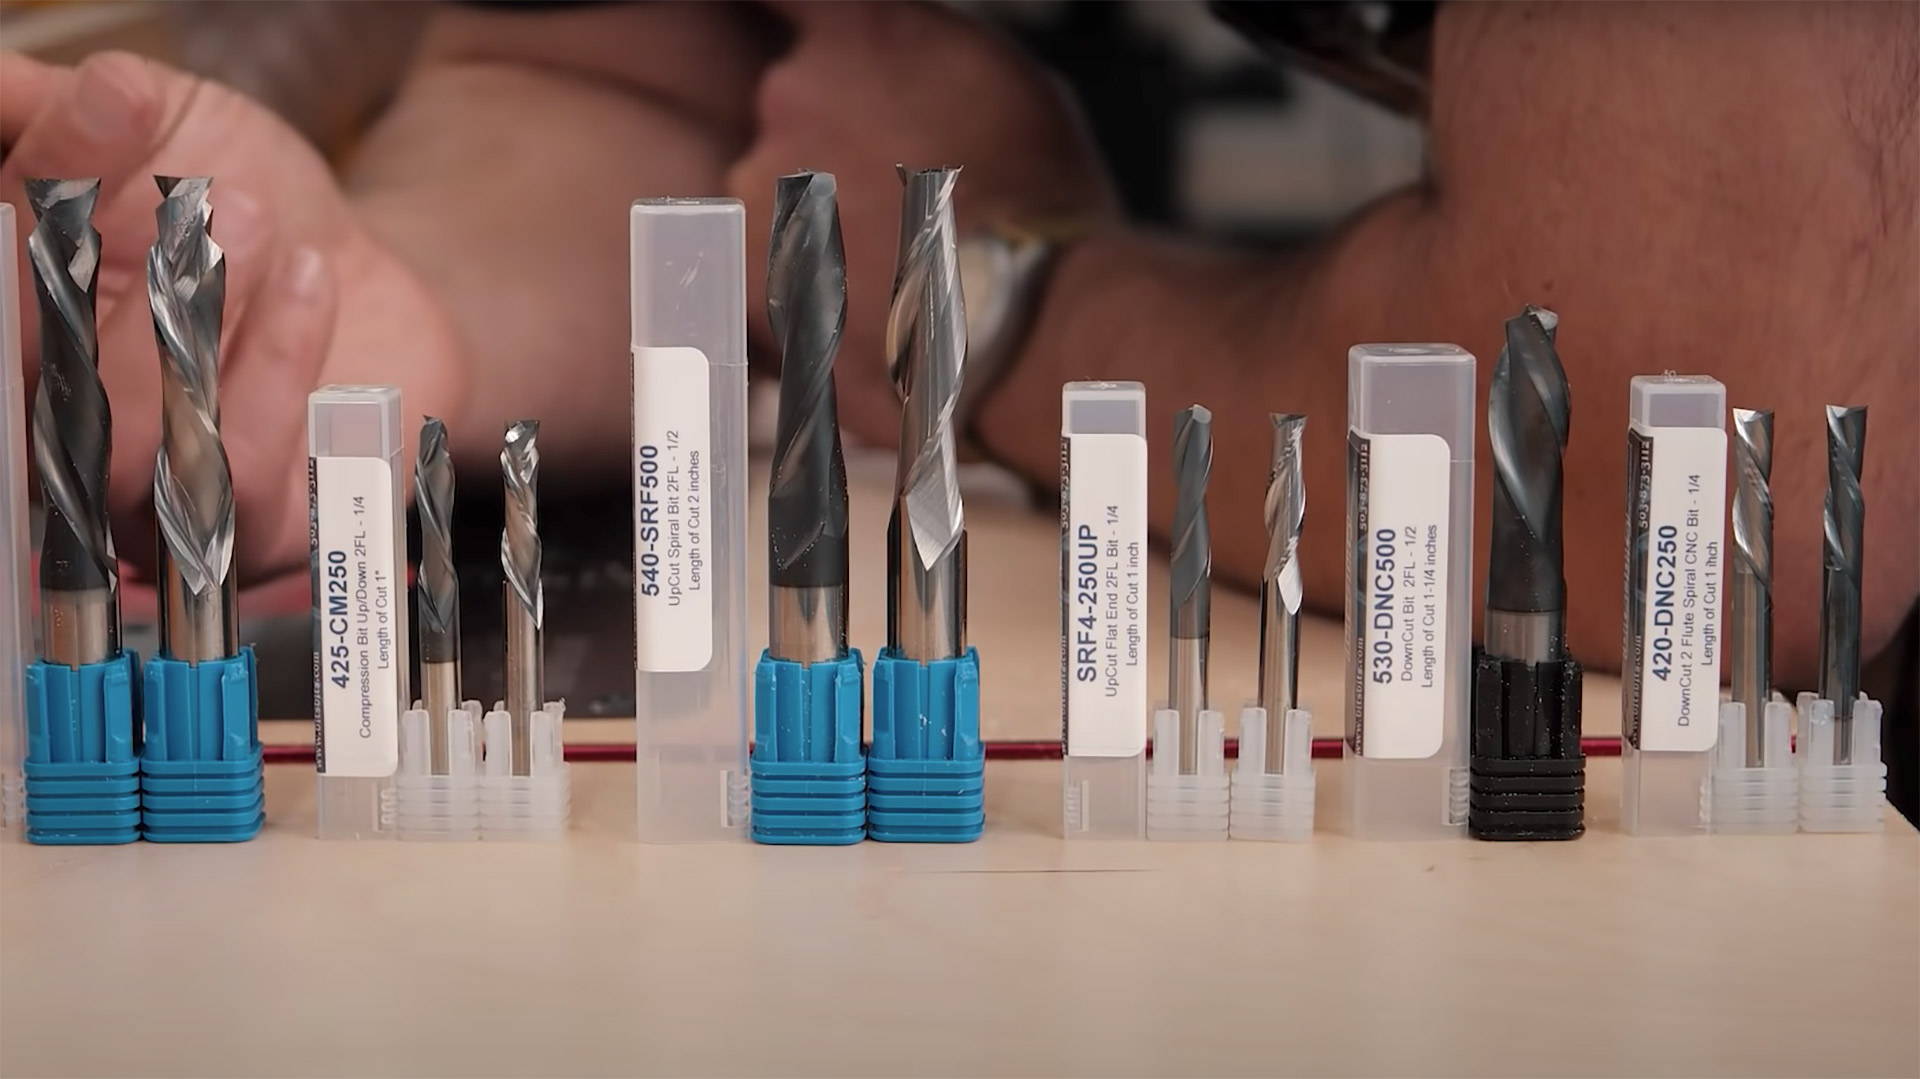
Now the question of straight bits vs spiral bits.
I go in depth about the difference in this post, but the gist is spiral bits are 1000x better. They’re safer, give better results, and have better longevity.
So if you’ve already settled on spiral bits, which should you use?
Compression bits will save you from tearout on both sides of your workpiece.
If you only need the showface tearout free, use either a downcut or upcut bit — whichever cuts material away from your showface. (Again, you can read more about spiral bits here.)
As to the size of your bit, go with the biggest that’ll work for your curves (insert Michael Scott meme). It’ll help reduce flex and the chances of tearout or kickback.
For super tight corners, you’ll need a smaller diameter bit.
We carry ¼ inch spiral flush cut bits that are excellent at getting into tight corners and curves and will give you spectacular results.
The beauty of good spiral bits — assuming you’re within 1/16 inch of your template — is you can flush cut your entire workpiece without worrying about grain direction.
But if you’re doing everything right and still getting tearout or kickback — it’s time to read the grain.
FEED AND GRAIN DIRECTION
The first rule of template routing is feed the right way (more on feed direction here).
The second rule is feed the right…wait. The second rule is go with the grain.
When you pet a cat, you run your hand in the direction their fur lies.
The same is true for how you run a router with grain direction (just please don’t mix up the two and try to pet your cat with a router).
I have a video all about reading grain direction — which is especially important in highly figured wood.
The problem is, these two rules can conflict.
Sometimes, the correct feed direction will make you cut against the grain.
If you have a flush trim bit with two bearings, this is no biggie. Just flip your workpiece over so the template’s on the bottom (talking router table here) and raise the bit.
You could also switch from a flush trim to a pattern bit and flip the workpiece over.
But if all your bits have a bearing on the same side, you might have to make a climb cut to go with the grain.
Climb cuts are when you feed stock the same direction as the router bit’s spinning — a practice best avoided.
Remember, as long as you leave a very small amount of material, a good spiral bit can cut all the way around no problem. Even against the grain.
But if you do have to make a climb cut, be extra careful. It might be better to do it with a handheld router and solidly clamp the workpiece to your bench.
On the router table, make sure you’re using push paddles and being hyper-cautious.
START IN THE RIGHT PLACE
Never start flush trimming on end grain or a curve. This will either take a chunk out of your workpiece or send it flying out of your hands.
Always start on the straight long grain.
Work your way towards a curve, stopping at the apex. Then come around from the other side and do the same (just be aware of climb cuts).
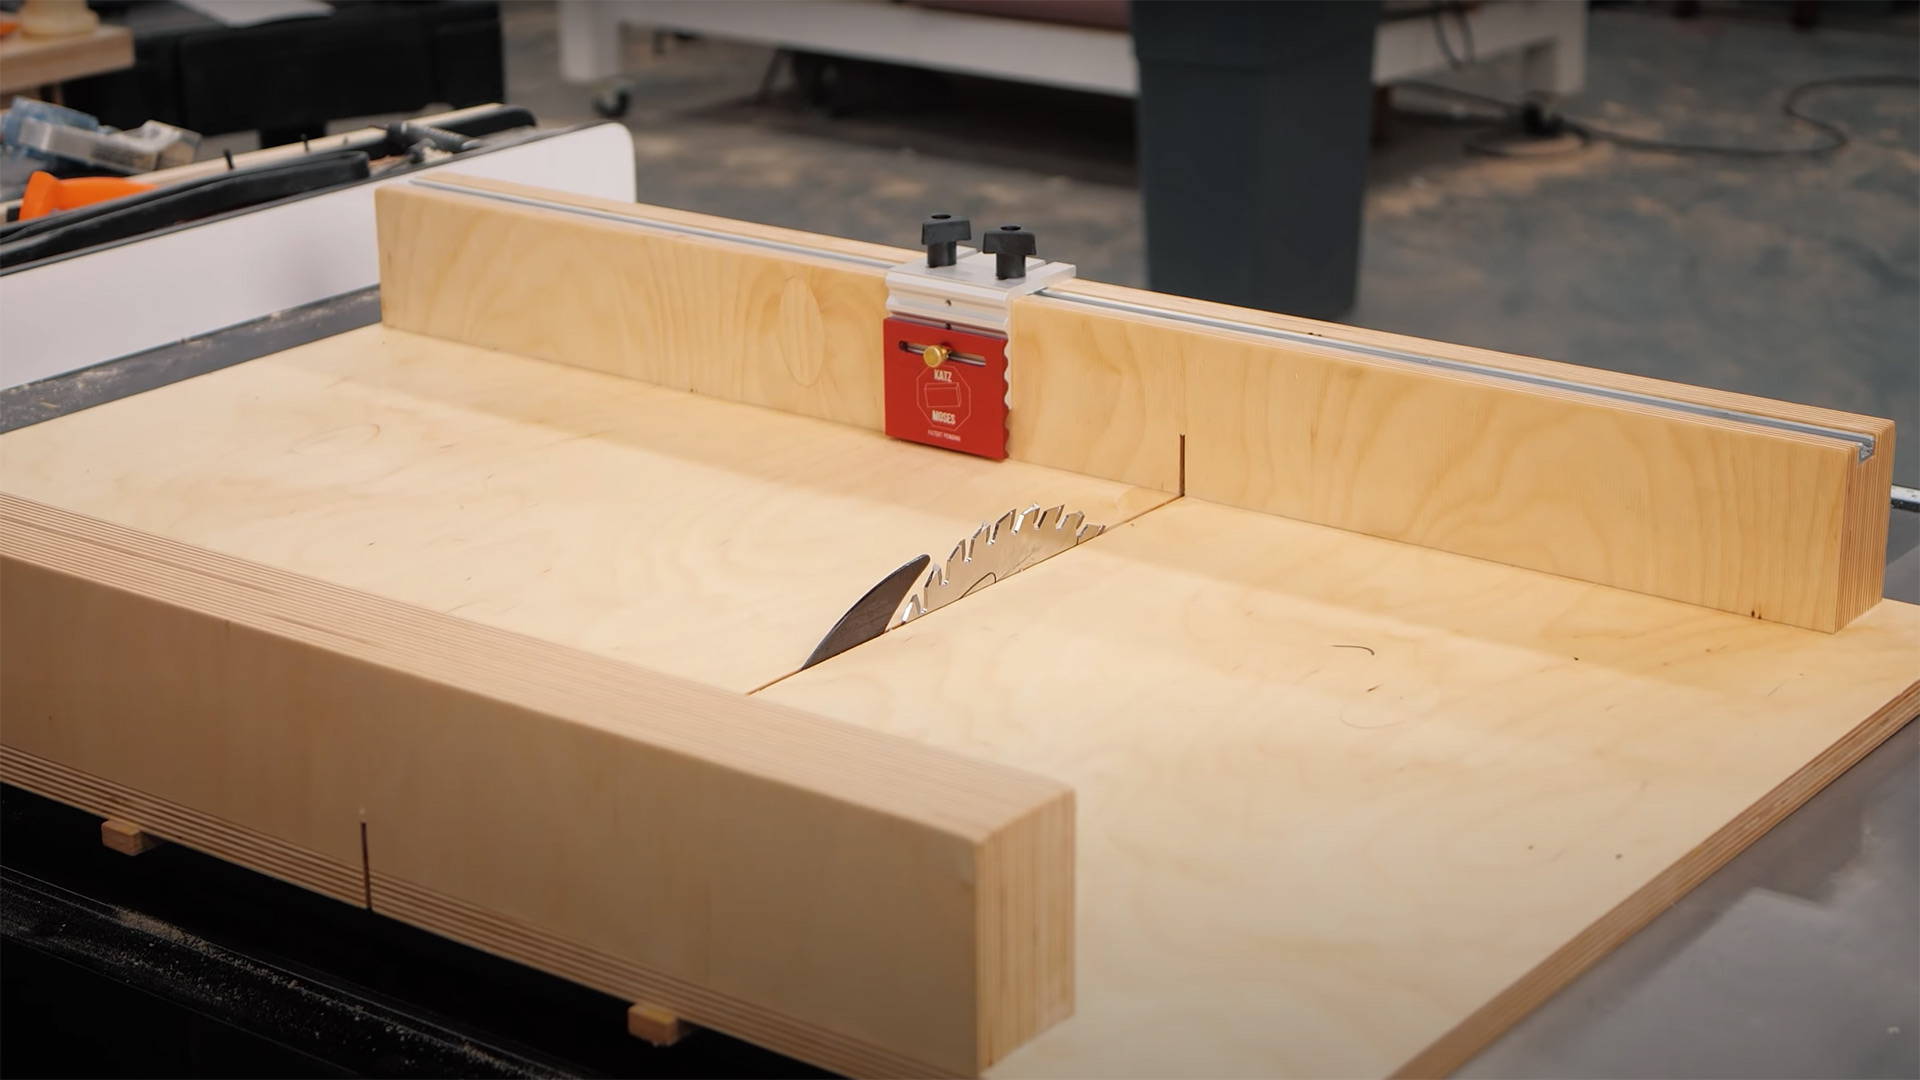
A safety pin is a great router table feature that helps with entering and exiting cuts. It gives you a pivot point for your workpiece, and a lot of added stability.
PRO TIP:
If you’re using a handheld router, attach a clamp to the base plate.
You can use it as a pivot point for your router, giving you smoother entries and exits.
ROUTER BIT HEIGHT
Set the height of your bit so the cutters only cut the workpiece, not the template. Trust me, I’ve made this mistake.
If your workpiece is thicker than the cutting length of your bit, you’ll need a pattern bit and a flush trim bit, or a flush trim bit with a shank-side bearing and a removable bearing on the tip.
Here’s what to do:
- Use a pattern bit (bearing by shank) to make a first pass, with the bearing riding on the template edge.
- Flip the workpiece over and switch to a flush trim bit (bearing on the tip). This time ride the bearing on the part of the workpiece you already flush cut.
FINISHING TOUCHES
When you go to remove the template, don’t try to pry the whole thing off from one side. You might snap it in half (I’ve also done this).
I use a putty knife to start wedging the template off along its length until it’s easy to pull off.
My last bit of advice would be to pay attention to how you store your templates. It’s best to either stack them on something flat or drill a hole so you can hang them on a wall.
EASY REPEATABILITY
Quality woodworking has a lot to do with mastering repeatability, and using templates almost makes it too easy. Even on complex shapes.
Just remember — most of the work should be done with a bandsaw, not a router.
If you’re looking for some great projects, we have a bunch of templates available in our store (as well as a few from Jay Bates).
What have you used templates to build? Let us know in the comments below!
Be sure to follow us on Instagram @katzmosestools and check out my YouTube channel…
And as always, STAY SAFE IN THE SHOP!
5 comments
Terry Treman
Oh my goodness! This could not have come to my attention at a better time. Thank you, Jonathan. You are, in my opinion, not only a skilled craftsman and a good teacher, but also a good and generous person. You are appreciated.
I’ll be printing off this guide and plan to be following it soon. Can hardly wait.
Anonymous
Thanks for the great content. Keep up the great work!
Thanks for the great content. Keep up the great work!
Jonathan Katz-Moses
@Yechiel: I’m glad you enjoyed it! Unfortunately, our courier doesn’t currently ship to Israel — but we’re looking into it.
@Mel: That’s an awesome tip. Great way to take small bites first.
@Yechiel: I’m glad you enjoyed it! Unfortunately, our courier doesn’t currently ship to Israel — but we’re looking into it.
@Mel: That’s an awesome tip. Great way to take small bites first.
Yechiel Gottlieb
Thank you so much Jonathan for another great, useful detailed pro post.
I really enjoy learning from you! I’ve just noticed today that you ofer free international shipping, does Israel included? Thanks again!
Thank you so much Jonathan for another great, useful detailed pro post.
I really enjoy learning from you! I’ve just noticed today that you ofer free international shipping, does Israel included? Thanks again!
Mel Johansen
Use a bearing that is a 1/16 larger in diameter than the cutter for the first pass. Remove that bearing and mount the original bearing to finish the operation.
Use a bearing that is a 1/16 larger in diameter than the cutter for the first pass. Remove that bearing and mount the original bearing to finish the operation.