


The key to safety and accuracy on the table saw? Having the right accessories to help with setup and operation.
And I’m not talking about a new set of earrings for your fence.
Table saw accessories are simple tools that make a MASSIVE difference in the quality of your cuts — and go a long way in preventing kickbacks and other table saw mishaps.
Today, I’m giving you a list of what I consider 10 Essential Table Saw Accessories for safe and accurate cuts.
From the simple to the specialized, these are tools every table saw user should have on hand…
And you can even make a few of them yourself.
1. PUSH STICKS
Push sticks are one of the most important table saw accessories for avoiding kickbacks and keeping your fingers away from the blade.
But NOT all push sticks are created equal.
You want to use ones that let you put adequate downward pressure on boards.
Those long birdsmouth push sticks that often come with table saws aren’t enough alone. Only use them to push the last bit of a board past the blade, and always in tandem with another push stick.
You also want at least one push stick with a hook on the bottom to hold the back of boards steady.
Making your own push sticks is easy. They can be as simple as a block of scrap with sandpaper super glued on the edge.
I have a whole video about how to make the “best” push stick… plus free printable templates to make it even easier.
Always have at least two push sticks handy — and plan to make more, because they will get chewed up.
2. FEATHERBOARD
Featherboards are super important and useful tools for making rip cuts.
The feathered tabs keep board edges flat against the table saw fence while ripping — and let boards move easily forward while creating resistance on them moving back.
This not only ups your accuracy, but goes a long way in preventing kickbacks.
A lot of featherboards work by locking into your table saw’s miter slots. These work well, but you won’t be able to use them on wide boards that extend past the miter slot.
That’s why I prefer magnetic featherboards like the ones Magswitch makes.
You can use them ANYWHERE on cast iron table tops — and the bump feet on the Magswitch Universal Featherboard Pro can even be used as a thin rip jig (more on that later).
3. SLEDS
Shop-made sleds allow you to safely and accurately make a HUGE array of otherwise tricky table saw cuts.
They truly expand how you can use your saw — and make repeatability a cinch.
The first sled I believe every table saw owner should make is a solid crosscut sled.
You can customize them with t-track, hold down clamps, and stop blocks, making them way more versatile than typical miter gauges.
But there’s no reason to stop there. I’ve made sleds to help with cutting box joints, bridle joints, angled crosscuts, and more.
Truth is, I might love sleds more than Santa Claus.
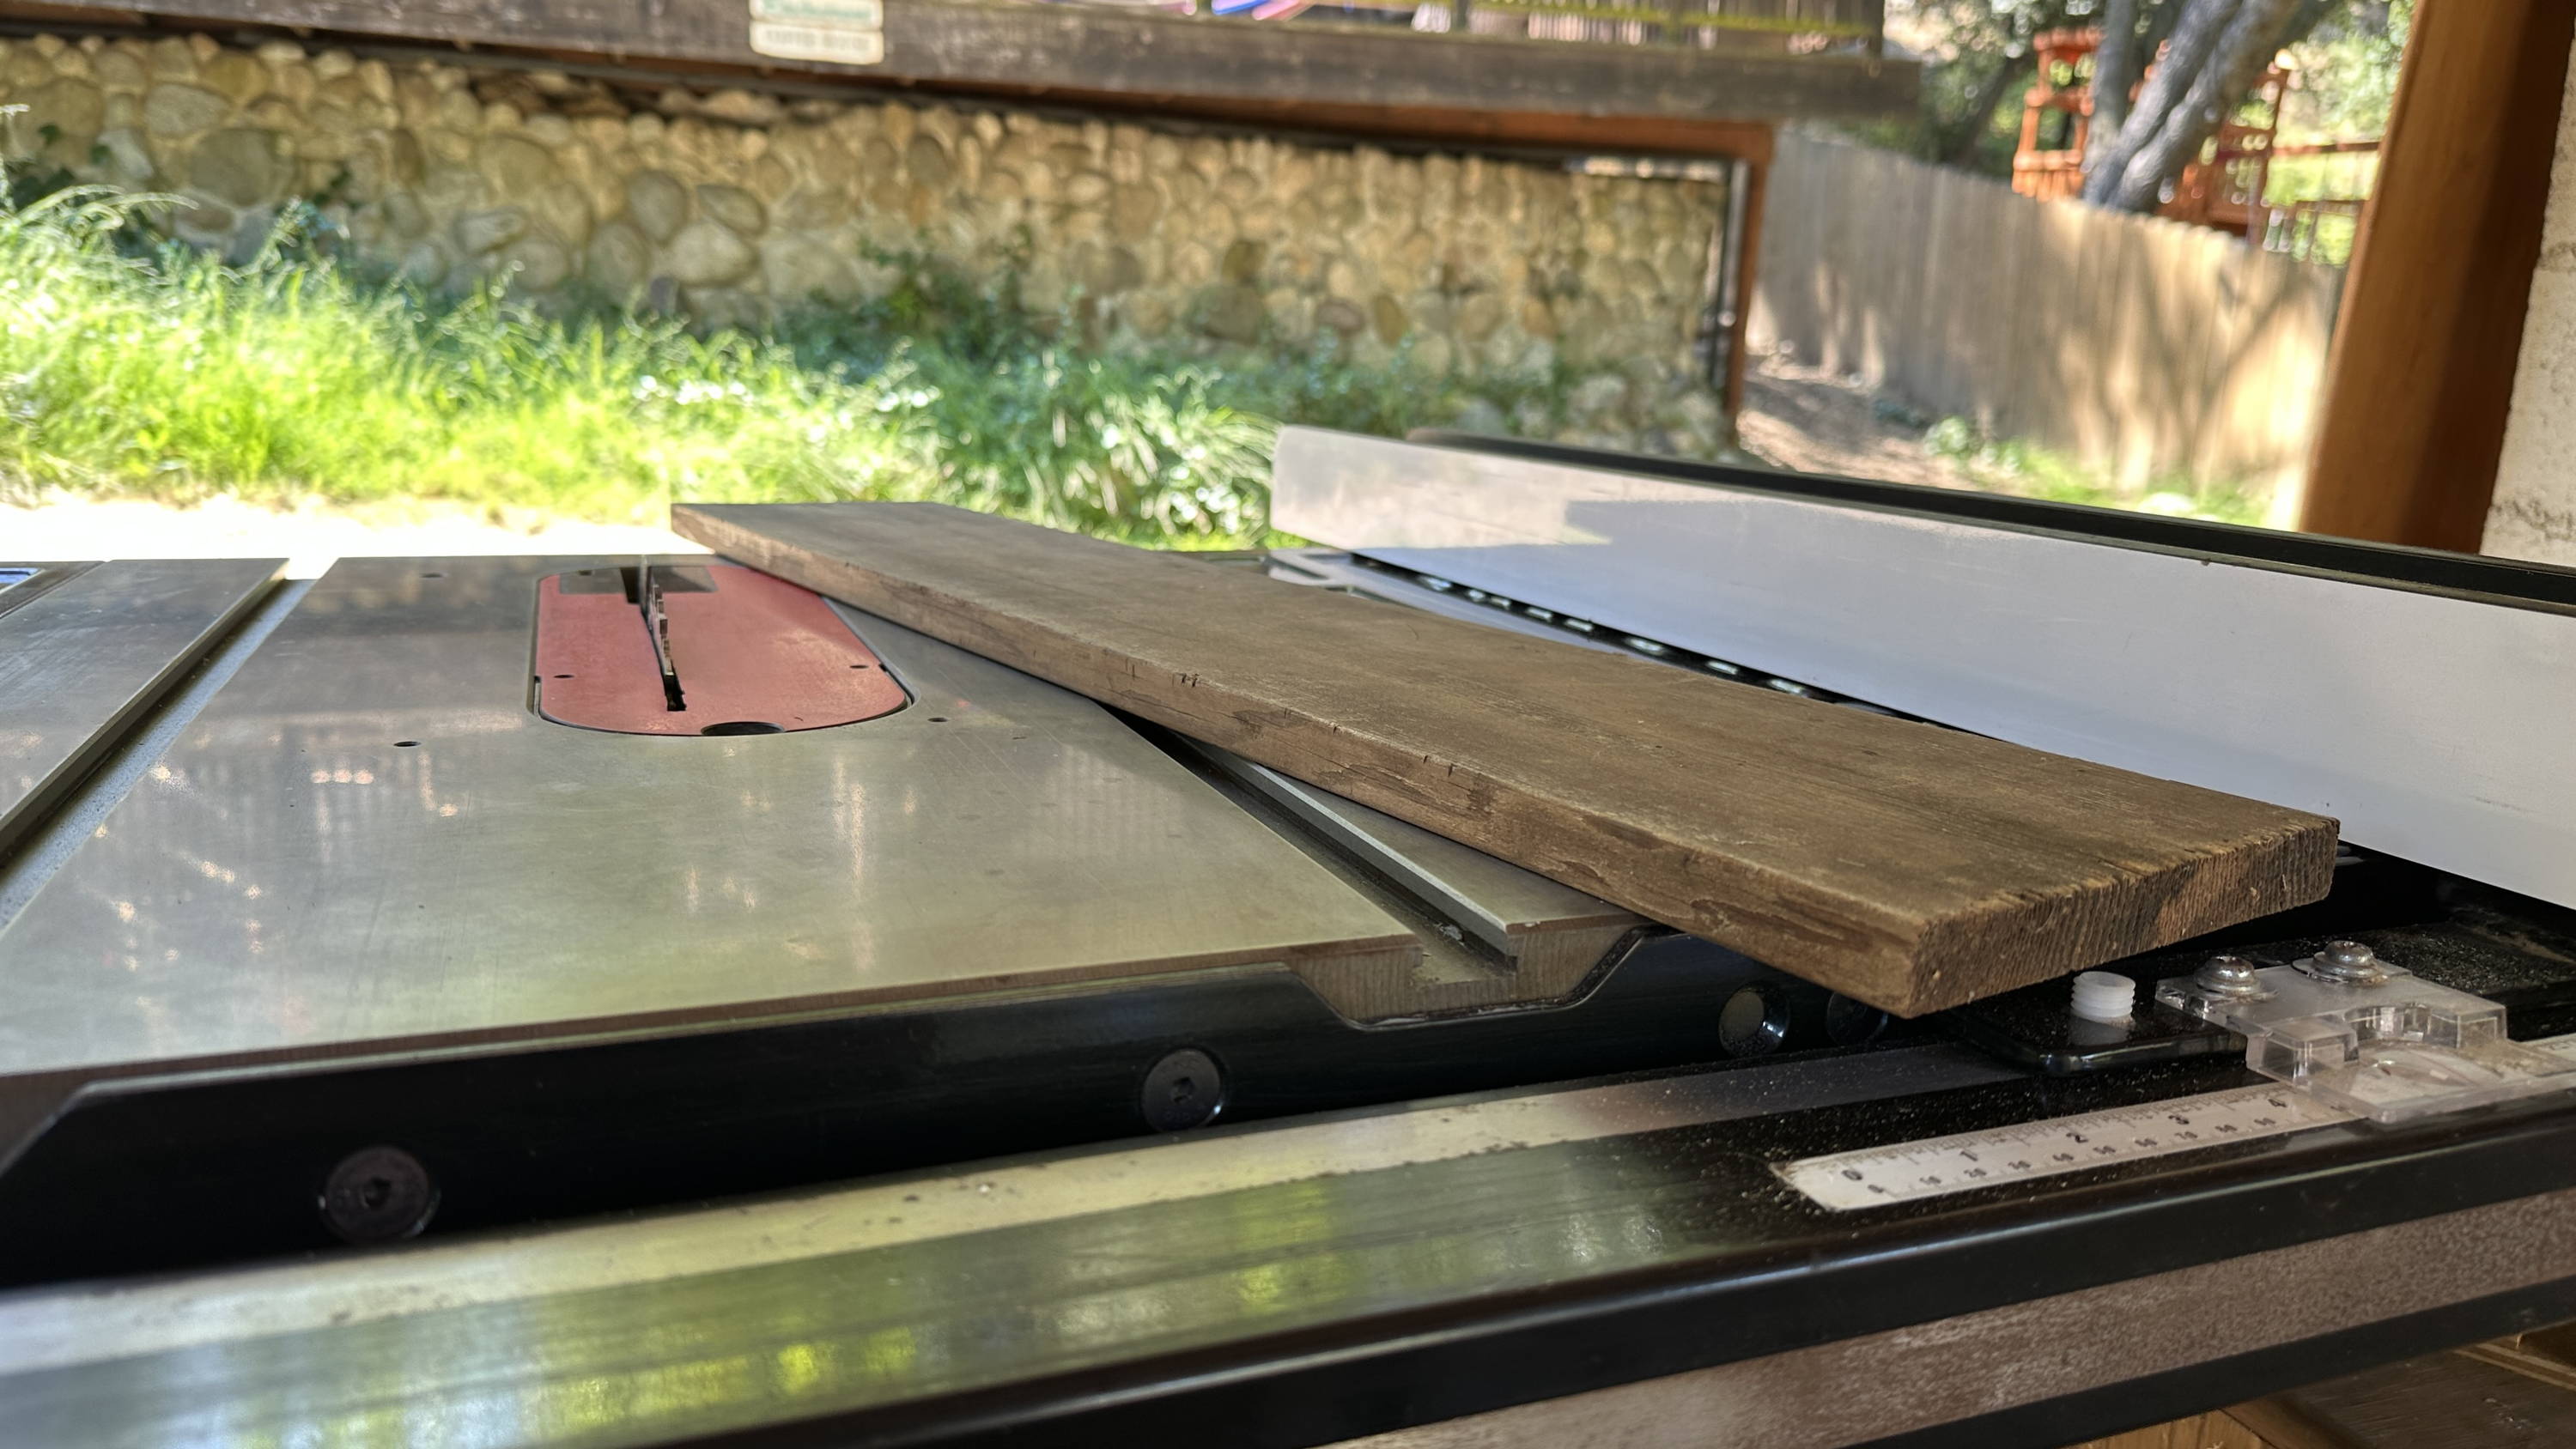
4. THIN RIP JIG
If you need to rip a piece of wood into multiple strips of ½” or less thick, you should use a thin rip jig.
Trying to do it like a normal rip cut can lead to boards pinching between the table saw fence and blade — leading to a kickback.
The solution is to cut the thin strips on the opposite side of the blade from the fence. And to make it repeatable, all you need is some sort of stop.
Lock down the stop so its distance from the blade matches the thickness of the strip you’re after. Bump your workpiece against it, then slide up your fence to hold it in that position.
For each successive cut, simply adjust the position of the fence.
Like with featherboards, I prefer magnetic versions since they’re easy to place anywhere.
Magswitch’s MagJigs work great. Just get them in position and lock down the magnet. You can also use the bump stops on the MagSwitch Universal Featherboard Pro.
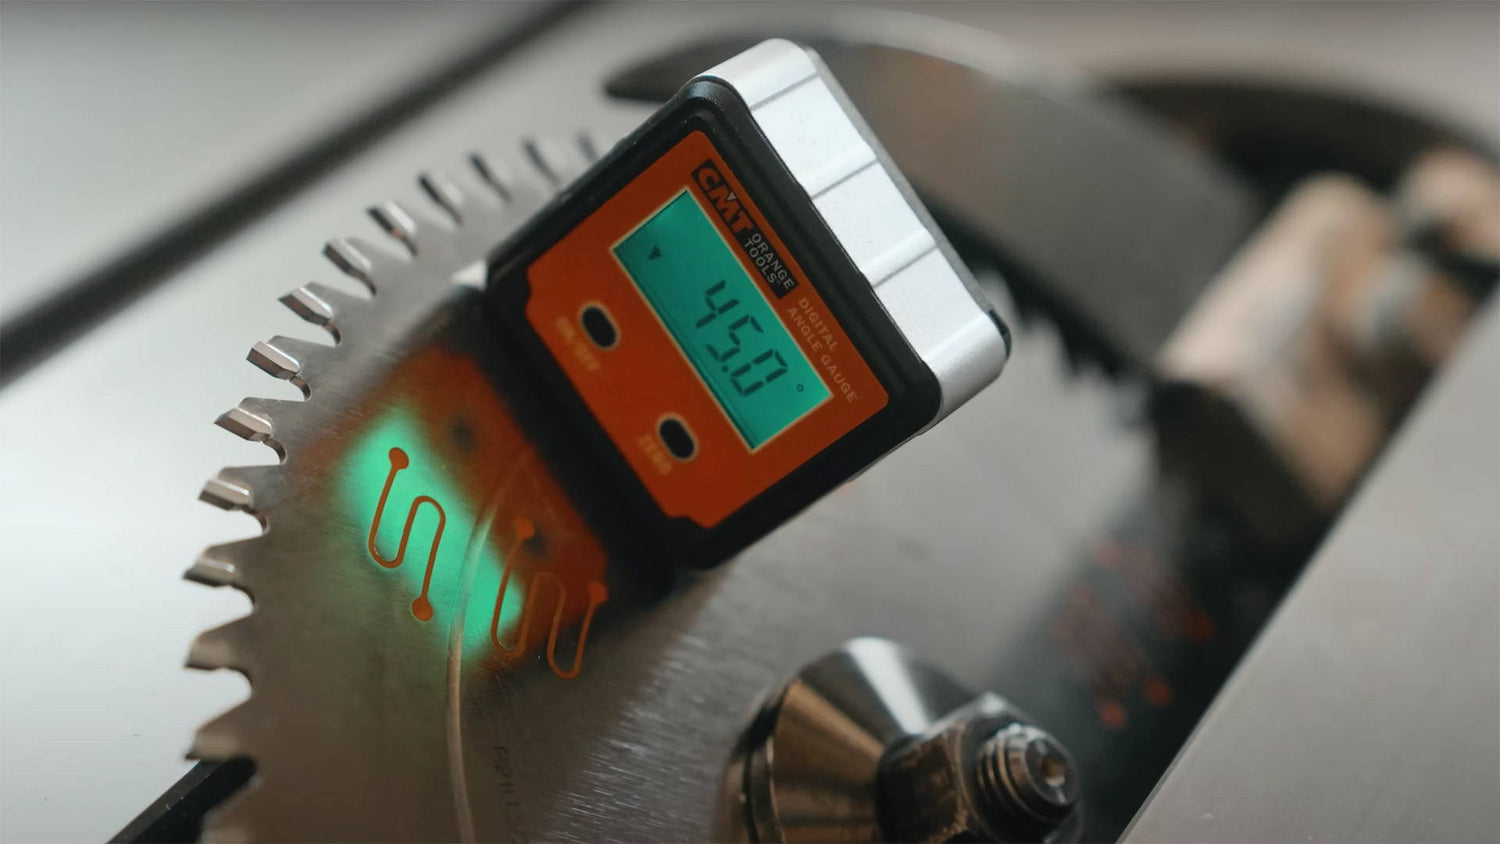
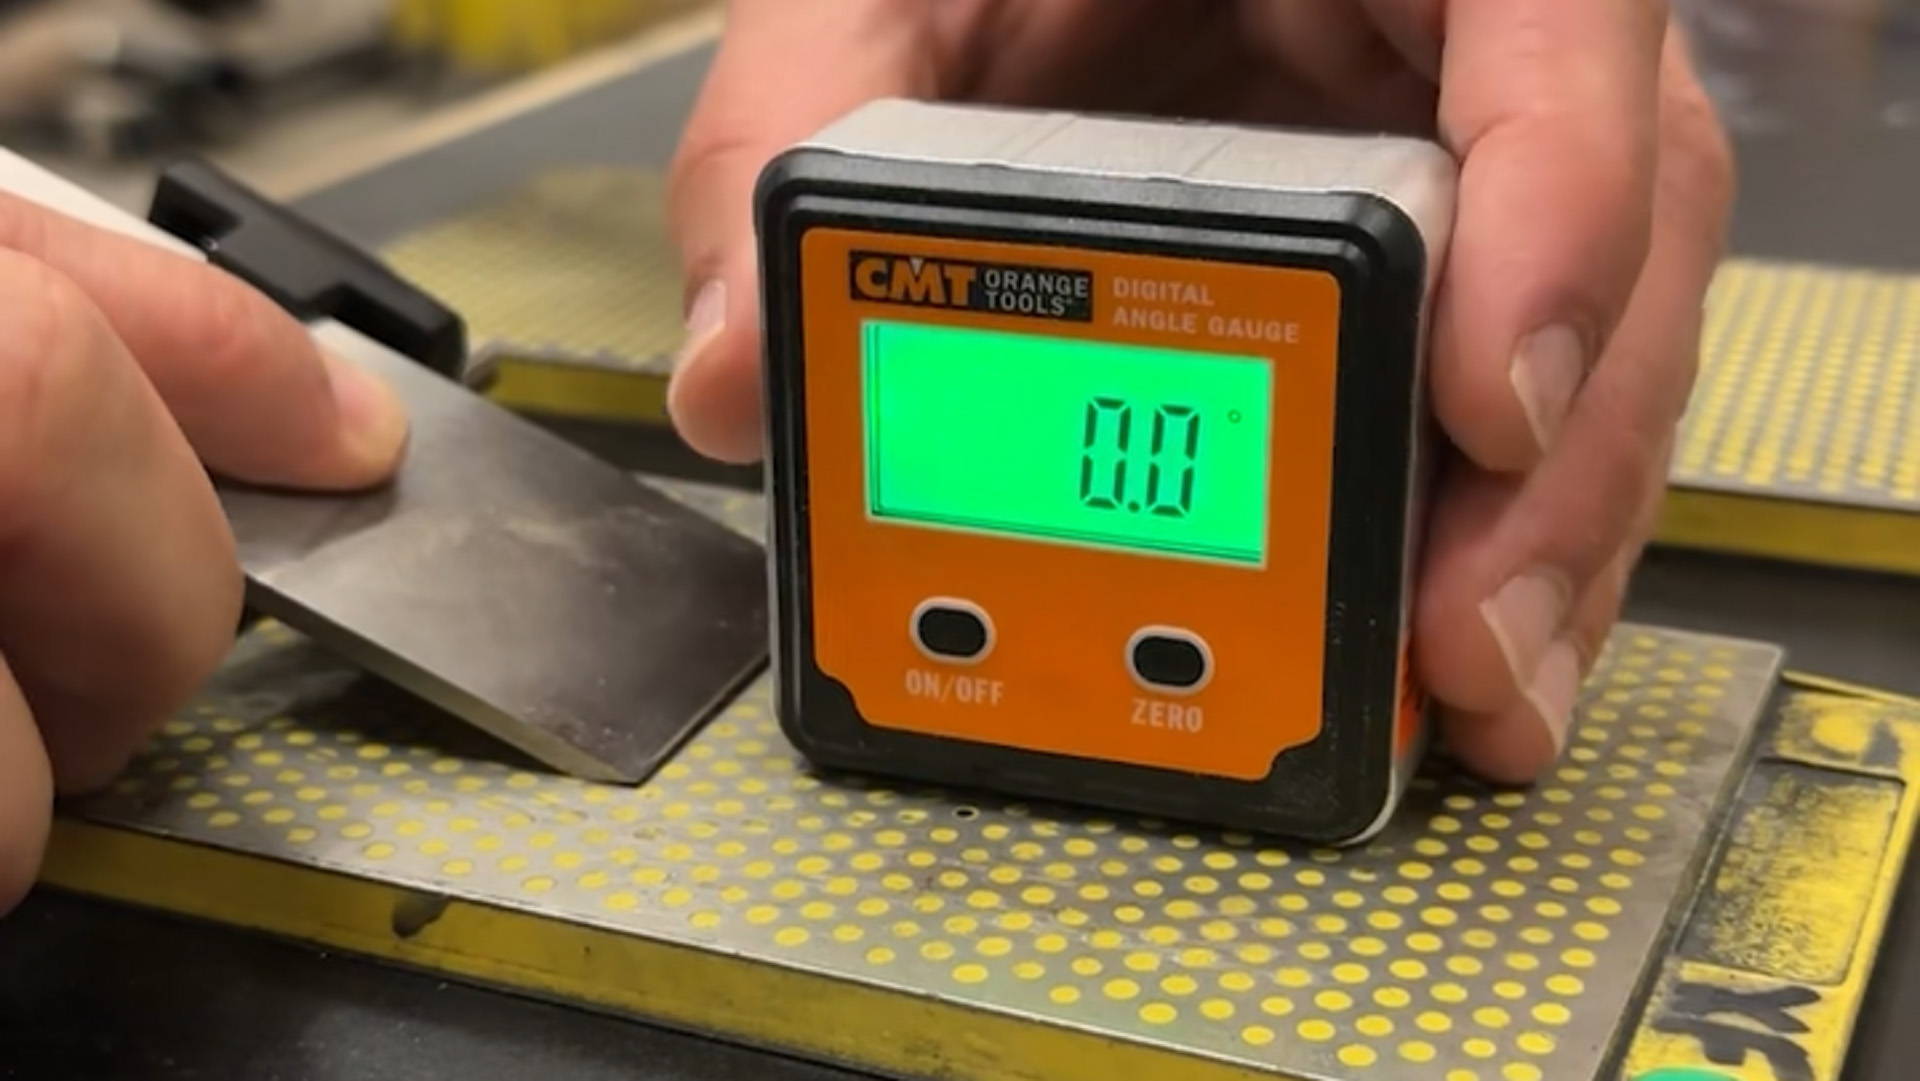
5. DIGITAL ANGLE GAUGE
Digital angle finders — a.k.a. digital bevel gauges — are absolute game changers for setting your table saw blade to precise angles.
They make you confident that you’ll get perfect 90° crosscuts and rips, 45° cuts for miters, and any angle between.
Yeah, you can use a combo square for the job. But digital angle finders require NO eyeballing and you know the cutting angle will be perfect.
There’s a ton of good options out there, but I’ve been using this CMT Digital Angle Finder for years and absolutely love it.
Simply zero it out on your table saw top or crosscut sled base, attach the magnets to the side of your blade, then adjust the bevel until you get the angle you’re after.
6. DIGITAL HEIGHT GAUGE
This tool maybe isn’t essential — but it’s incredibly helpful for setting cutting depth on non-through cuts.
I love to use it with dado blades to help dial in perfect half laps, bridle joints, and other joinery styles.
The easy-to-read digital display eliminates the need to eyeball or squat down to the blades level…
And it makes setting exact cutting depths that much easier.
7. KERF SPACER
I always keep a ⅛” drill bit on my table saw fence. Why?
Because it perfectly matches the thickness of my full kerf blades.
A “kerf spacer” like this can help you cut really accurate joinery without having measure.
The technique is a little tricky to explain — but it’s a must-know tip for cutting lap joints.
Thin kerf blades have a kerf around 3/32”, so find a drill bit that size or make your own from a strip of wood.
Feeler gauges or setup blocks work great as well.
8. BLADE CLEANER
Most of the time you think your table saw blades are dull, they just need to be cleaned.
Pitch and sap buildup reduces the effectiveness of the carbide cutting edges. Overtime, it can make cuts more difficult and lead to burning.
But pitch is super easy to clean off.
I used Simple Green for years, and it does the job well. You just need to make sure to fully wipe it off since it can damage some heat-protective coatings.
More recently, I’ve been using CMT Formula 2050 Blade and Bit Cleaner.
Not only does it clean off any residue quickly — it also provides added rust protection for your blades.
9. DIAL INDICATOR
Again, this tool isn’t essential. But it does make setting up and tuning your table saw a whole lot easier.
For table saws to cut safely and accurately, the blade, miter slots, and fence all need to be parallel.
With a dial indicator, the process of aligning them is a cinch.
If you’ve just gotten a new or used table saw, you definitely want to check this alignment. It’s also good to check after big moves or brake activations on SawStop saws.
10. MACHINIST’S BLOCK
A machinists’ block — or a “1-2-3” block — can be used a ton of ways in your shop.
But they work great for setting up repeatable crosscuts that are too long to use a stop block on your crosscut sled.
You never want to use your table saw fence as a stop. The wood can get trapped between the blade and fence and shoot back.
Instead, set your fence to 1” more than the length you’re after. Set the machinist’s block against the fence, and bump your workpiece against it.
Once your workpiece is positioned, remove the block. Now you can safely make repeatable crosscuts without the workpiece touching the fence.
If you don’t have a machinist’s block, you can also just cut a piece of scrap to 1” wide and use it the same way.
ACCESSORIZE YOUR TABLE SAW
With the 10 accessories listed above, you’ll be well equipped to get the most out of your table saw — all while staying safe and getting the highest quality cuts.
There are of course a whole host of fancy aftermarket tools to supe up your table saw…
But with these basics, you’ll be ready for anything.
Need to know more about safe table saw operation? Read this post about 13 Table Saw Mistakes to Avoid.
What table saw accessories do you consider essential? Let us know in the comments below!
Follow us on Instagram @katzmosestools, on TikTok @katzmoseswoodworking, and check out my YouTube channel for more great woodworking content...
And as always, STAY SAFE IN THE SHOP!
2 comments
Kristin
I read all your email and blog posts.
Being severely dyslexic, my favorite are your videos.
Would you consider do more of your email with links to a video rather a ton of verbiage?
A faithful follower :)
Kristin
I read all your email and blog posts.
Being severely dyslexic, my favorite are your videos.
Would you consider do more of your email with links to a video rather a ton of verbiage?
A faithful follower :)
Kristin
MJ
Very informative and well written. Thank you!
Very informative and well written. Thank you!