Today we're talking squares!
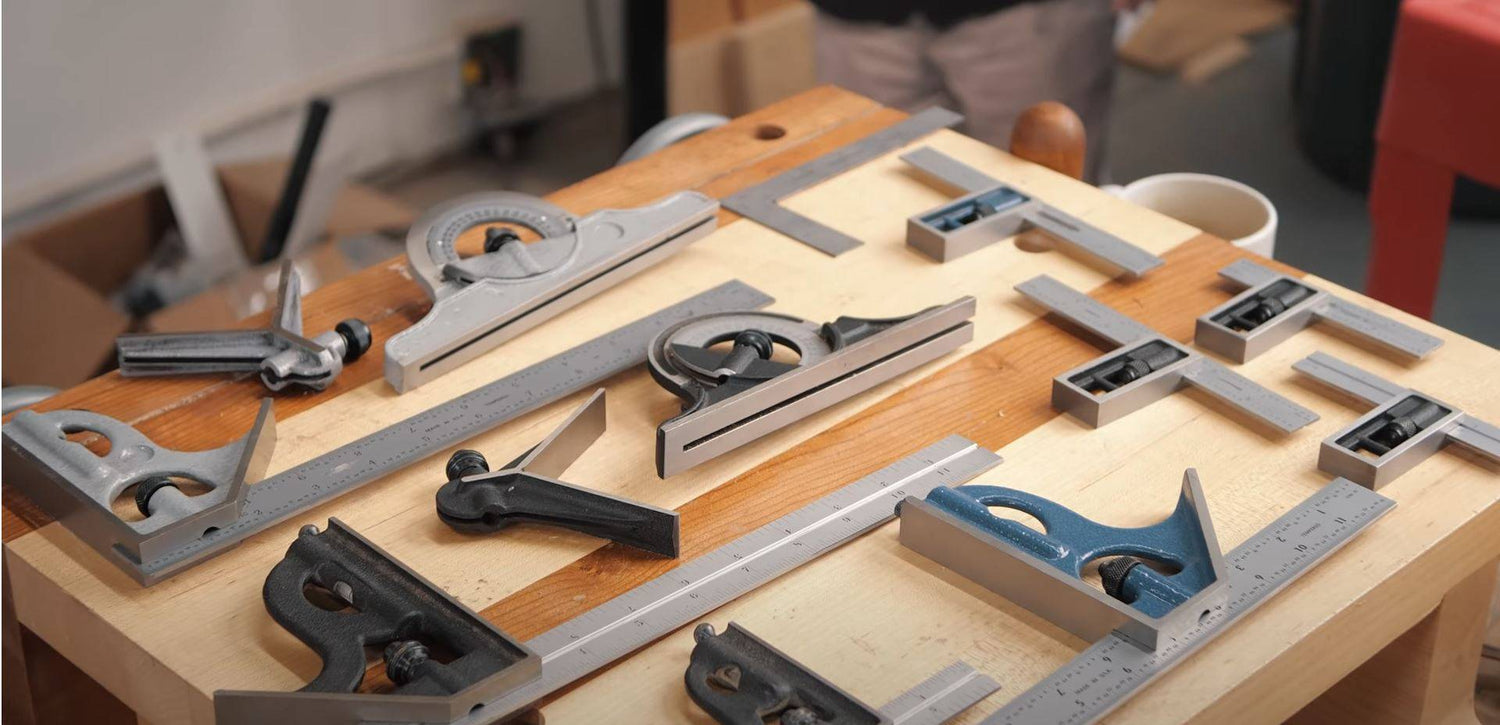
this magnificent little tool comes in a wide variety of styles and lengths, such as the triangular layout square, the unmarked engineer square (used to measure squareness to perfection), and my personal favorite, the combination square!
The powers of the combination square are nearly limitless. At least for the woodworker, who'll find endless uses for this tool!
In this blog post, I'll share my favorite tips on using the combination square for measuring, marking, and tool setup. Plus, I look at how to get your hands on a top-notch square from the best brands at a great discount!
BUY THE RIGHT SQUARE!
A combo square measures both 90 and 45-degree angles, and it comes with a small scribe inserted in the bottom, which can be used as a marker. Because of its versatility, a combo square is an essential tool in your arsenal!
Because of this, it's important that you invest in a quality square. Look for a combination square set that contains everything you need in one package:
- The main body casting of the square is 12 inches
- the blade contains a ruler, a compass protractor, and a center finder
- the square you want to buy is made of sturdy material and machined to impeccable flatness and accuracy
- the numbers are laser-etched onto the blade
Never EVER buy a cheap square! Cheap squares are made of soft castings, making them less accurate and less durable, and the marking are stamped, which eliminates many of the square's uses and makes them less accurate.
An excellent combination square is not a cheap tool, and the price can easily climb up to $100. The good news is that you can get the highest precision combination squares at an absolute steal if you go for a BLEM square! These BLEMs are squares that can’t be sold for cosmetic reasons (such as a minor scratch or dip), but they’re still excellent tools made by the best companies (Starrett, Brown & Sharpe, Mitutoyo, etc.)
BLEM squares are just as accurate as regular squares at a max error rate of .015” over 12”, but they cost a fraction of the price!
HOW TO USE THE COMBINATION SQUARE
CHECK FOR ACCURACY
A square needs to be completely square to be useful and assist you in achieving precise measurements.
Here’s a simple 3 step method that I use to check accuracy:
-
First, put your square against the edge of a flat piece of wood or surface and make sure it‘s locked down.
-
Then, take your mechanical pencil of choice and draw a straight line along the blade of your square onto the surface.
- Finally, flip the square over along the same edge and draw a second line next to the first one. If the lines are perfectly parallel to one another, your square is accurate!
MEASURING AND MARKING
MARKING OUT A SPECIFIC DISTANCE
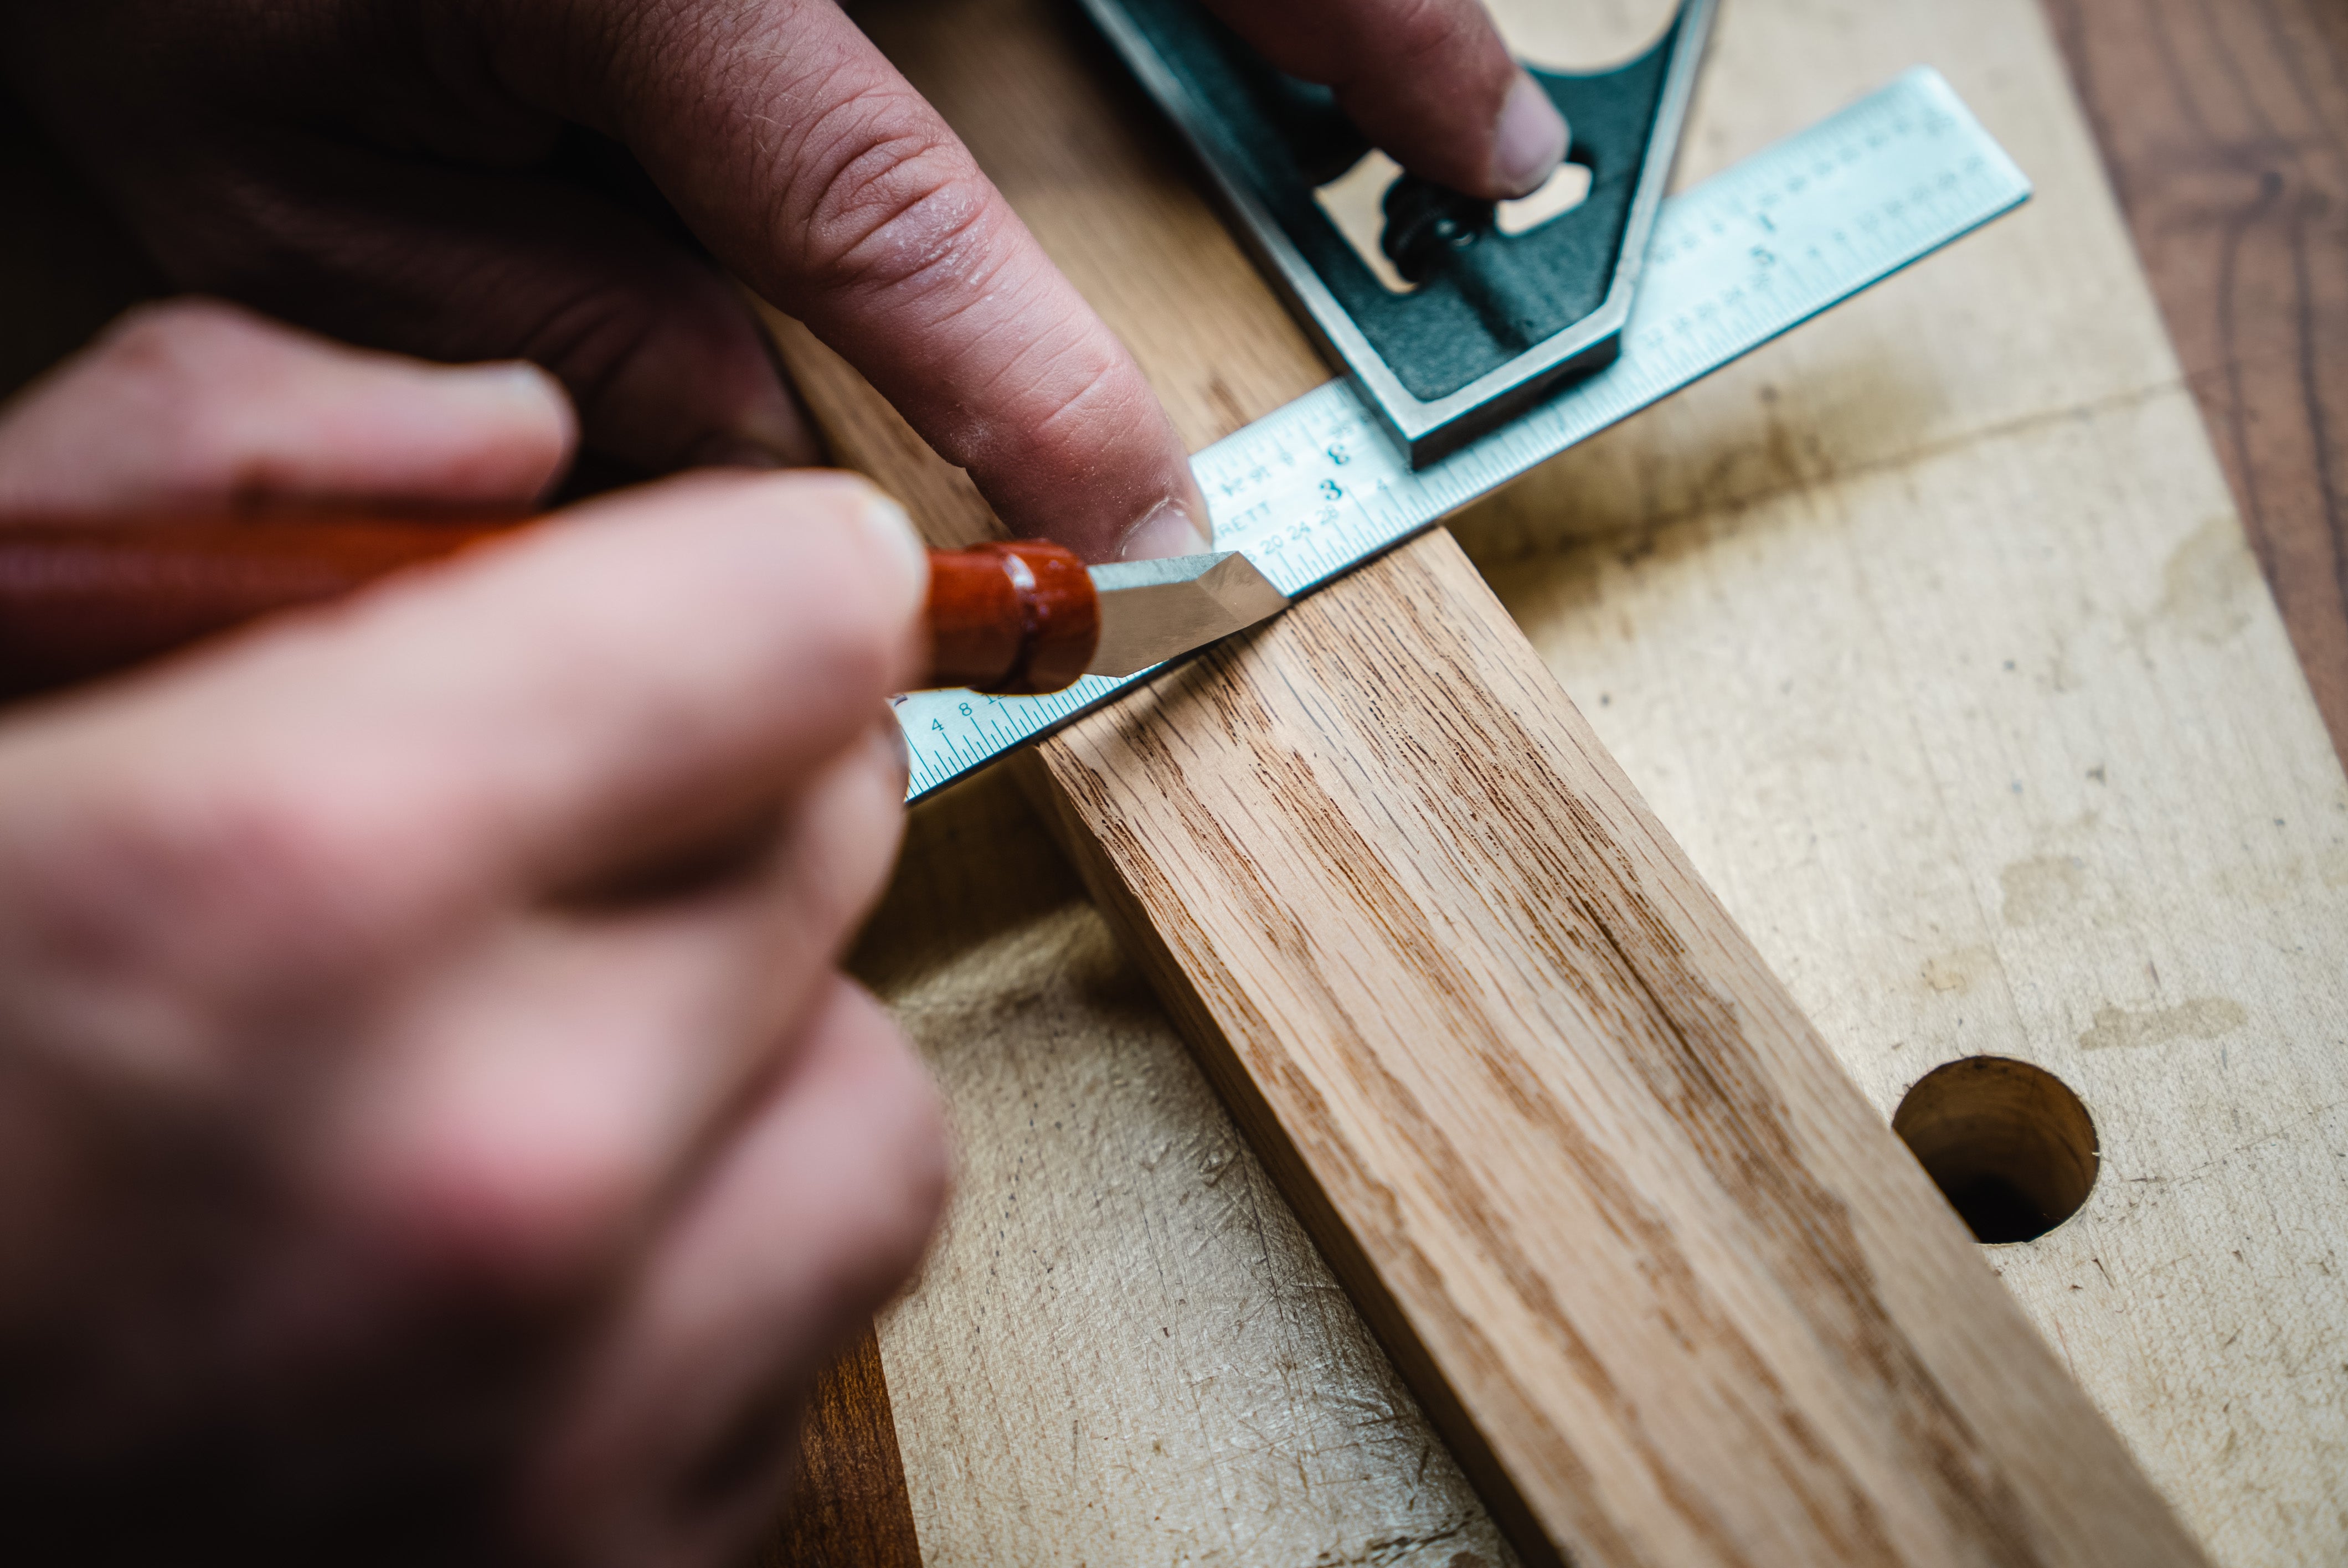
Let’s say you want to make a 2-inch mark using a tape measure or a square. Set your square at the desired distance and use your marking knife to make a small mark at the edge of the board.
You’ll easily find the mark again by sliding your marking knife along the edge of the board until it locks into the jack. Then slide your combo square right next to your knife and draw a line.
USE THE SQUARE TO DRAW A STRAIGHT LINE WITH A PENCIL
The square casting has a line for locking the blade in the square, but this line can also be used to lock your pencil in when you need to draw a straight line! Put the square facing down on the surface where you want to mark and slide the tip of the pencil into the gap at the edge of the blade. This way you can easily draw a line without your pencil slipping off, and it accounts for the thickness of the lead so that your measurement won’t be off!
This is a great little tip if you need to draw a line for where to put your screws, mark a cabinet door, or a million other things!
MARKING AND MEASURING JOINERY
When you're trying to mark out joinery, a great tip is to use your combo square as a depth gauge. This trick works especially well for mortises and dados.
For example, if you’ve already cut your mortise and need to figure out how long your tenon should be, simply take your square and stick it into your mortise and slide it down to make sure you go through to the bottom and you’ll have the exact depth for your tenon!
Another tip for measuring mortises is to use the tick marks which are engraved on the ruler of the square to mark out the distances on your mortise. Put the blade of the square along your workpiece and make sure that the square’s edge is flush to the edge of the workpiece.
Next, put the tip of the marking knife where the gap in the square matches the desired length you want to measure and put your mark right where the knife clicks into the gap.
OTHER GREAT USES FOR YOUR COMBO T-SQUARE
FINDING CENTER
Finding the center is especially important if you’re a woodturner! Set your square ruler as close as possible to the center of your work and draw four lines from each edge. The lines will create a square in the middle which marks the exact center of your workpiece
CHECKING FLATNESS
The 12-inch blade of a good combination square is so well machined that it will be extremely flat, and thus, it can be used to check if a surface is flat! Simply put the blade of your square on the top of the surface and look for any air gaps along the blade.
SIX GREAT WAYS TO USE A COMBO T-SQUARE FOR TOOL SETUP
Here are six great tips for how to get set up in the workshop using your combination square!
- Make sure that the saw blade on your table saw is square by ensuring that the blade of your combo square sits right between two teeth when held against the saw plate.
- Take the blade out of the combo square to check the accuracy of a 45-degree angle on your table saw blade.
- Use your square as a depth gauge to find the apex of the table saw blade.
- The combo square is also great for setting the depth on your router table! Especially if you are transferring a mortise or a tenon for cutting.
- The smaller 6-inch or 4-inch squares are great for checking that the blade is square to the table on your bandsaw.
- The jointer is where the 12-inch square excels. Not only can it be used to check the squareness of the fence, but it can also be used to check that your outfeed table is co-planar with the very tops of your blades!
What’s your favorite way to use the combo square? Share your own tips and tricks with the community in the comments below!
We're here for you. If you have any questions or need customer service, you can email us at support@kmtools.com
As always, STAY SAFE IN THE SHOP!


3 comments
Patrick
Leave the blems and off brands on the shelf where they belong. The $50.00 to $70.00 squares are about the same quality as the $12.00 BORG squares. If your goal is to minimize as much accumulated error from your work as possible just bite the bullet once and buy the hardened steel combo squares from Starrett. I now own 2 of their 6" inch combination squares, a 12" combination square set and my personal king daddy 24" combination square set. I also have a centering head for one of the 6" combination squares. One of the 6" squares lives in my apron while the other squares live in carefully built boxes with lightly oiled canvas. They are reserved for careful layout and checking of larger projects and machine setups and tune ups. The 24" is an extravagance most – including me, I just had to have it – can probably do without but you can get a top notch 6" and 12" for under $500.00 and never have to buy them or worry about that tool ever again.
Leave the blems and off brands on the shelf where they belong. The $50.00 to $70.00 squares are about the same quality as the $12.00 BORG squares. If your goal is to minimize as much accumulated error from your work as possible just bite the bullet once and buy the hardened steel combo squares from Starrett. I now own 2 of their 6" inch combination squares, a 12" combination square set and my personal king daddy 24" combination square set. I also have a centering head for one of the 6" combination squares. One of the 6" squares lives in my apron while the other squares live in carefully built boxes with lightly oiled canvas. They are reserved for careful layout and checking of larger projects and machine setups and tune ups. The 24" is an extravagance most – including me, I just had to have it – can probably do without but you can get a top notch 6" and 12" for under $500.00 and never have to buy them or worry about that tool ever again.
Rod
I bought one of the Blem squares from Taylor Toolworks and it was off by about 1/8" over 12". Needless to say, I’ll be very leery about buying anything from them again.
I bought one of the Blem squares from Taylor Toolworks and it was off by about 1/8" over 12". Needless to say, I’ll be very leery about buying anything from them again.
Anonymous
How do I find blem sales from Starrett ect?
How do I find blem sales from Starrett ect?