


We’ve all been there...
You’ve planned your project, bought your supplies, and measured meticulously.
You’re ready to make your first cut.
It’s a doozy, so you’ve checked your measurements, double-checked them AND triple checked them (just in case).
You finally muster up the nerve to make the cut and...
It’s short!
On a beautiful (and expensive) piece of hardwood, that pain is palpable.
When it comes to woodworking, accuracy is everything. That’s why accurate marking is one of the most essential woodworking skills.
While mistakes happen occasionally, there are a few things I’ve learned along the way that help minimize errors.
In this blog, I’ll walk you through the best tools to obtain superior accuracy when marking and cutting wood, plus how I use them in my own shop.
MY TOP 3 MUST-HAVE TOOLS
1. PENCILS VS. KNIVES
Let’s start with the basics. Every woodworker needs a marking implement. When it comes to deciding between a pencil and a marking knife, one should follow the words of the great woodworker and teacher William Ng “good joinery is done with a pencil; great joinery is done with a marking knife.”
Simply put, a pencil is suitable for rough dimensioning, but it’ll never be as accurate as a marking knife. The pencil line is thick and the pencil itself can wander slightly away from your square while you try to mark, so it doesn’t stay on the line.
A marking knife creates a precise cut line that helps you make more accurate cuts with a saw or chisel by giving you a tactile reference line. At KM Tools, we’ve got your marking needs covered with our Double Bevel Marking Knife. This affordable marker is designed for both right- and left-hand use! It comes with a leather blade sheath, a smooth and comfortable hardwood handle; it also fits into your KM Apron and has flattened sides to prevent roll-away.
2. SQUARES FOR PERFECT ANGLES
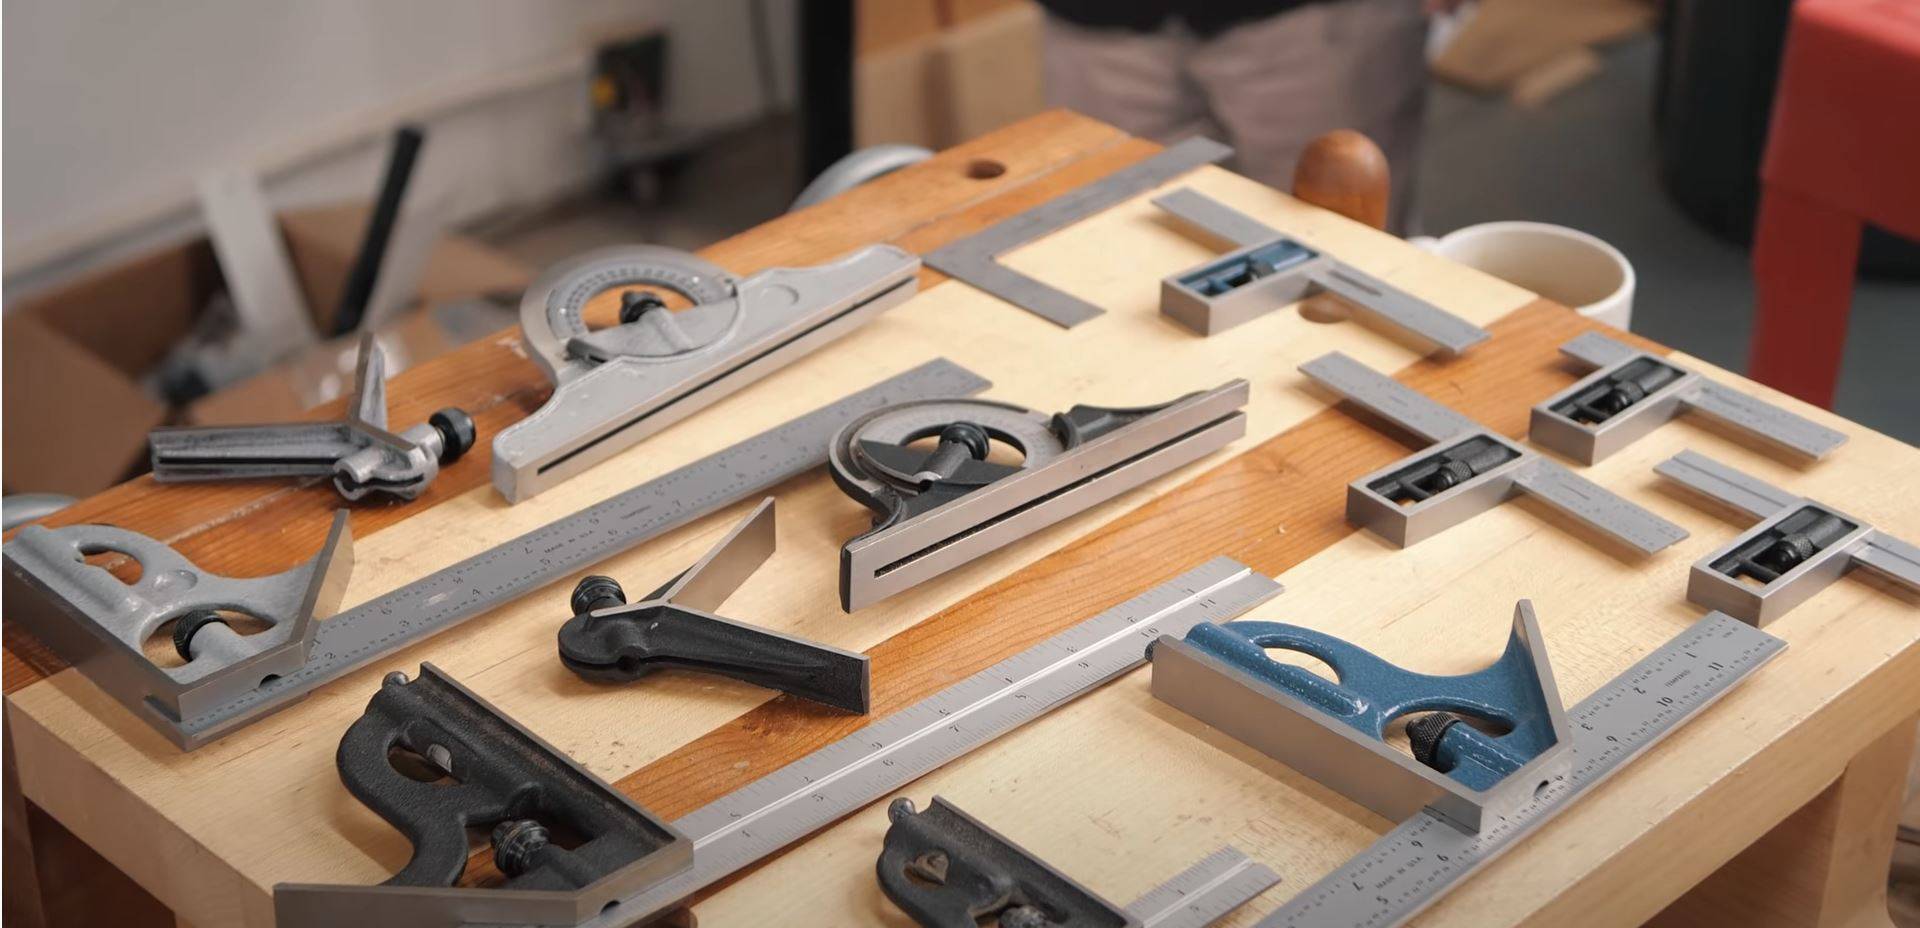
Another tool that’s essential for achieving accuracy in woodworking is a square. A square is used to mark and reference a 90-degree angle, though miter squares are used to measure 45-degree angles. The combination square gives both angles. Some squares incorporate scales to calculate angles.
I highly recommend staying away from cheap squares like the ones you would find at big box stores. They’re typically made from aluminum and carry very loose tolerances. Buy once, cry once is an essential mantra when buying measuring tools. If you take care of your squares and keep them from sharp impacts, they will retain their accuracy for life.
LAYOUT SQUARE
A layout or speed square is a triangle-shaped measuring tool. It’s a right triangle with a ruler on one side and a fence on the perpendicular side to create a baseline marking for cross-cuts. Because the layout square is usually made of durable materials such as stainless steel, it can also be used as a skill saw guide for cutting rough lumber.
ENGINEER SQUARE
The engineer square is a small square without markings, used to ensure that two faces of your workpiece are “square” to one another. Because it is small, you can hold it up to the blade of your tool to make sure that it is cutting at 90 degrees, or you can use the engineer square as a visual guide when drilling..
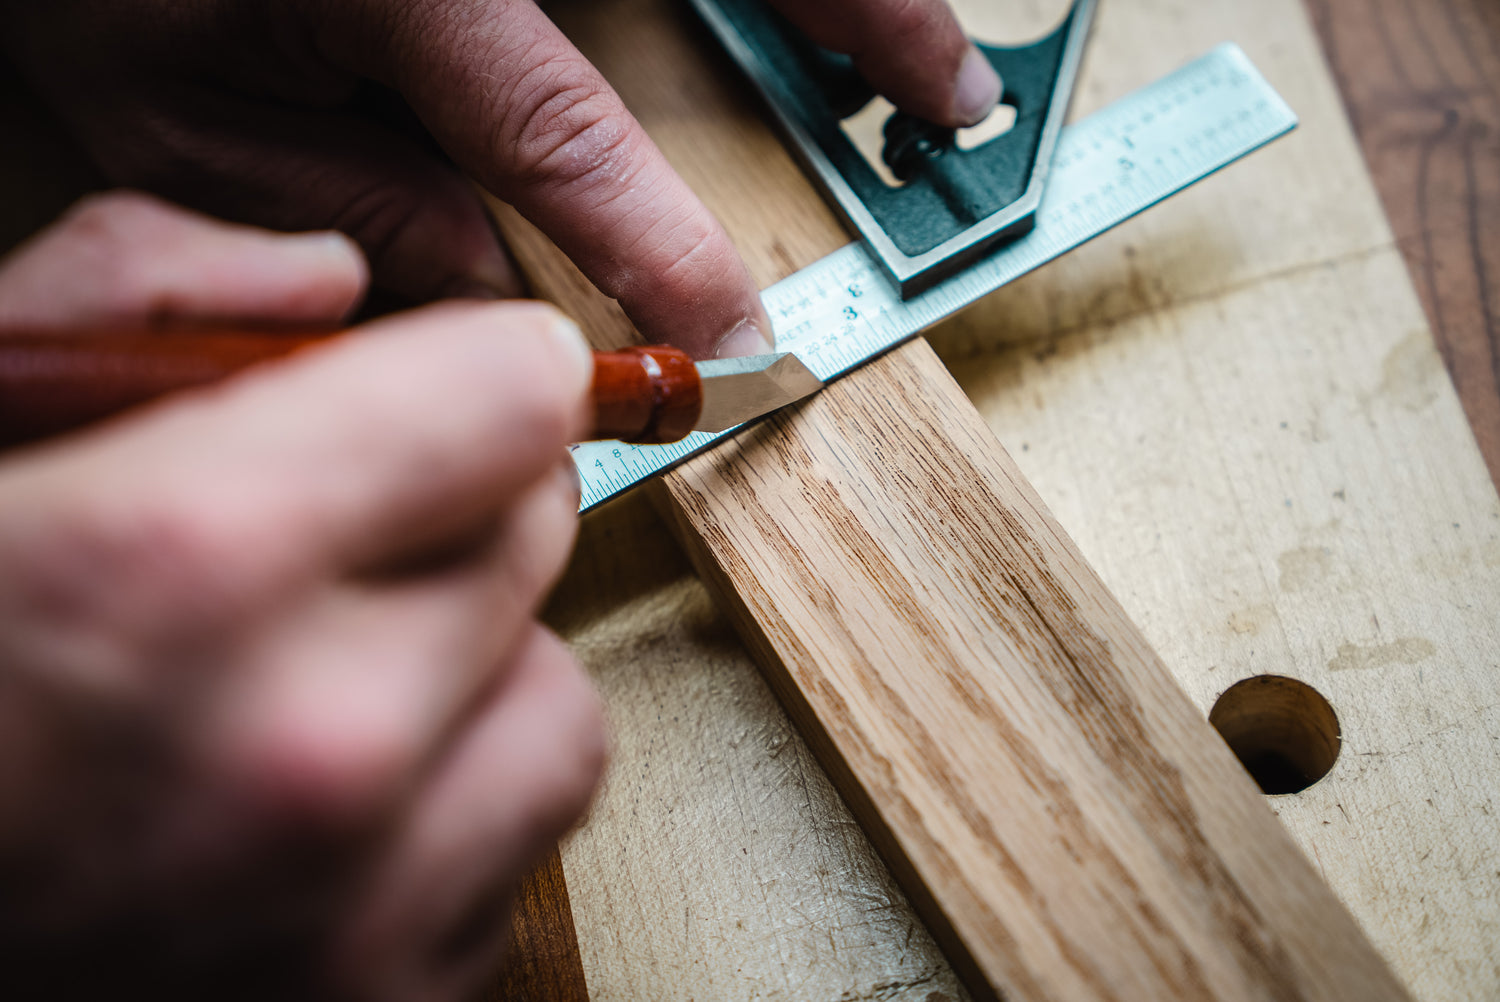
COMBINATION SQUARE - MY ABSOLUTE FAVORITE AND MOST ESSENTIAL
The combination square is super useful as it measures both 90 and 45 degrees and has an adjustable sliding ruler with laser-etched measurement graduations. It is used for measuring and marking. Another nifty thing with this tool is that it has a scribe inserted at the bottom, which can be used as a marking tool!
3. GAUGES FOR STRAIGHT LINES
Another essential tool for marking, especially over long pieces, is the marking gauge. A gauge is the perfect marking tool for joinery work such as cutting dovetails as well as mortise and tenon joints.
Marking gauges come with different types of cutting tips: wheel cutter, knife, or pin.
WHEEL CUTTERS
Wheel cutters create clean lines both along and across the grain and are good for marking around corners.
KNIFE GAUGES
Knife gauges are helpful for marking lines across the grain and end grain without tearing wood fibers.
PIN GAUGES
Pin gauges are best for marking lines across the grain because, when cutting with the grain, they risk getting stuck in the grain and wandering away from the reference fence of the marking gauge.
A marking gauge has a fence that can be moved and locked along a beam. It utilizes a single cutter to scribe one line, while a mortise gauge is equipped with two cutters to scribe both sides of a mortise. Thus, a marking gauge creates one line while the mortising gauge will make two parallel lines.
Because of its many uses, our favorite type of marking gauge is the wheel gauge! For superior accuracy in marking and cutting, check out the KM Tools Wheel Marking Gauge and Brass Marking Gauge. Our wheel gauge is designed with a solid brass head and thumb screw that securely locks the head to the beam to hold the measurements while you mark across your workpiece. The hardened cutting wheel leaves a sharp and distinct line in any type of wood. All our gauges utilize both metric and imperial measurements. The Brass Marking Gauge further increases accuracy with its micro-adjustment feature!
If you’d like to make your own marking gauge, here is a great video where I show you how to make several different variations.
DIVIDERS
Dividers are great for laying out dovetails and drawing circles. They can also be used as a pair of calipers for marking. Just slide your divider along the edge of a piece of wood to create a nice straight line.
HOW TO MARK FOR ACCURACY
MARKING OUT A CROSS CUT:
Place the tip of your marking knife at your desired measurement. With the body of your combo square flat against the long grain of the piece you’re cutting, slide the ruler side of your square up to your knife until the flat back rests completely against the ruler. Your ruler is now at the exact spot you need to cut and you can make one or two light cuts with the flat side of your marking knife sliding along the ruler.
MARKING OUT A RIP CUT:
When it comes to rip-cuts (along the grain), you can use a marking gauge (my preferred method) to mark a line or a pair of calipers, then simply lock the desired measurement in and drag the calipers along the side as if they were a marking gauge.
Something else you can’t go without is a center punch.
A center punch is an essential tool for drilling holes. Once you mark the center of a hole using one of the methods described above you can use a spring-loaded center punch to create a divot in your workpiece that can be used as a physical reference and starting point for your drill bit.
We have a fantastic center punch in the KM Tools store that is both incredibly durable and of great value.
What are some of your top tips for accurate marking and cutting? Comment below! I’d love to hear your thoughts and if you have any unique approaches.
We're here for you. If you have any questions or need customer service you can email us at support@kmtools.com
As always, STAY SAFE IN THE SHOP.

7 comments
Ras
Roy Underhill, The Woodwright’s Shop, uses a marking gauge with two pins to layout mortise joints. I never see these for sale. Recommendations?
Roy Underhill, The Woodwright’s Shop, uses a marking gauge with two pins to layout mortise joints. I never see these for sale. Recommendations?
Brian
Great advice. The marking knife and gauge are game changers for tight fitting joinery. But you need a high quality square and ruler to make the right marks. I struggled for years with old worn out and cheap imports. The Starrett tools I use now make all the difference. I’m partial to a small double square for joinery and a 12" combo square for more general work. I also have a 6" Starrett rule with the perpendicular end markings which are nice for small tool height adjustments. A digital caliper is also very handy for the last digit of precision. But the best tip is to use the mating piece as a reference when laying out joinery or setting tool height.
Great advice. The marking knife and gauge are game changers for tight fitting joinery. But you need a high quality square and ruler to make the right marks. I struggled for years with old worn out and cheap imports. The Starrett tools I use now make all the difference. I’m partial to a small double square for joinery and a 12" combo square for more general work. I also have a 6" Starrett rule with the perpendicular end markings which are nice for small tool height adjustments. A digital caliper is also very handy for the last digit of precision. But the best tip is to use the mating piece as a reference when laying out joinery or setting tool height.
Peter
Hello Jonathan, in my short sporadic career as a woodworker, I have used sandpaper to create a flat sharp end on a .5mm pencil. I can see that your design tools are the way to go and look forward to expanding my tool kit after building a dustless woodworking workshop.
Hello Jonathan, in my short sporadic career as a woodworker, I have used sandpaper to create a flat sharp end on a .5mm pencil. I can see that your design tools are the way to go and look forward to expanding my tool kit after building a dustless woodworking workshop.
Richard Nelesen
I use both the marking knife and pencil for my lines. At 72, my vision doesn’t pick up the knife line, especially when planing to final dimensions or chiseling to the line. I use a three mm Pentel mechanical pencil to darken the line. The lead fits in the cut from the knife without bleeding over. On the rare occasions when I use a dark wood like walnut, I use a white or yellow art pencil that I sharpen to a very fine point to color in the knife line.
I use both the marking knife and pencil for my lines. At 72, my vision doesn’t pick up the knife line, especially when planing to final dimensions or chiseling to the line. I use a three mm Pentel mechanical pencil to darken the line. The lead fits in the cut from the knife without bleeding over. On the rare occasions when I use a dark wood like walnut, I use a white or yellow art pencil that I sharpen to a very fine point to color in the knife line.
Eli Richardson
I liked what you explained about measurement tools and how to make sure they give us accurate results. The other day, my brother said he’s interested in opening a tool shop with one of his friends, and I think he’d benefit from reading your insight on measurement tools, so I’ll share it with him right now. Thanks for the tips on essential tools and which are the best for accurate measurements. https://westportcorp.com/pages/british-thread-gages
I liked what you explained about measurement tools and how to make sure they give us accurate results. The other day, my brother said he’s interested in opening a tool shop with one of his friends, and I think he’d benefit from reading your insight on measurement tools, so I’ll share it with him right now. Thanks for the tips on essential tools and which are the best for accurate measurements. https://westportcorp.com/pages/british-thread-gages
Dave Wood
Always cut on the waste side of the lines that you mark and sneak up yo the line with a sharp chisel
Always cut on the waste side of the lines that you mark and sneak up yo the line with a sharp chisel
27Sax
I’ve found a saddle square is essential to transfer measurements around edges. So simple, but so important, it lives in my KM apron with my combi square and block plane.
I’ve found a saddle square is essential to transfer measurements around edges. So simple, but so important, it lives in my KM apron with my combi square and block plane.