


Want an easier way to mount things on walls? Look no further than french cleats.
I friggin’ love these things.
Whether you need a modular system to hang clamps in the shop or an easy way to mount cabinets in your kitchen, french cleats make it a cinch.
Best of all? They're super easy to make and install.
Today, I’m covering french cleat basics — including how to cut them, tips for installation, and a few ideas of where to use them.
Your wall-hanging struggles are about to get a whole lot simpler.
HOW FRENCH CLEATS WORK
French cleats make your wall-mounted projects look like they defy gravity — but how, exactly?
Typical french cleats consist of two pieces of wood that each have an edge cut at 45°.
(The exact angle isn’t ultra-critical, but 45° provides the best strength-to-durability ratio).
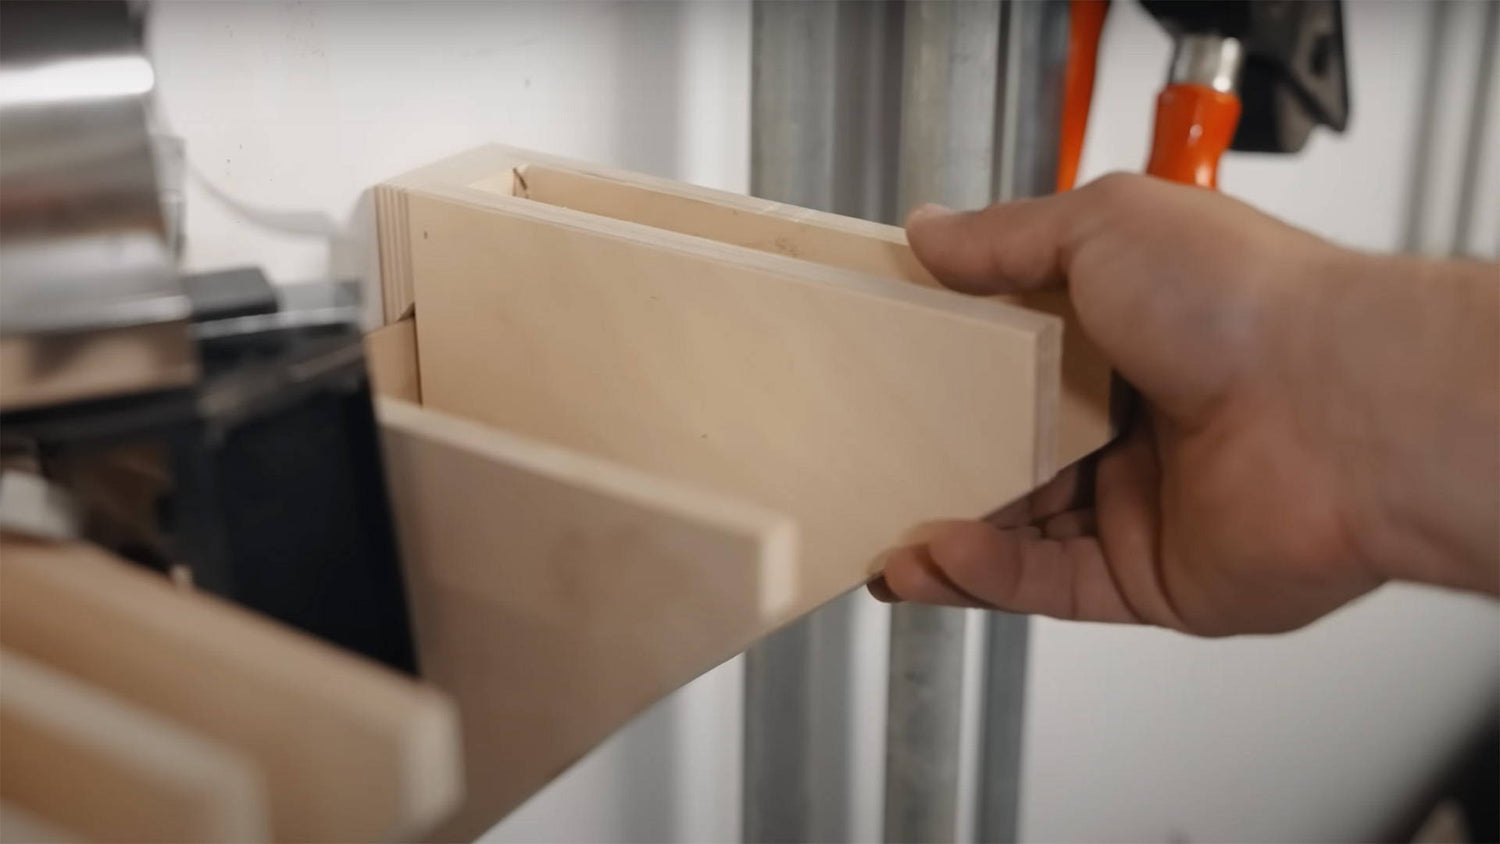
One of the pieces is connected to the back of your project (with the angled edge facing down), while the other is attached to the wall (with the angled edge facing up).
The 45° edges then interlock with each other, holding even super heavy projects securely on the wall.
From there, all you need to add is a spacer block (that’s the same thickness as your cleats) to support the bottom edge of your project .
French cleats can be used to hold something in position while you secure it to the wall with other fasteners, like a heavy kitchen cabinet…
Or be used alone to create a versatile setup you can adjust and move around (like this modular clamp rack I built).
HOW TO CUT FRENCH CLEATS
French cleats can be made out of pretty much any material — but, I prefer at least ¾” thick plywood for anything that’ll hold significant weight.
Hardwoods can work too… but why use such expensive wood for something you probably won’t even see?
Now onto the cutting.
In my mind, a table saw is far and away the best tool for cutting french cleats.
Sure, you could do it with a track saw — or even a hand saw.
But the table saw makes it dead simple to keep your angled cuts exact and your rip cuts square. Here’s how it works.
1. RIP A PIECE OF PLYWOOD
Start by ripping a piece of plywood for your cleats. It’s width should be twice as wide as you want your actual cleats.
For example, if you want your cleats to be 2” wide, cut this board a hair over 4”.
I recommend using a general purpose blade for these cuts. They’re the best all-around blade for plywood when you don’t need ultra-clean cuts.
Now cut this piece to a length that’ll fit on the back of your project.
2. CUT THE CLEATS
Set your table saw blade to 45° using a digital angle finder or combo square.
You’re going to cut the board down the middle to get two equally sized cleats — but be careful.
45° cuts are a little tricky to center. If you set your table saw fence for a 2” cut on a 4” board, you’ll end up with one cleat that’s significantly wider than the other.
The cleats don’t need to be exactly the same width, but you should try to get them close.
To make it easy, mark the center point on the end grain edge of your board (centered from both the edges and faces).
Now set your fence so the table saw blade passes over this center point. When you make the cut, you should now get two roughly equally wide pieces.
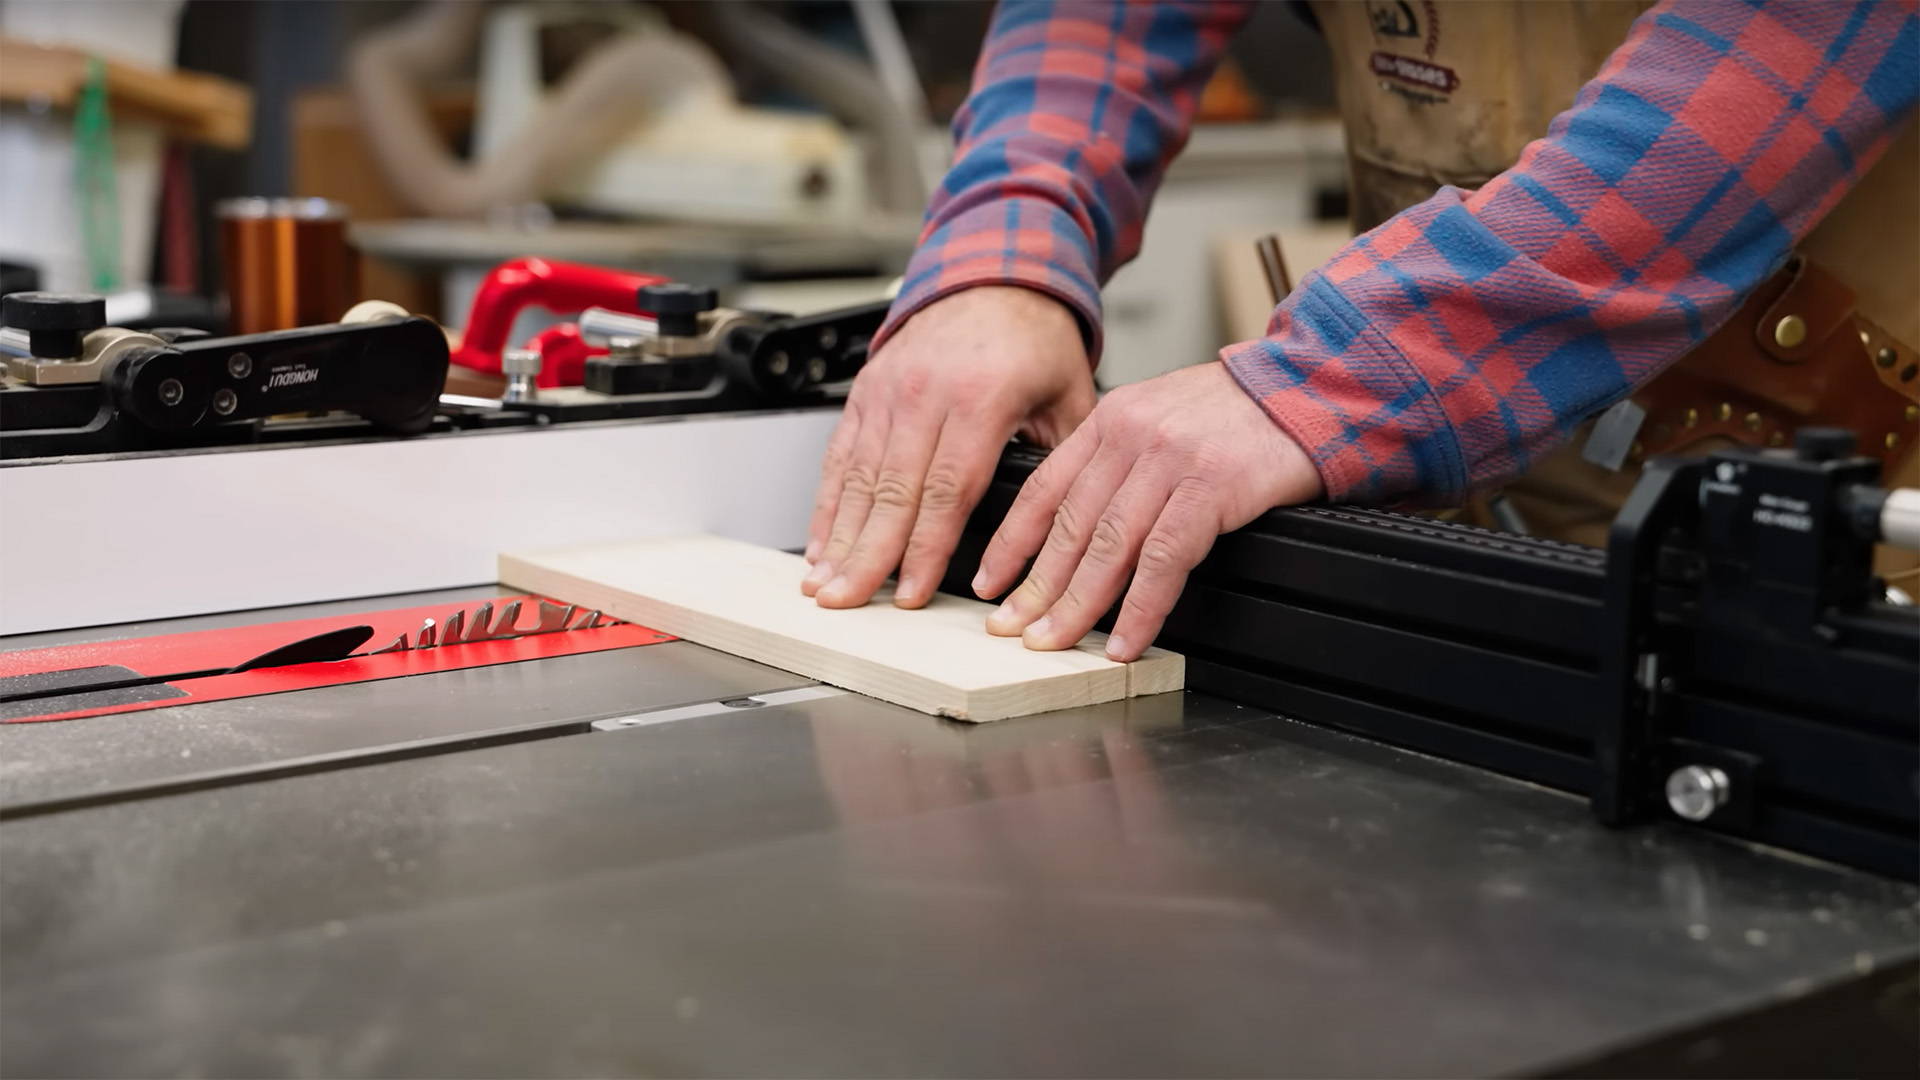
Use a featherboard and push stick to rip the board, and congrats — you’ve got your cleats.
3. MAKE A SPACER BLOCK
Later on, you’ll attach one of the cleats to the back top edge of your project.
But that means your project will be offset from the wall you mount it on by the thickness of the cleat.
Because of that, you need a spacer block attached near the bottom back edge of your project to support it and keep it hanging at an even distance from the wall.
Luckily, spacer blocks are easy. They just need to be the same thickness as your cleats.
Rip a piece from the same piece of plywood you used for your cleats (no 45° angle necessary).
It only needs to be wide enough to take a few screws. And you can either go for a single long spacer that spans the back of your project, or two small ones at the corners.
HOW TO INSTALL FRENCH CLEATS
Now that your cleats are finished, it’s time to attach them to your project.
This is simply a matter of gluing and screwing them in position.
But the most important thing is to make sure they are LEVEL.
1. ATTACH A CLEAT AND SPACER TO YOUR PROJECT
Start by attaching one of the cleats to the back top edge of your project.
Remember, this one will have the angled 45° edge pointing down.
You can use a marking gauge to scribe a line on the back of your project with the fence referencing the top edge. Then use this line to position the top edge of your cleat.
Just do your best to make sure it’s an equal distance from the top edge of your project from end to end.
For heavier cabinets, I recommend using both wood glue and screws for the strongest bond.
Once that’s attached, you can move on to the spacer block.
The spacer isn’t really structural — so any attachment method you choose is fine. Screws. Wood glue. Super glue. A little spit. Whatever floats your boat.
It also doesn’t need to be level. But get it close for the perfectionist in you.
2. ATTACH THE SECOND CLEAT TO THE WALL
Now it’s time to figure out where on the wall you’ll mount your project.
This cleat will have the angled edge pointing up so the cleat on your project can slide into place.
To make the process easier, I like to put some small pieces of double stick tape on the back of the cleat.
This lets you play around with the position until you get it where you want it.
Once you're satisfied, drive a screw through one end of the cleat to secure it to the wall.
Now place a level on the top edge and adjust the other side until it’s level. Drive in a screw on the other end, then add a few more screws across the middle for extra security.
If you’re attaching it to drywall, make sure to drill the cleat into studs or use solid anchors.
Once it’s securely attached, you can mount your project on the wall!
LEVELING FRENCH CLEATS
Let’s say you’ve done all this work and finally mount your project on the wall… and it’s not level.
No need to panic. A bit of blue tape will fix it right up.
Add a strip of blue tape over the top edge of the wall-mounted cleat on whatever side of your project is sitting lower.
So if your project is leaning lower on the left side, add a bit of tape to the left side of the wall-mounted cleat.
It might take a bit of trial and error — but just add more strips of tape as needed.
HOW TO HIDE FRENCH CLEATS
For shop furniture and tool storage, there’s no issue with visible french cleats.
But if you’re using them to mount kitchen cabinets, you probably don’t want a big visible gap between the back of the cabinet and the wall.
The best way to solve this is to inset the back of the cabinet by a distance that matches the thickness of your cleats.
The sides of your cabinet will extend past the back and be perfectly flush with the cleat. When mounted, there will be no gap at all.
PROJECTS THAT USE FRENCH CLEATS
Want to use french cleats but don’t know where? Here are a few project plans and ideas for you.
LET IT ALL HANG UP
French cleats are a serious game changer for wall-mounted projects.
They’re sturdy, adaptable, affordable…
And as you can see above, they’re super easy to make and install.
Want to step up your table saw skills? Here’s 10 table saw accessories that can help.
What projects have you used french cleats for? Let us know in the comments below!
Follow us on Instagram @katzmosestools, on TikTok @katzmoseswoodworking, and check out my YouTube channel for more great woodworking content...
And as always, STAY SAFE IN THE SHOP!
4 comments
Carey Holman
I really like the light-hearted, enthusiastic tone of your writing. I mean, we don’t have to take everything so seriously. Seriously.
I really like the light-hearted, enthusiastic tone of your writing. I mean, we don’t have to take everything so seriously. Seriously.
R
One thing to keep in mind if you are stuck with a jobsite saw like me, if you use the digital angle gauge, be sure the saw itself is plumb or that you use relative mode on the gauge. I almost forgot to do this because I was so excited to get started with the cleats after having my stuff all over the floor for weeks while finishing the walls in my spare time.
I have seen some articles state the angle doesn’t matter too much, but I think if you are going long-term and converting an entire shop for example, you want to get as close to 45* as possible for when you need to make more of them
Anonymous
Love French cleats – agree – precise angles not critical – but thought you’d find this of interest:
From a Youtube site – A Glimpse Inside (?) – using a 5" x3/4" board/ply
Set the table saw fence to 1/2 width minus 1/2 thickness minus 1/2 blade thickness -
I found it very helpful – https://m.youtube.com/watch?v=usFRvasGW70
John N
Hell yes to French cleats!
I used 1x SPF for my shop walls, since you can get 8ft without wrangling a full sheet of plywood, but you can still use 3/4" ply for projects and spacers. The tip is probably more fragile due to the grain than plywood, but practically speaking doesn’t matter much when fully seated.
Those suckers are strong enough to hang a 10" miter saw from! Mine is designed for those parallel tube stands, and the scoop fits perfectly on the rail so I didn’t even need to make a mount.