


There's a unique joy in crafting your own tools — and featherboards are a great place to start.
Featherboards are crucial for ensuring accuracy and safety on power tools like the table saw, bandsaw, and router table…
And by building your own, you can customize it to your exact needs.
Today, I’m walking you through the process of making your own featherboard — including different ways to secure them to your tools and ideas for customization.
Ready to channel your inner tool maker? Let’s get to it.
(Prefer to just buy a featherboard? Check out our collection here).
WHAT IS A FEATHERBOARD AND HOW DOES IT WORK?
A featherboard is a guiding hand for boards, keeping them snug against a tool's fence or table.
They feature a series of angled “fingers,” or tabs, that apply gentle pressure on a board to prevent any unwanted shifts during the cutting process.
Because of their angle, these fingers allow boards to move forward through a cut while preventing the board from moving back.
On a table saw, featherboards keep your workpiece snug against the fence — ensuring a straight cut and reducing the risk of kickback.
On a bandsaw, they are super helpful for keeping boards straight while resawing.
And on a router table, featherboards ensure your board doesn’t drift during a cut.
All in all, featherboards add an extra layer of control, stability, and safety to power tool use.
HOW TO MAKE YOUR OWN FEATHERBOARD
The basics of making a featherboard are simple. (We’ll cover how to secure them to your tools in the next section).
1. SELECT A BOARD
Start with a scrap piece of solid lumber (hardwood or softwood — plywood is not the best for this build).
A 1x6 piece of pine is perfect. Otherwise, aim for a board around 4” wide.
2. MAKE AN ANGLED CUT ON ONE END
You’re going to cut one of the board’s end grain edges at an angle.
There’s no single “correct” angle — but aim for something between 20° and 45° off 90°.
You can make this cut with a miter saw, or on the table saw with a miter gauge or multi-sled.
3. MARK A LINE PARALLEL TO THE ANGLED EDGE
Use a marking gauge or pencil to mark a line parallel to the angled edge, about 3-4” back.
This doesn’t need to be exact. It’s just a visual guide for where to stop when cutting the featherboard fingers.
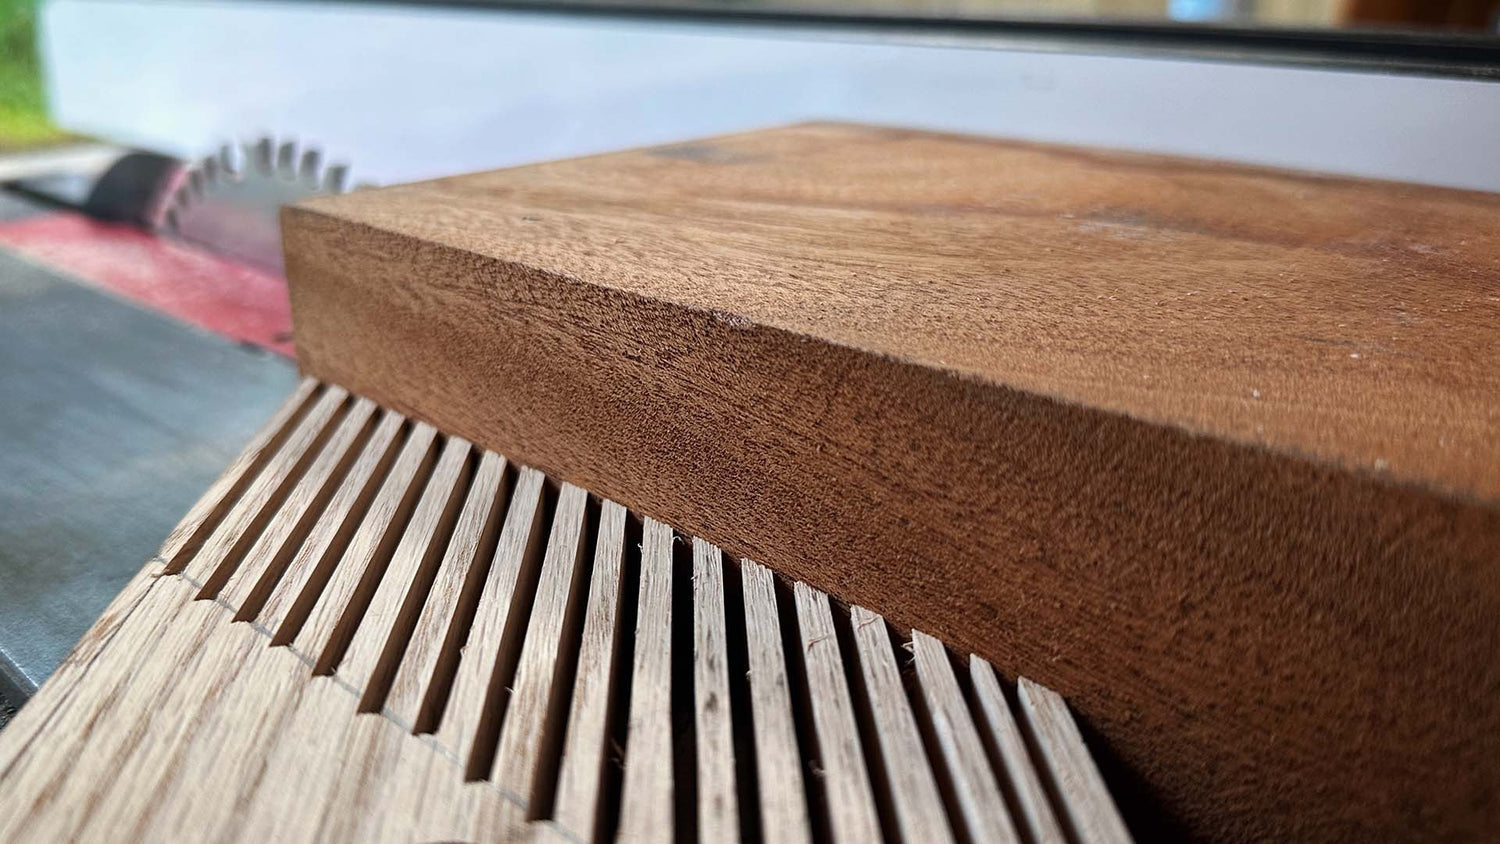
4. CUT THE FINGERS
Set the table saw fence for around a ¼” cut.
With the angled edge forward and the reference line facing up, push the board into the table saw. Make sure to use two push sticks to keep it steady against the fence and flat on the table.
Stop the cut when the blade reaches the reference line. Now either carefully pull the piece back away from the blade, or turn the saw off and then pull the piece out.
You’ll notice an undercut on the bottom side of the board. This is because the front of the blade is cutting further than the top.
The higher your blade is set, the less of an undercut there’ll be — but be careful. Too much exposed blade can get sketchy.
Once the first cut is done, bump your table saw fence over by about a ¼” and repeat the process, only cutting until the reference line.
The fingers of the featherboard don’t all need to be the exact same thickness. Eyeballing is definitely ok — just try to keep each finger ¼” thick or thinner.
Repeat this process until you’ve got fingers all along the angled edge of the board.
5. CUT TO LENGTH
Now you can trim your featherboard to its final length — which will depend on the attachment method you choose.
If you plan to secure it in your table saw’s miter slot, it needs to be at least long enough to reach from the miter slot to the edge of the blade.
If you plan on using magnets, the featherboard only needs to be long enough to leave space for the magnets.
At this point, you’ve technically got a featherboard.
But we still need to figure out how to secure it on your power tools — and there are a few ways to do this.
HOW TO SECURE YOUR FEATHERBOARD TO POWER TOOLS
Here are 3 ways to secure your featherboard to your power tools — along with the pros and cons of each method.
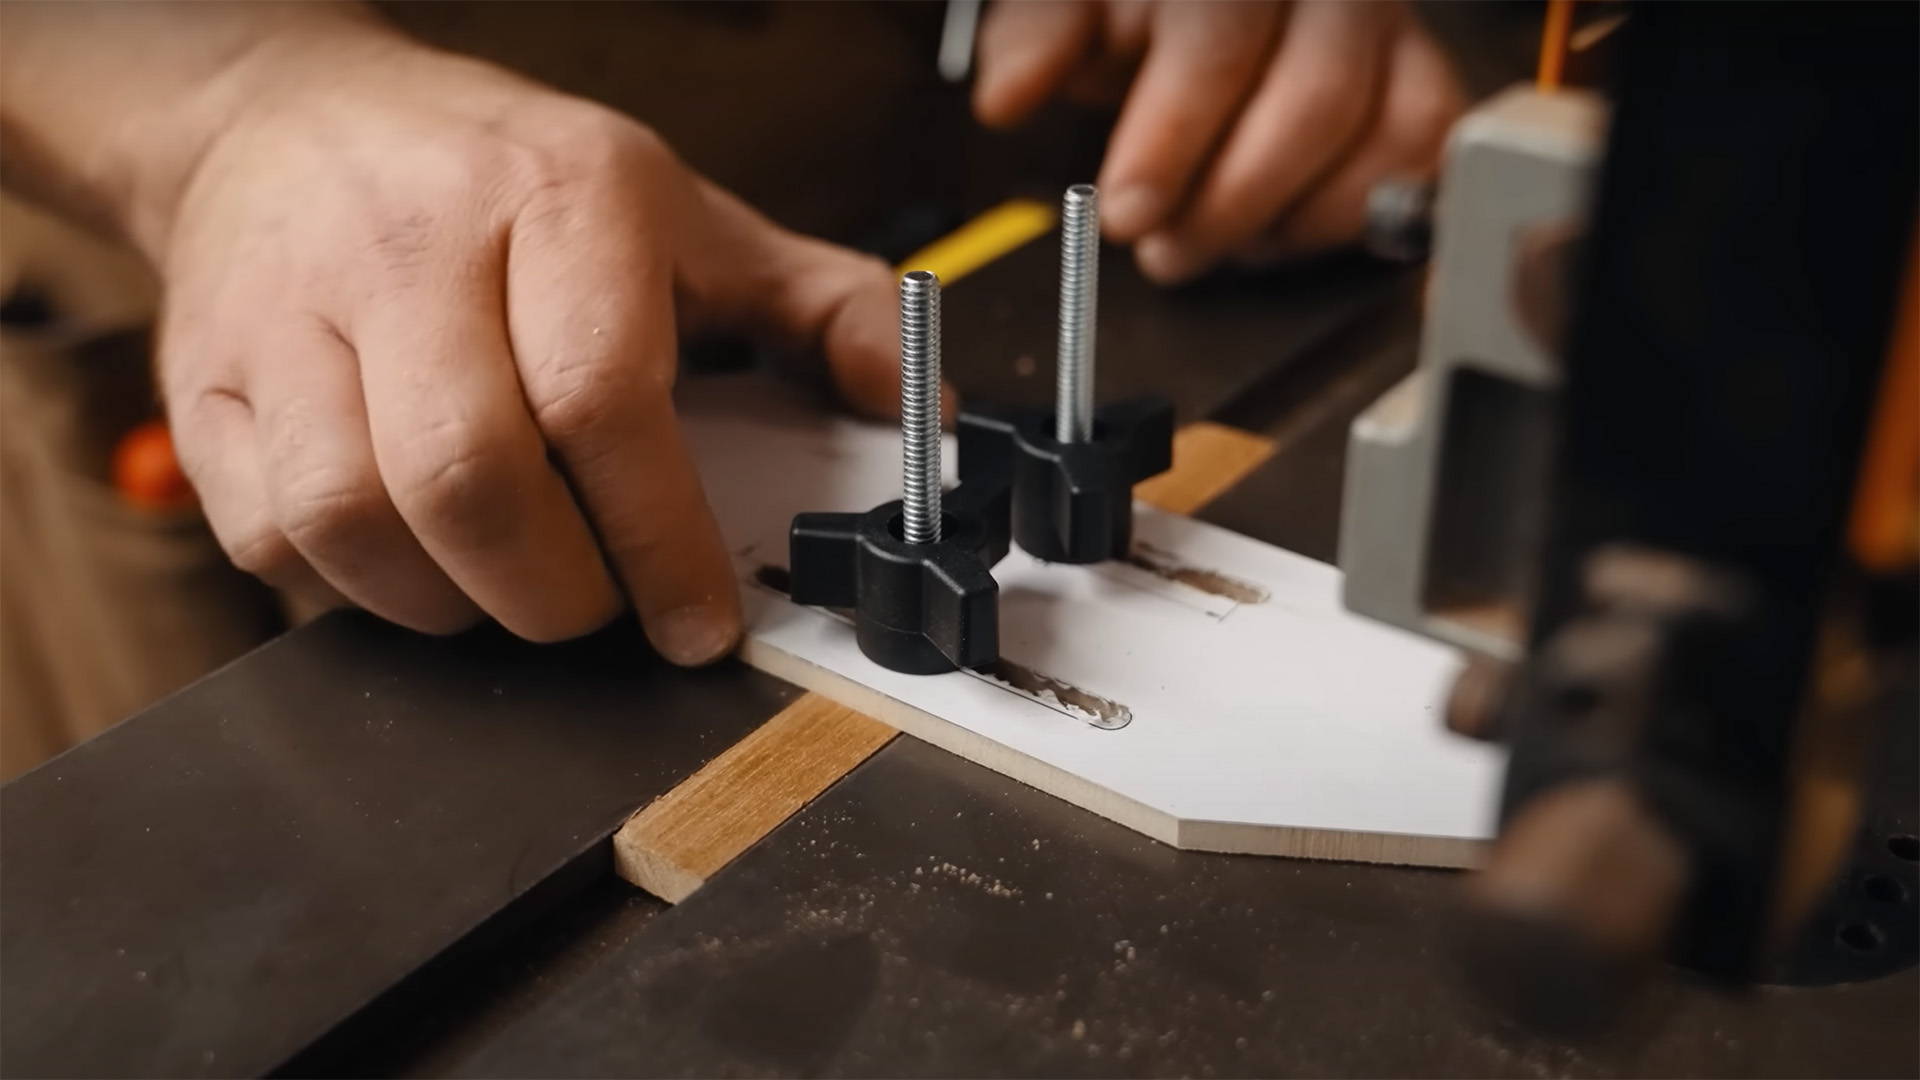
EXPANDING MITER BARS
This method involves a miter slot runner that expands as you tighten down the featherboard.
You can make your own (like I did for this bandsaw jig), or buy a set like these ones we carry in our store.
Cut two slots along the length of your featherboard for the bolts to fit through and you’re good to go.
Expanding miter slot bars like these are a great option because they lock down tight, work on any kind of table (whether cast iron or not), and are super affordable.
The one disadvantage is that you’re limited in the width of boards the featherboard will work with.
If you need to make a rip cut where the offcut side of the board reaches past the miter slot, the featherboard won’t have anywhere to attach.
MAGSWITCH MAGNETS
For a touch of modern magic, consider Magswitch magnets for securing your featherboard.
They provide a secure grip on cast iron tables with the convenience of “switchable” magnets.
The beauty of this option is that you can place the featherboard anywhere on the table — allowing you to use it for wider boards than a miter slot based featherboard allows.
The downside? The MagJig magnets are more of a splurge — and they’ll only work if your tables can hold magnets (so some jobsite table saws won’t work).
T-BOLTS OR WASHERS
This is a cost-effective option that can work for both miter slots and t-track.
Similar to the expanding miter bars, you need to cut two slots down the length of your featherboard for the t-bolts to slide through.
T-bolts and knobs might even slide in the undercut bottom section of your miter slots, allowing you to tighten them.
Otherwise, a 1” washer and a regular bolt can do the trick.
The same as with the expanding miter bars, relying on the miter slots means you won’t be able to use the featherboard if a cut requires a board to extend past the miter slot.
FEATHERBOARD VARIATIONS
The real beauty of making your own featherboards is you can customize them to your needs — and save money at the same time.
Here’s a couple ideas for customized featherboards.
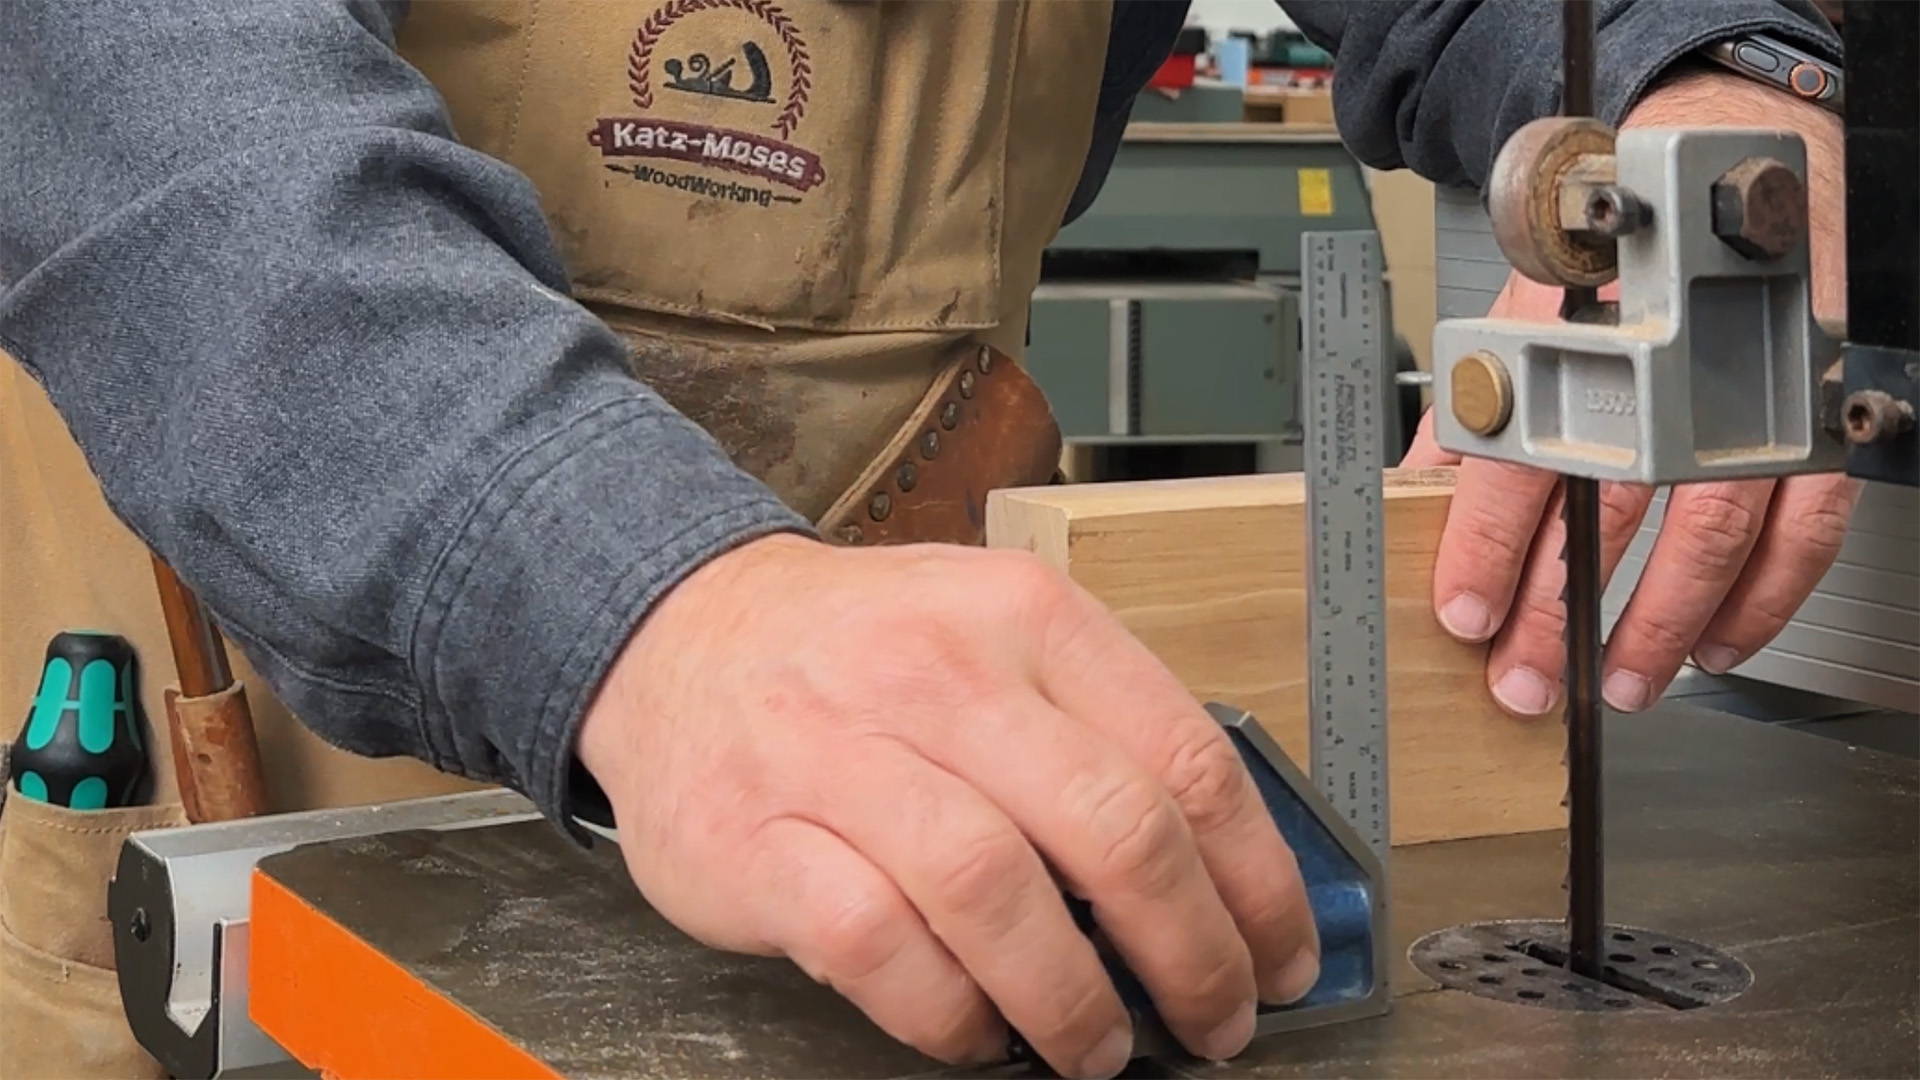
STACKED FEATHERBOARDS FOR RESAWING
Need to resaw a wide board on the bandsaw or table saw?
Stacked featherboards allow you to stabilize both the bottom and top edges of a board.
Make two featherboards, create a vertical structure to stack one at a set height on top of the other, and you’re ready to resaw.
You can also use this setup for safer resawing on the table saw.
VERTICAL FEATHERBOARDS FOR TABLE SAWS
Increase your table saw safety even more by making a vertical featherboard for your fence.
It keeps your workpieces firmly pressed against the table, preventing them from lifting during a cut.
TIPS FOR USING A FEATHERBOARD
Here are a couple tips to ensure you’re using your featherboard correctly.
SET IT UP BEFORE THE CUTTER
When locking your featherboard down, make sure none of it reaches past the front of the blade.
This ensures the featherboard won’t pinch the offcut into the blade — which on a table saw, could potentially lead to a kickback.
This isn’t so critical on a router table when making non-through cuts.
SET THE RIGHT PRESSURE
When securing your featherboard, push it against your workpiece just enough to make the fingers flex slightly.
Avoid excessive pressure against the workpiece, since this can make it difficult to push your board through the cut.
The slight flex is all it takes to keep your board locked in position.
ANOTHER FEATHERBOARD IN YOUR CAP
Featherboards are the perfect tool to make yourself — and as you can see above, the process is simple.
Now you're another step closer to staying safe in the shop…
And without having to break the bank.
Want to learn about my most used table saw jigs? Read this.
Got any of your own tips for making a DIY featherboard? Let us know in the comments below!
Follow us on Instagram @katzmosestools, on TikTok @katzmoseswoodworking, and check out my YouTube channel for more great woodworking content...
And as always, STAY SAFE IN THE SHOP!
2 comments
Anonymous
Thanks for all your tips and tricks. They make woodworking fun and help me be a better woodworker.
Thanks for all your tips and tricks. They make woodworking fun and help me be a better woodworker.
Frank Kalinski
I’m going to make some feather birds with extra length such that they’ll be able to clamp to the underside of the table saw wings. I have a pair of short plastic feather boards that I clamp close to my router table fence instead of using t or miter slots
I’m going to make some feather birds with extra length such that they’ll be able to clamp to the underside of the table saw wings. I have a pair of short plastic feather boards that I clamp close to my router table fence instead of using t or miter slots