


Want to access a world of new jig-making possibilities? You need to try some expanding miter slot runners.
These little gizmos allow you to fasten jigs down tight in your power tool miter slots…
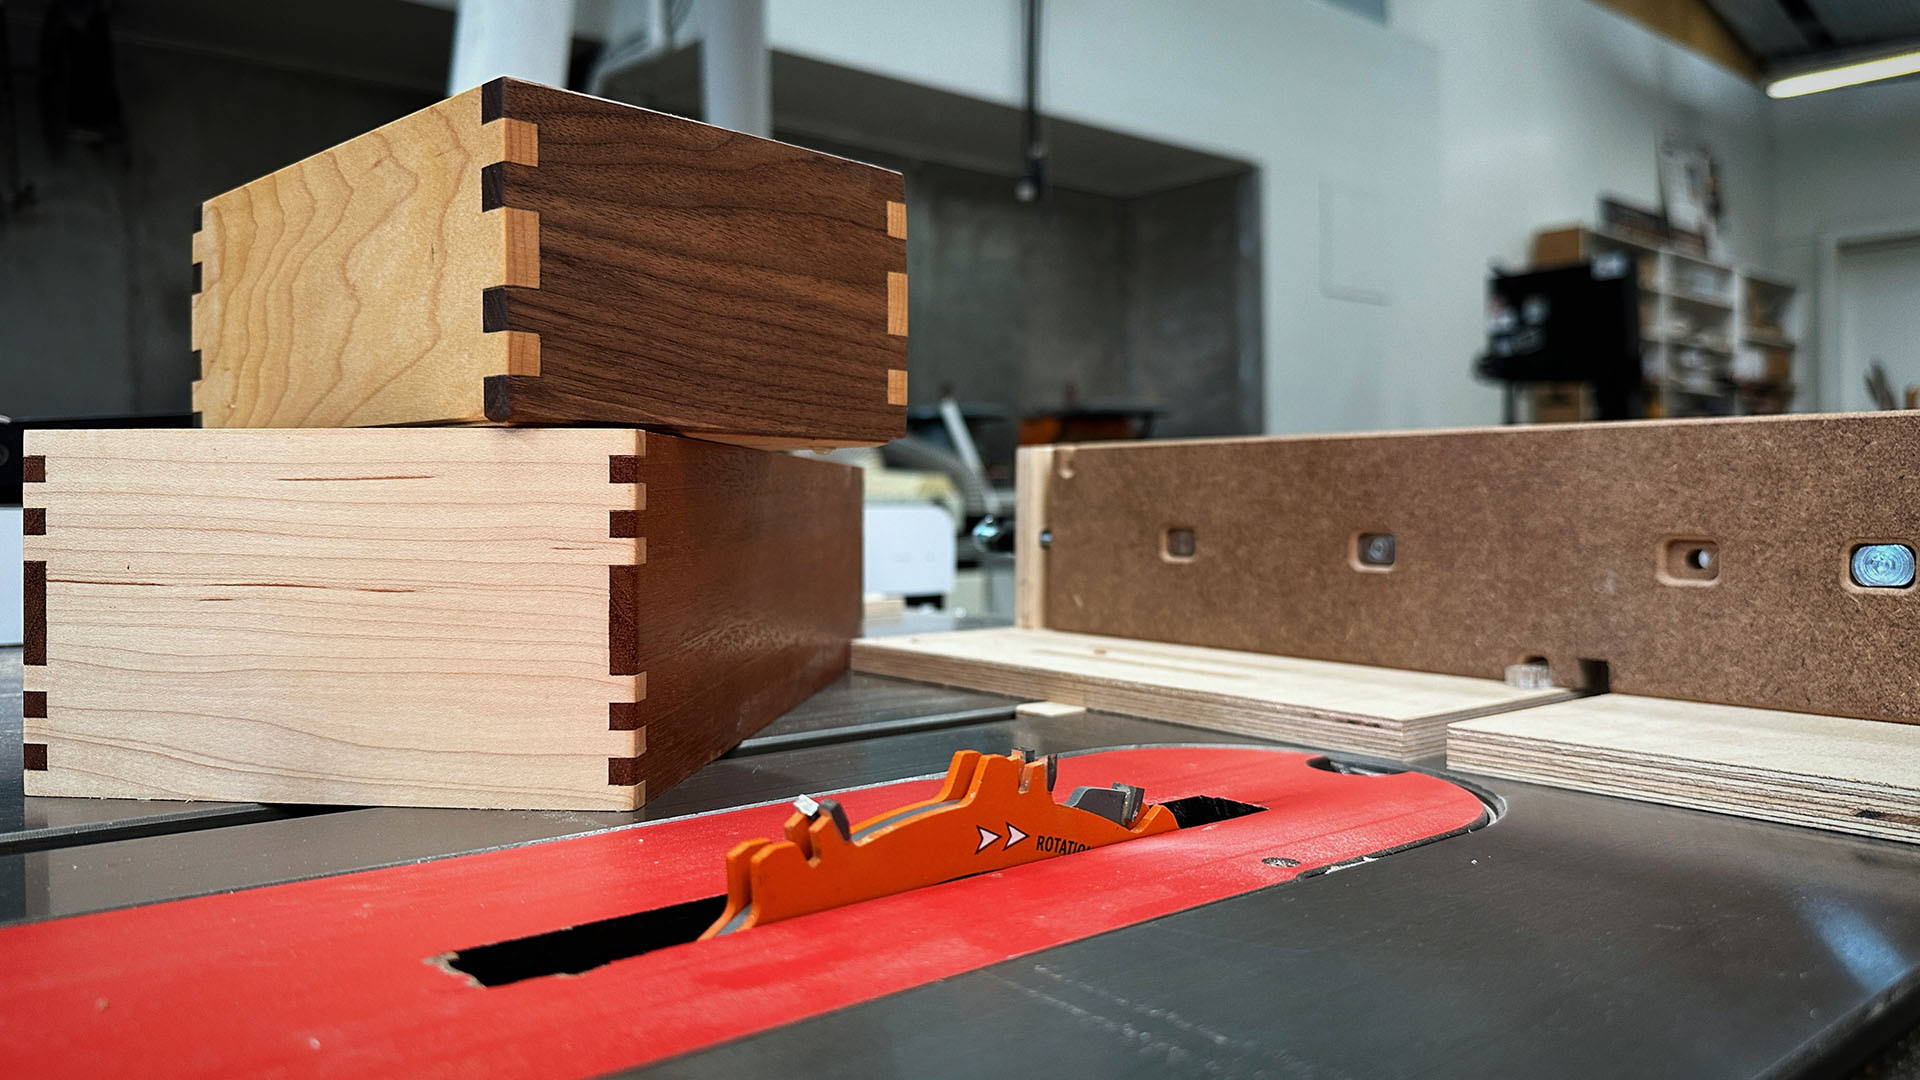
And can be used for holding down featherboards, thin rip jigs, sacrificial bases, and a host of other useful woodworking jigs.
Of course, you can just buy a set (like these) and get straight to it.
But today, I’m going to show you how to make your own expanding miter slot runners — and expand the possibilities of your custom-made jigs.
HOW DO EXPANDING MITER SLOT RUNNERS WORK?
The way expanding miter slot runners hold fixtures down tight is pretty genius.
They consist of 3 pieces: A runner, a bolt, and some kind of knob or wingnut.
The runner has a slot cut down the middle of it. As you tighten down the knob, the head of the bolt causes this slot to expand.
The edges of the runner then compress against the edges of the miter slot — locking your jig in position.
And they’re super easy to make (I made a set in this video about my bandsaw flush trimming jig).
For most jigs, I recommend using 2 expanding miter slot runners for stability.
(Need some hardware? Check out our collection of t-bolts and knobs).
1. MAKE YOUR RUNNERS
Start by making a runner to fit your tools’ miter slots.
Standard miter slots are ¾” wide by ⅜” deep. Try to get the width of your runner so it fits in the miter slot with minimal play but still slides smoothly.
Make sure the thickness is less than ⅜”. That way, you’ll leave some space beneath to accommodate the head of the t-bolt.
I typically cut my runners on the table saw — and I recommend using a thin rip jig for added safety.
Either plywood or hardwood make good material for runners.
2. DRILL HOLES AND COUNTERSINKS FOR THE T-BOLTS
Cut your runner into two smaller pieces. The exact length isn’t critical.
Drill a hole for the t-bolt to pass through about ½” to 1” from the end of each runner, in the middle between both edges.
Now drill a countersink on the bottom edge of each hole. Make it wide enough to accommodate the width of the t-bolt head.
At this point, you’ll need to elongate the countersink to accommodate the shape of the t-bolt head.
The indent will stop the t-bolt from spinning as you lock it down — and the sloped walls will cause the runner to expand as you tighten the knob.
Either do this by drilling another adjacent countersink or a little chisel work.
3. SLICE THE RUNNER DOWN THE MIDDLE
This next step is what turns your runner into an expandable runner. And I find it best to do on the bandsaw.
You’re going to cut a kerf down the middle of the runner — starting at the end closes to the hole.
Cut down the middle through the hole, and continue cutting another ½” to 1” past it.
Repeat for both runners.
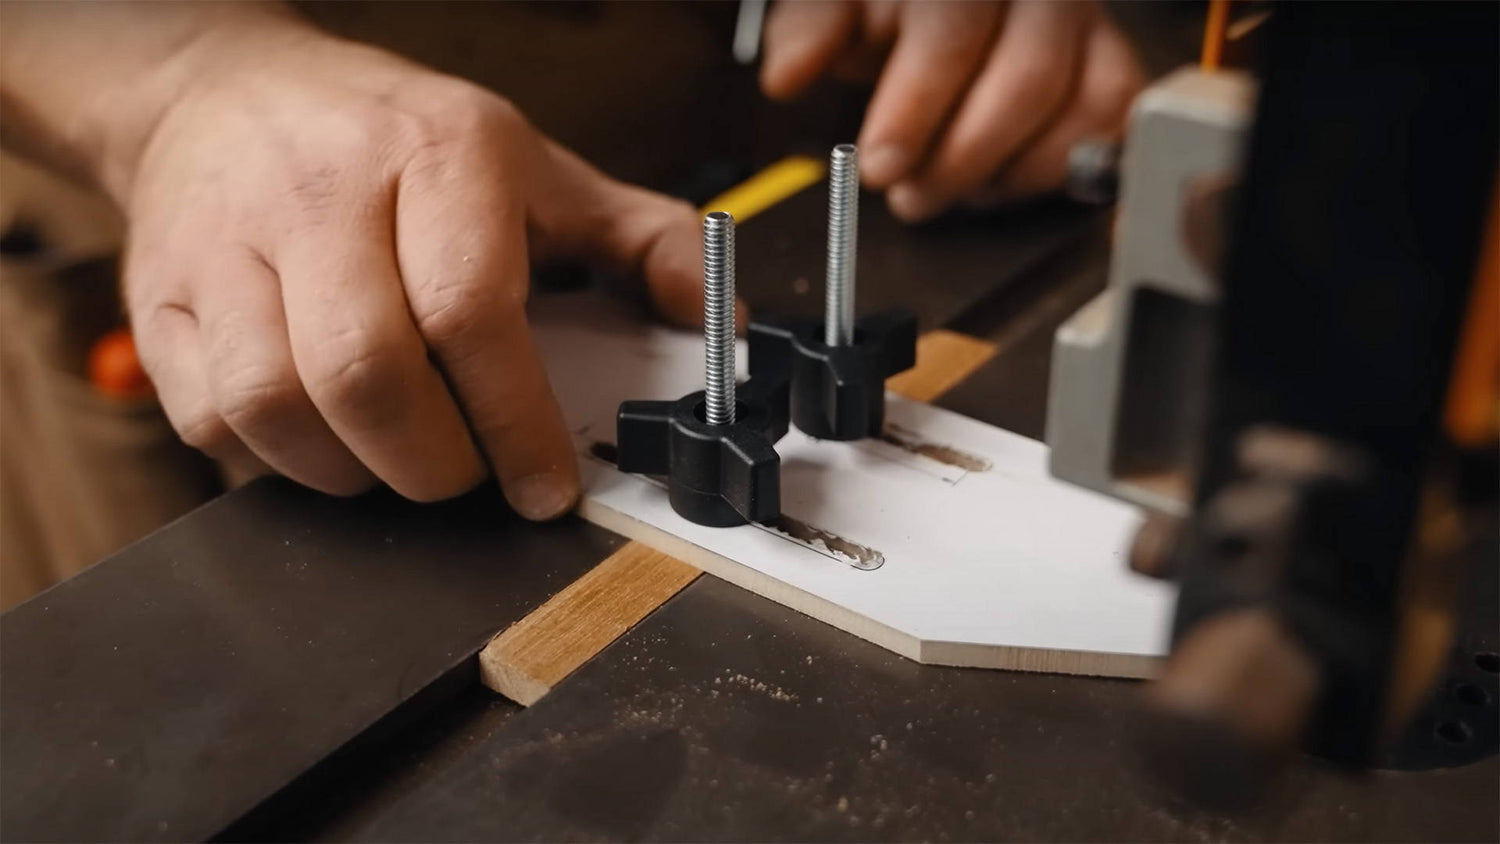
4. SET IT ALL UP
Now you’re ready to set up your jig!
On most jigs using expanding miter slot runners, you’ll want to cut two slots for the bolts to pass through (this lets you adjust the jig position).
Leave enough space between the slots to accommodate the width of the knobs.
Now slide the t-bolt through the bottom of the runner so its head sits in the countersink. Place the slot of your jig over the bolt, then spin the knob into position.
Congrats — you’ve now got a new way to hold your jigs steady.
(And if you ain’t feeling the DIY vibe, get your expanding miter slot runners here).
Want to make your own featherboard? Read this.
Got any other creative ways to hold jigs steady on your tools? Let us know in the comments below!
Follow us on Instagram @katzmosestools, on TikTok @katzmoseswoodworking, and check out my YouTube channel for more great woodworking content...
And as always, STAY SAFE IN THE SHOP!

2 comments
Joe
Handy write up – could you include a picture or two of the finished runner, without the jig attached? So it’s clearer what it should look like finished with the bolt? Thanks!
Handy write up – could you include a picture or two of the finished runner, without the jig attached? So it’s clearer what it should look like finished with the bolt? Thanks!
John Short
Great idea so simple but very effective.
Great idea so simple but very effective.