


An employee of mine once met a woodworker missing four fingers from his right hand.
He’d lost them using a jointer. But when asked what he thought the most dangerous tool in the shop was, he said the router table. Yeah, seriously.
Router tables are ridiculously useful tools — but they’re friggin’ dangerous if you don’t know how to use them safely.
Kickback is a big risk (just like with table saws). And rapid, unexpected movements are no joke when your fingers are a few inches from a bit spinning at 24,000 RPMs.
So today, I’m telling you everything you need to know to get the most out of your router table — and keep your sweet hand sausages bandaid-free.
1. THE SHOULDN’T HAVE TO SAYS
Here’s a list of safety protocols that should be obvious — but are worth mentioning anyway.
- Unplug the router while changing bits, or make sure it can’t power on
- Ensure enough of the bit shank is in the collet and that the collet is properly locked down
- Make sure nothing is touching the bit when you turn the router on or off
- Wear PPE, including safety glasses, ear protection, and a dust mask (but don’t wear gloves, loose long sleeves, or anything that could snag on the bit)
2. FEED THE RIGHT (LEFT) WAY
Whether handheld or in a table, always feed boards the opposite direction of a router bit’s rotation.
On a router table, that means moving boards from right to left.
It can get confusing with curved workpieces. But as long as the workpiece is between you and the bit, just remember to move towards the left.
(On that note, always make sure your workpiece is touching the side of the bit facing you).
Feeding the opposite direction is called a climb cut.
Since the feed direction is the same as the bit’s rotation, climb cuts can shoot the workpiece forward — pulling your fingers towards the bit.
There are instances where climb cuts can be useful (like dealing with grain direction and end grain corners), but I only recommend them for very experienced woodworkers.
If you have to make a climb cut, keep it short, don’t take off too much material, and use push paddles that give you a solid hold of the workpiece.
3. TAKE SMALL BITES
This is probably the most common mistake people make with routers.
Just because your router can hog out a 1” deep dado in a single pass doesn’t mean you should.
Cutting too much material in one pass:
- Dulls your bits faster
- Is more likely to cause kickback
- Causes more tearout and burning
- Puts too much strain on your router
Make multiple small passes instead of one big pass. Cutting ¼” or less of material with each pass is ideal.
This is true when cutting grooves, flush trimming, and cutting roundovers, chamfers, or other profiles.
For profiles and grooves, you can either incrementally raise the bit or move the fence back between each pass.
If you’re template routing, first get within 1/16” of your template on the band saw. Use a spindle or belt sander to dial it in if you’re not comfortable cutting that close.
You can also put a bearing on the flush trim bit that’s 1/16” bigger than the bit’s diameter. Use this for a first pass, then follow up with the bit’s original bearing.
4. KNOW THE LIMITS OF YOUR BIT
The bigger the bit, the more material it can handle in a single pass.
Again, don’t take off too much. But you can get away with more using a ¾” bit on a ½” shank than you can with a ¼” shank bit.
Narrower bits can flex if you try to take too much material. And that flex can lead to kickback.
The style of bit also makes a huge difference.
Spiral bits are better than straight bits in every way. They’re safer, stay sharp longer, and give you better results.
Check out our collection of signature router bits — including top notch spiral and profile bits.
5. LOOK AT GRAIN DIRECTION
Whenever possible, feed boards so the router bit cuts with the grain direction.
Simply put, you want the bit to move across the edge the same way the grain lays — like how you pet a cat.
Read more about grain direction here.
This is one of the challenges of template routing. Since you always want to feed the board from right to left, there’s often one side that will need to be fed against the grain.
One way to alleviate this is by using a flush trim bit that has an option for a top and bottom bearing, or by switching from a flush trim bit (which has a bearing on the tip) to a pattern bit (which has the bearing by the shank).
If that’s not an option and you have to cut against the grain, make sure you’re taking as little material as possible with each pass.
Some people use climb cuts for these situations — but again, I don’t recommend it.
A thick spiral bit will do the job just fine as long as you take off very little material.
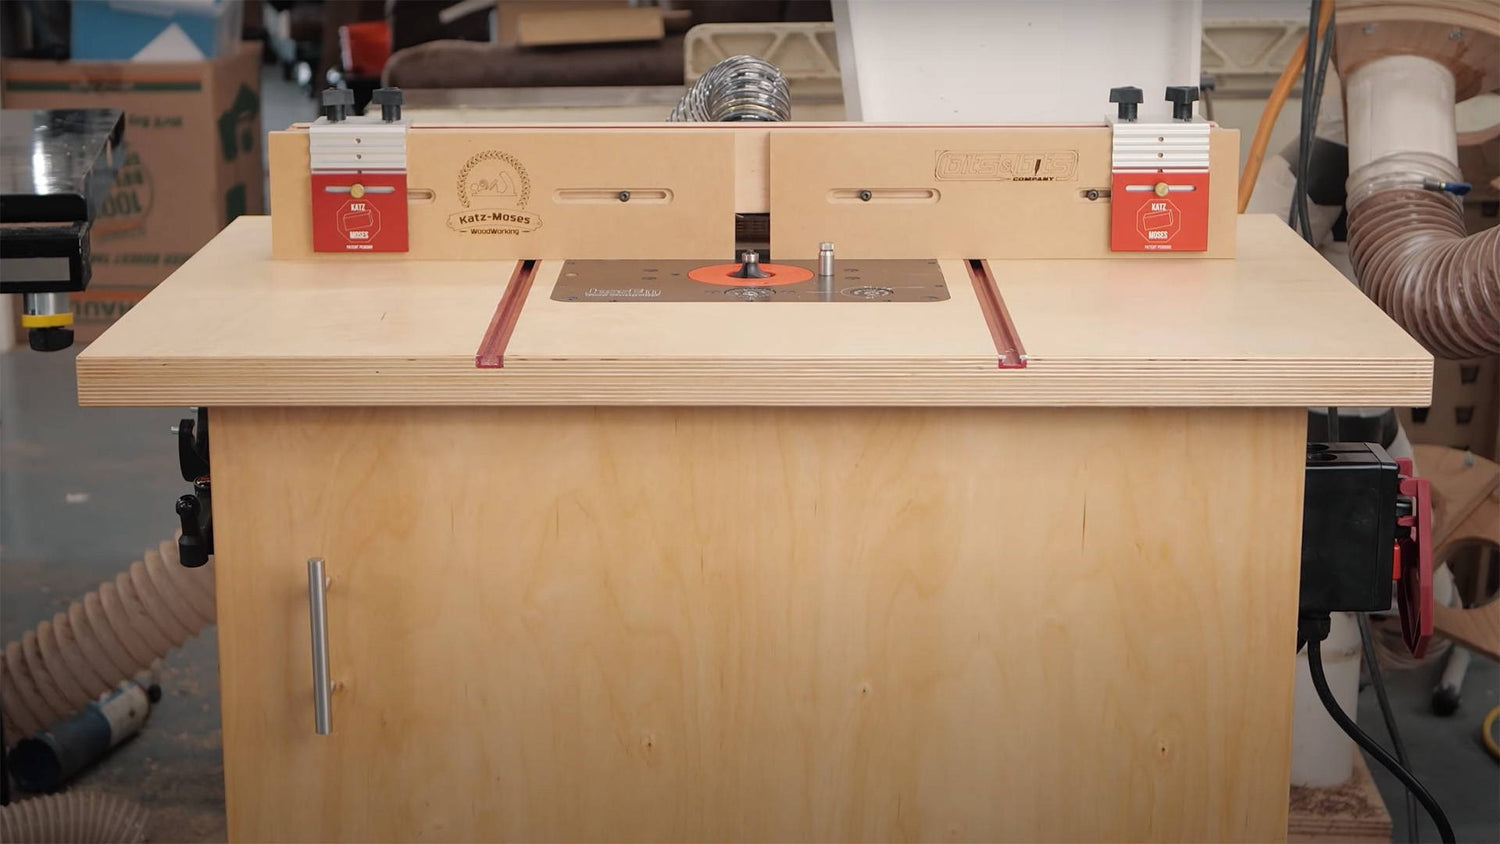
6. USE A FENCE OR A STARTER PIN
Use the fence on your router table whenever possible.
It adds stability to the cut and keeps less of the bit exposed.
A fence won’t usually work for template routing, but that’s when the starter pin comes in.
Starter pins are just small pins that come out of the top of your router table. It creates a pivot point for your workpiece, which is useful for two reasons.
One, it makes entering and exiting cuts safer.
Coming into cuts is often when kickback occurs on router tables. With a starter pin, you get a smoother entrance and another point of support to help resist kickback.
Two, it adds more stability to the cut in general, since your template has a second point of contact instead of just the bit’s bearing.
Most router lifts come with a detachable starter pin. If you have a super DIY router table, you can just drill a hole and glue in a wooden dowel.
Just make sure your workpiece never finds its way between the bit and starter pin. That creates the potential to bind the workpiece which is a really bad situation.
7. USE PUSH PADDLES AND JIGS
I don’t know when being unsafe got conflated with coolness — but it’s not the case. Use friggin’ push paddles.
If anything goes wrong —which if it does, happens faster than you can react — those push paddles are a barrier between your fingers and spinning blades.
Jigs are another useful way to add extra safety to cuts.
For grooves, you can use a featherboard to keep the workpiece snug against the fence.
You can even build jigs to help with specific operations, like cutting end grain edges.
Point is, use push paddles. If it’s not possible for the cut you’re making, just be extra careful.
8. USE A HANDSCREW CLAMP FOR SMALL PARTS
In the same vein as push paddles, those classic wooden handscrew clamps are great for the router table.
If you need to cut a profile on a small piece, use the clamp as a workholding device to keep your fingers far from the bit.
Set the clamps flat on your router table. Then set the piece you’ll cut between the tips of the clamp.
Leave the edge you’re cutting out further from the clamp, and make sure everything stays flat when you tighten it.
When I made the mallet for Vlad, this is how I added chamfers around the handle base.
9. NEVER TRAP THE BOARD
This maybe belongs in the “shouldn’t have to says,” but never trap a board between the bit and fence.
It can make the board bind up. And that’s pretty much guaranteed to cause kickback.
There’s never a situation where this setup is necessary. But I have seen newer woodworkers ask about this (or even do it regularly).
Same goes with the starter pin. Never let a board go between the bit and starter pin.
10. CAREFUL WITH END GRAIN
End grain is always a bit of a challenge on the router table.
It’s more liable to get hooked on the bit and kick out — and also prone to tearout.
Avoid starting cuts on end grain when possible. Start on the long grain and work around the corner onto the end grain edge.
As you move around corners from end grain to long grain, you’re nearly guaranteed to get tearout.
But it’s almost never deeper than the profile you’re cutting. Just route the long grain afterward and you should have a clean corner.
RESPECT THE ROUTER TABLE
I love my router table — but always approach it with a healthy amount of caution.
And as long as you follow the safety tips above, there’s no reason to be afraid.
Take the time to think about cuts before you make them and you’ll have no problem spending more time in the shop — and less in the ER.
And of course, remember: Just because you see someone do something on YouTube doesn’t mean it’s a good idea.
Any router table safety tips of your own? Share them in the comments below!
Follow us on Instagram @katzmosestools, on TikTok @katzmoseswoodworking, and check out my YouTube channel for more great woodworking content...
And as always, STAY SAFE IN THE SHOP!

3 comments
Dan
:“Use friggin’ push paddles.” Yet the post is full of pictures of fingers on boards near the bit. Hrmm…
:“Use friggin’ push paddles.” Yet the post is full of pictures of fingers on boards near the bit. Hrmm…
Bruce Furie
I use feather boards to hold the work piece horizontally against the fence and featherboards to hold down the work vertically. And a pushstick. You can’t get your fingers near the router bit! I use BI-DTOOL featherboards but there are others as well. Inexpensive.
I use feather boards to hold the work piece horizontally against the fence and featherboards to hold down the work vertically. And a pushstick. You can’t get your fingers near the router bit! I use BI-DTOOL featherboards but there are others as well. Inexpensive.
Tim Simin
Great blog. Required shop reading.
Great blog. Required shop reading.