


Forstner bits are my favorite bit for drilling clean holes. But they have some inherent problems.
For one, they have a tendency to heat up. And as you know, heat is the enemy of sharpness.
And while they’re great for cutting clean edges — as they exit a cut, there’s a tendency for pretty dramatic blow out.
So how can you ensure you’re getting clean, tearout free cuts and preventing your bits from dulling at the same time?
Today, I’m walking you through my top 7 forstner bit tips to reduce heat, stop tearout, and deal with tricky operations.
Not only will these tips give you the best results. They’ll also help extend the life of your forstner bits for many projects to come.
TABLE OF CONTENTS
1. MATCH THE RPM TO THE BIT’S DIAMETER
Spoiler alert: You’re probably running your forstner bits too fast.
Using the right RPM is critical to keeping down the heat. And the right RPM is often a lot slower than you think.
Here’s a general recommendation of RPMs relative to bit diameter:
| SIZE IMPERIAL | SIZE METRIC | HARDWOOD RPM | SOFTWOOD RPM |
| ¼” - ⅜” | 6.4 - 9.5 | 800 | 2400 |
| ½” - ⅝” | 12.7 - 15.9 | 500 | 2400 |
| ¾” - 1” | 19 - 25.4 | 500 | 1500 |
| 1 ⅛” - 1 ¼” | 28.6 - 31.8 | 250 | 1000 |
| 1 ⅜” - 2” | 34.9 - 50.8 | 250 | 500 |
| 2 ⅛” - 4” | 54 - 101.6 | 250 | 250 |
But the easiest way to tell if you’re at the right RPM is to look at the chips your forstner bit is cutting.
They should come out looking almost like shavings from a hand plane. If you’re seeing nothing but dust, you’re probably running the bit too fast.
2. USE A CENTER PUNCH OR AWL FOR ALIGNMENT
Most forstner bits have a spur in the center — which makes alignment super easy.
Use a center punch or awl to create a divot where you want the hole centered.
Place the board under the bit so it looks like the divot is under the spur. Eyeballing it is enough here.
Turn on your drill press and slowly lower the bit so the spur goes into the divot. Loosen your grip on your workpiece slightly.
Even if you aren’t centered initially, the spur will pull the workpiece into alignment and center it perfectly.
This technique makes it SO easy to drill holes exactly where you want them (and is why I always keep a center punch in my apron).
3. USE THE PULL-OUT METHOD TO BRING DOWN THE HEAT
If things start to heat up, the pull-out method will save your bit from overheating (relax — I’m still talking about woodworking).
Really, this should be called the “plunge and pull out method.” Still not great… I know.
The way it works is as you cut, you make a shallow plunge then retract the bit.
You don’t need to pull the bit all the way out of the hole. Just enough to let things cool off and evacuate any chips that are trapped at the bottom of the cut.
Plunge a ¼” or so, pull out, plunge a bit deeper, and repeat. Think of it like two steps forward, one step back.
This plunge and pull out technique keeps your bits from overheating the way they would if you were to continuously plunge all the way through a cut…
Which again, means they’ll stay sharper for longer.
4. USE A BACKER BOARD TO MITIGATE TEAROUT
If you plunge a forstner bit all the way through a board with nothing behind it, it’s going to cause major blow out.
And while that might not matter in some cases, you often don’t want your workpiece ravaged with splintered wood fibers.
The easiest way to mitigate tearout is to use a backer board under your workpiece.
As the forstner bit exits the cut, the backer board helps keep the workpiece’s wood fibers in place.
I like to use a flat piece of scrap plywood, but anything can work — from hardwood to MDF.
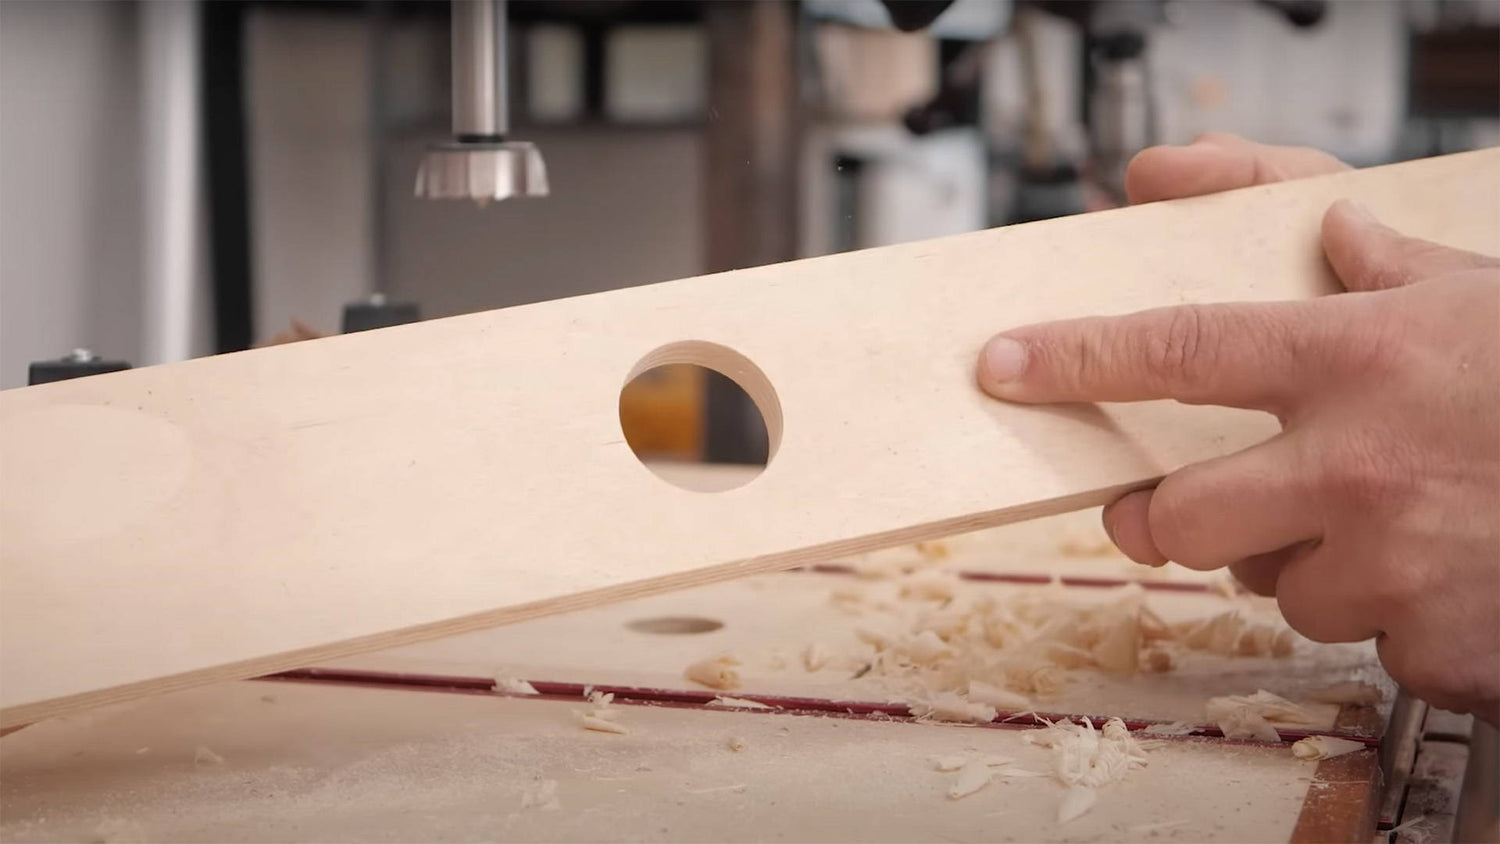
5. CUT FROM BOTH SIDES TO STOP TEAROUT COMPLETELY
If you want to cut a through-hole with ultra clean edges on both sides, this technique works like a dream. And you don’t even need a backer board.
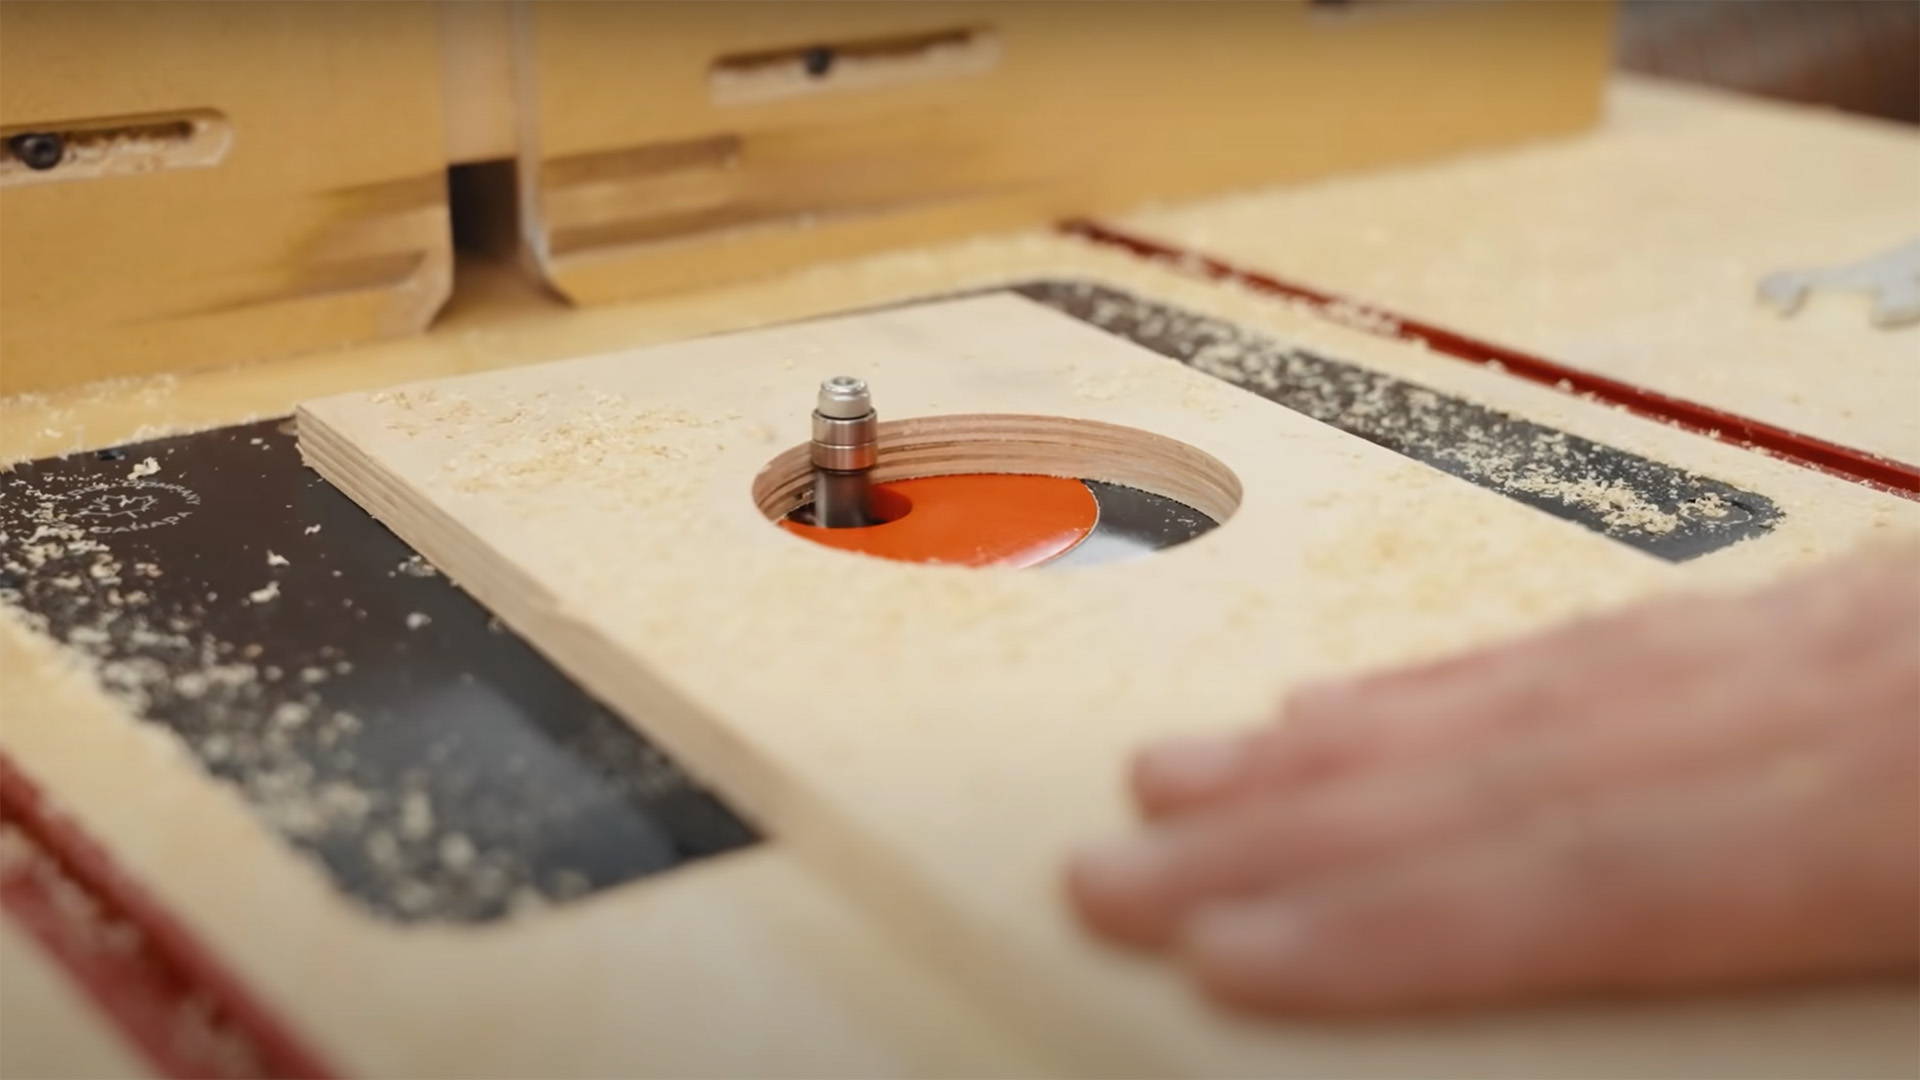
Start by lowering the bit until the tip of the spur slightly punctures your drill press table. Then set the stops on your drill press to that position.
Now using the other tips mentioned above, drill your hole on one side as far as the stops will let you.
When you flip the workpiece over, you should see a small hole where the spur of the forstner bit poked through (if you don’t, use an awl to punch it through).
Now with this side facing up, use that spur hole to center the forster bit and drill through.
This cut will go fast, so take it slow.
You might end up with a round wafer-like disc in your hole. Just push it out, and you’ve got a hole with perfectly clean edges on both sides of your workpiece.
6. USE BLUE TAPE TO RE-DRILL BIGGER HOLES
Sometimes you drill a hole — then realize it actually needs to be bigger.
This can feel like a catastrophic situation. How are you supposed to center a forstner bit when there’s no material to center the spur in?
Blue tape to the rescue.
Place a strip of blue tape over the hole. Then insert whatever size bit you drilled the hole with and use the spur to poke a hole in the tape.
Now install the bigger forstner bit in the drill press and position the workpiece so the spur of the bit is aligned with the hole in the tape.
You’ll need to secure the workpiece since the tape won’t be strong enough to center it under the bit.
But once it’s centered and locked down, simply make the cut and you’ve got a perfectly centered, bigger hole.
7. PRE-DRILL WASTE FOR LARGE DIAMETER BITS
Really large diameter forstner bits (like 2” plus) are especially liable to heat up during cuts.
But you can take off some of the load by clearing waste with a smaller diameter bit first.
Like in Tip #5 above, set up your drill press stops so the spur of the bit touches your drill press table.
Then using a smaller diameter bit, drill through the board until you hit the stops.
Now flip the workpiece over. You should see a small hole where the spur poked through.
Install the larger diameter in your drill press, then use the spur hole to center your workpiece under the bit.
Make the cut through this side, and you end up with a large diameter hole without having to remove as much material — meaning a lot less heat buildup.
GET FANCY WITH FORSTNER BITS
Once you learn to master them, forstner bits provide some of the cleanest holes you can cut.
It’s just a matter of knowing how to mitigate heat buildup and prevent tearout…
And with the tips above, you’ll have no problem doing just that.
Want to learn wacky ways to use forstner bits you maybe didn’t know? Read this.
What other tips do you have for using forstner bits? Let us know in the comments below!
Follow us on Instagram @katzmosestools, on TikTok @katzmoseswoodworking, and check out my YouTube channel for more great woodworking content...
And as always, STAY SAFE IN THE SHOP!
5 comments
John C Ford
I found it a bit funny – except for #1 and #4, these are all tips I use with my brace and auger bits. Makes sense, I suppose.
I’m not a complete Neanderthal – thanks for that chart. I’ll post it next to my drill press.
I found it a bit funny – except for #1 and #4, these are all tips I use with my brace and auger bits. Makes sense, I suppose.
I’m not a complete Neanderthal – thanks for that chart. I’ll post it next to my drill press.
Phillip Roberts
My tip to avoid tearout is after centre punching the the position of the hole is to drill through with a 1.5-2mm twist drill. Then start off the hole from the frontside and drill 3/4 way through. Then turn the piece over and centre the point of the forster bit in the small hole and drill back. Even if the the holes do not quite line up, and they should, the mismatched edge in the middle of the piece can be lightly filed or sanded but is in a place where it can’t be seen. Learnt this as a kid in the 1950’s long before ‘blue tape’ 🤪
My tip to avoid tearout is after centre punching the the position of the hole is to drill through with a 1.5-2mm twist drill. Then start off the hole from the frontside and drill 3/4 way through. Then turn the piece over and centre the point of the forster bit in the small hole and drill back. Even if the the holes do not quite line up, and they should, the mismatched edge in the middle of the piece can be lightly filed or sanded but is in a place where it can’t be seen. Learnt this as a kid in the 1950’s long before ‘blue tape’ 🤪
Rob
In machine shop language, the pull out method is called “peck drilling” and is done for the same reasons, keep the heat down and clear the chips.
In machine shop language, the pull out method is called “peck drilling” and is done for the same reasons, keep the heat down and clear the chips.
David Brooks
Do you feel that any of bit lubricants on the market aid in cutting.
Do you feel that any of bit lubricants on the market aid in cutting.
Cliff Baughen
Could the list also include suggestions on the best way to keep them clean and any maintenance recommendations, please?
Could the list also include suggestions on the best way to keep them clean and any maintenance recommendations, please?