Sawing with a hand saw is easy enough. It’s getting the cut started that’s tricky.
Starting hand saw cuts right on a line is the first step to accuracy.
But while beginning cuts, saws have a tendency to jump out of position…
Or start cutting a kerf not where you intended.
So how can you ensure your hand saw cuts start right on your line every time?
Today, I’m giving you 6 simple tips for starting cuts with a hand saw — including general tips, plus a couple for crosscuts and rip cuts.
With these tricks, you’ll have no trouble starting cuts right on your line.
1. START THE WRONG WAY
The key to starting a cut is establishing a kerf. But to just go straight into sawing will probably establish a kerf in the wrong place.
Start your cuts by pushing or pulling the saw the opposite way of the cutting direction.
If you’re using Western push saws, start with a few strokes pulling the saw on your line.
If you’re using Japanese pull saws, start with a few strokes pushing the saw on your line.
This creates a super light kerf to guide your saw, and makes it easier to control.
2. PAY ATTENTION TO TOOTH SET
Almost all saws have tooth set — where the teeth angle slightly out from the body of the saw.
(The exception being flush cut saws).
To accurately saw to a line, don’t center the entire saw on the line.
Only center one row of teeth — either the left or right side depending on which is the waste side of your cut.
The opposite row of teeth from your line should extend into the waste side of your cut. That way, the outer edge of your kerf will be right on your line.
For example, if you're cutting a board where the material to the right of the line is your waste, set the left row of teeth of the saw in that line.
Remember: It’s always better to cut slightly proud than to cut too short.
3. USE YOUR THUMB AS A STOP
The thumb of your non-sawing hand is an excellent “stop” for your saw.
So if you saw with your right hand, place your left hand thumb next to your layout line.
Bump the flat blade of the saw against your thumb. Then adjust your thumb’s position until the correct row of teeth are right in the line.
Your thumb prevents you from cutting past the line and stabilizes the saw in position as you start the cut.
(Just make sure you don’t accidentally saw into your thumb).
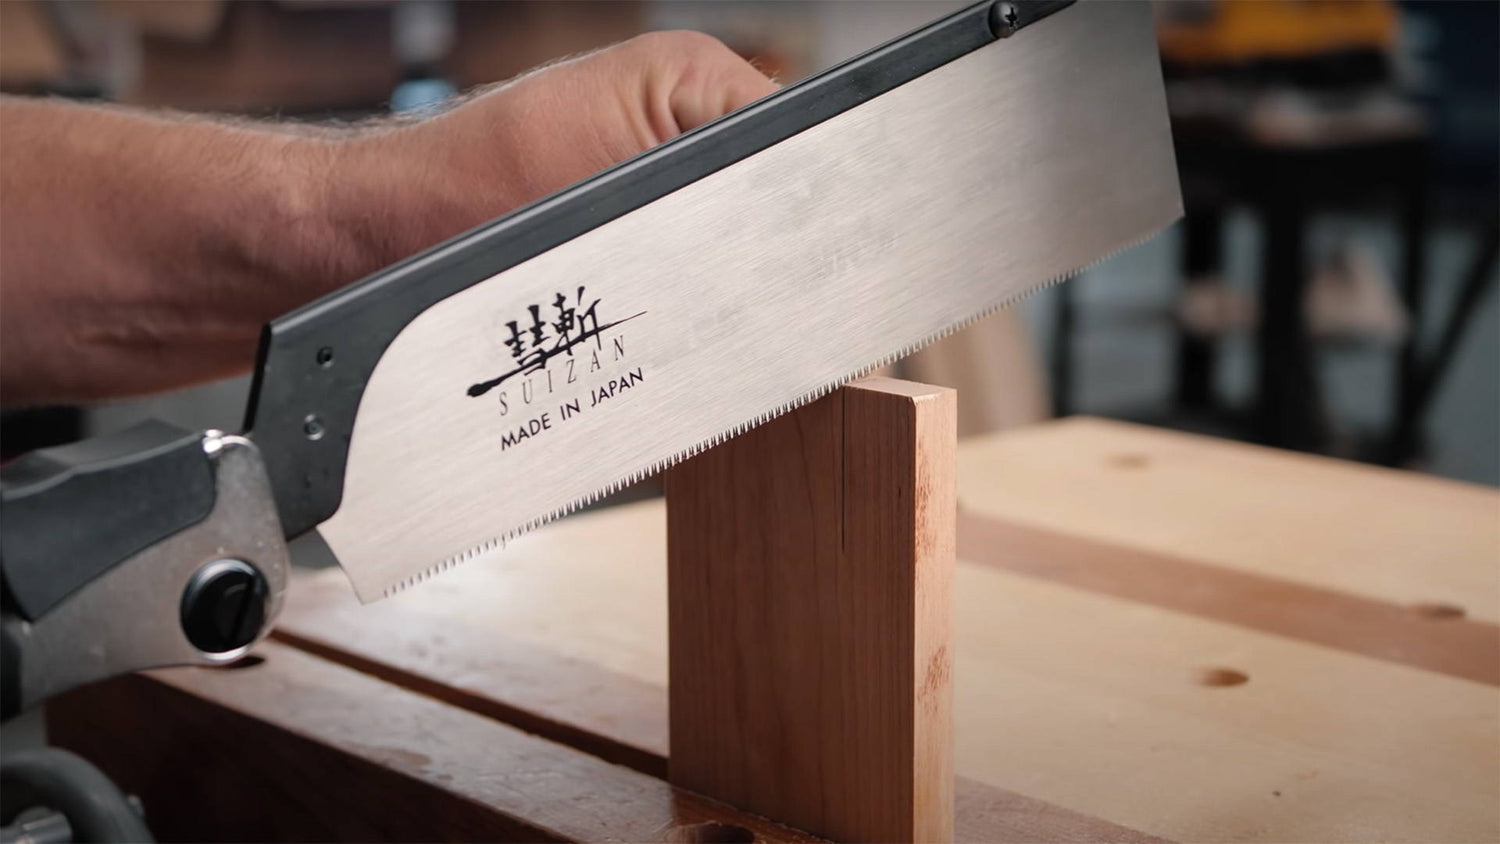
4. START AT ONE EDGE AND WORK TOWARDS THE OTHER
Trying to start cuts with all the teeth in your line is tricky. The resistance can cause the saw to jump out of position.
Instead, angle your saw so you start cutting at one end of the line.
Then as the kerf starts to get established, slowly start lowering the front of the saw as you cut.
This technique lets you “lay” the saw teeth into the line — helping prevent any jumpiness in the blade.
And you can also use your thumb to stabilize the blade as described in the tip above.
5. USE KNIFE WALLS FOR CROSSCUTS
Knife walls are an amazing way to create a solid physical reference for your saw to register in a line.
Start by marking your line with a marking knife (a pencil won’t work for this).
Then use a sharp chisel to carve a shallow groove on the waste side.
Set the chisel blade in the wood a couple millimeters away from the line on the waste side, angle the chisel at about 45°, then push it into the wood toward the line.
As long as the marking knife line is deep enough, it’ll stop the chisel and let you pop out a small bit of wood.
Continue across the entire line until there’s an established channel.
Now you can set your saw blade right in that channel and know you’re exactly in your line.
6. START RIP CUTS WITH A CROSSCUT BLADE
Ripping hand saws are especially tricky to start cuts with. With bigger and fewer teeth, the tendency to jump out of position is higher.
That’s why I actually like to start rip cuts with a crosscut saw (and why I especially love my double-sided Ryoba saw that has both a ripping and crosscut side).
Use the crosscut teeth to establish the kerf.
Then when it’s a couple millimeters deep, switch to a ripping saw for better efficiency and continue the cut.
Use these tips, and you’ll have no problem starting hand saw cuts right on your line!
Want to learn more about hand saws? Read this.
What other tips do you have for starting hand saw cuts? Let us know in the comments below!
Follow us on Instagram @katzmosestools, on TikTok @katzmoseswoodworking, and check out my YouTube channel for more great woodworking content...
And as always, STAY SAFE IN THE SHOP!


3 comments
Donald Kern
Jonathan, as always, your tips and advice are spot on! The new one for me here: start a rip with a crosscut. Makes perfect sense.
Jonathan, as always, your tips and advice are spot on! The new one for me here: start a rip with a crosscut. Makes perfect sense.
Phil
That’s exactly how my Grandfather did it when I was a kid in the 60s. He built houses and barns often with no temporary service so all the work was done by hand. He had sawhorses at knee height so he could steady the boards with his knee and use his thumb to guide the saw. He also taught me how to start on one corner to get the correct line.
That’s exactly how my Grandfather did it when I was a kid in the 60s. He built houses and barns often with no temporary service so all the work was done by hand. He had sawhorses at knee height so he could steady the boards with his knee and use his thumb to guide the saw. He also taught me how to start on one corner to get the correct line.
27Saxophone
You can also use the flat face of a dovetail jig, hand-clamped to the workpiece, to start a straight line. Anyone know where I might buy one of those?
You can also use the flat face of a dovetail jig, hand-clamped to the workpiece, to start a straight line. Anyone know where I might buy one of those?