


Ever drill a hole in a workpiece, then realize it needs to be bigger? It’s definitely a facepalm moment.
Especially if you want to keep the bigger hole centered in the same place. How can you even center a bit over negative space?
But woodworking is full of facepalm moments.
And it’s not avoiding them that makes you good — it’s knowing how to overcome them.
So today, I’m showing you 2 tricks to expand drilled holes while still keeping them centered.
These tips can save you from seemingly catastrophic mistakes… and ensure your palm stays well away from your face.
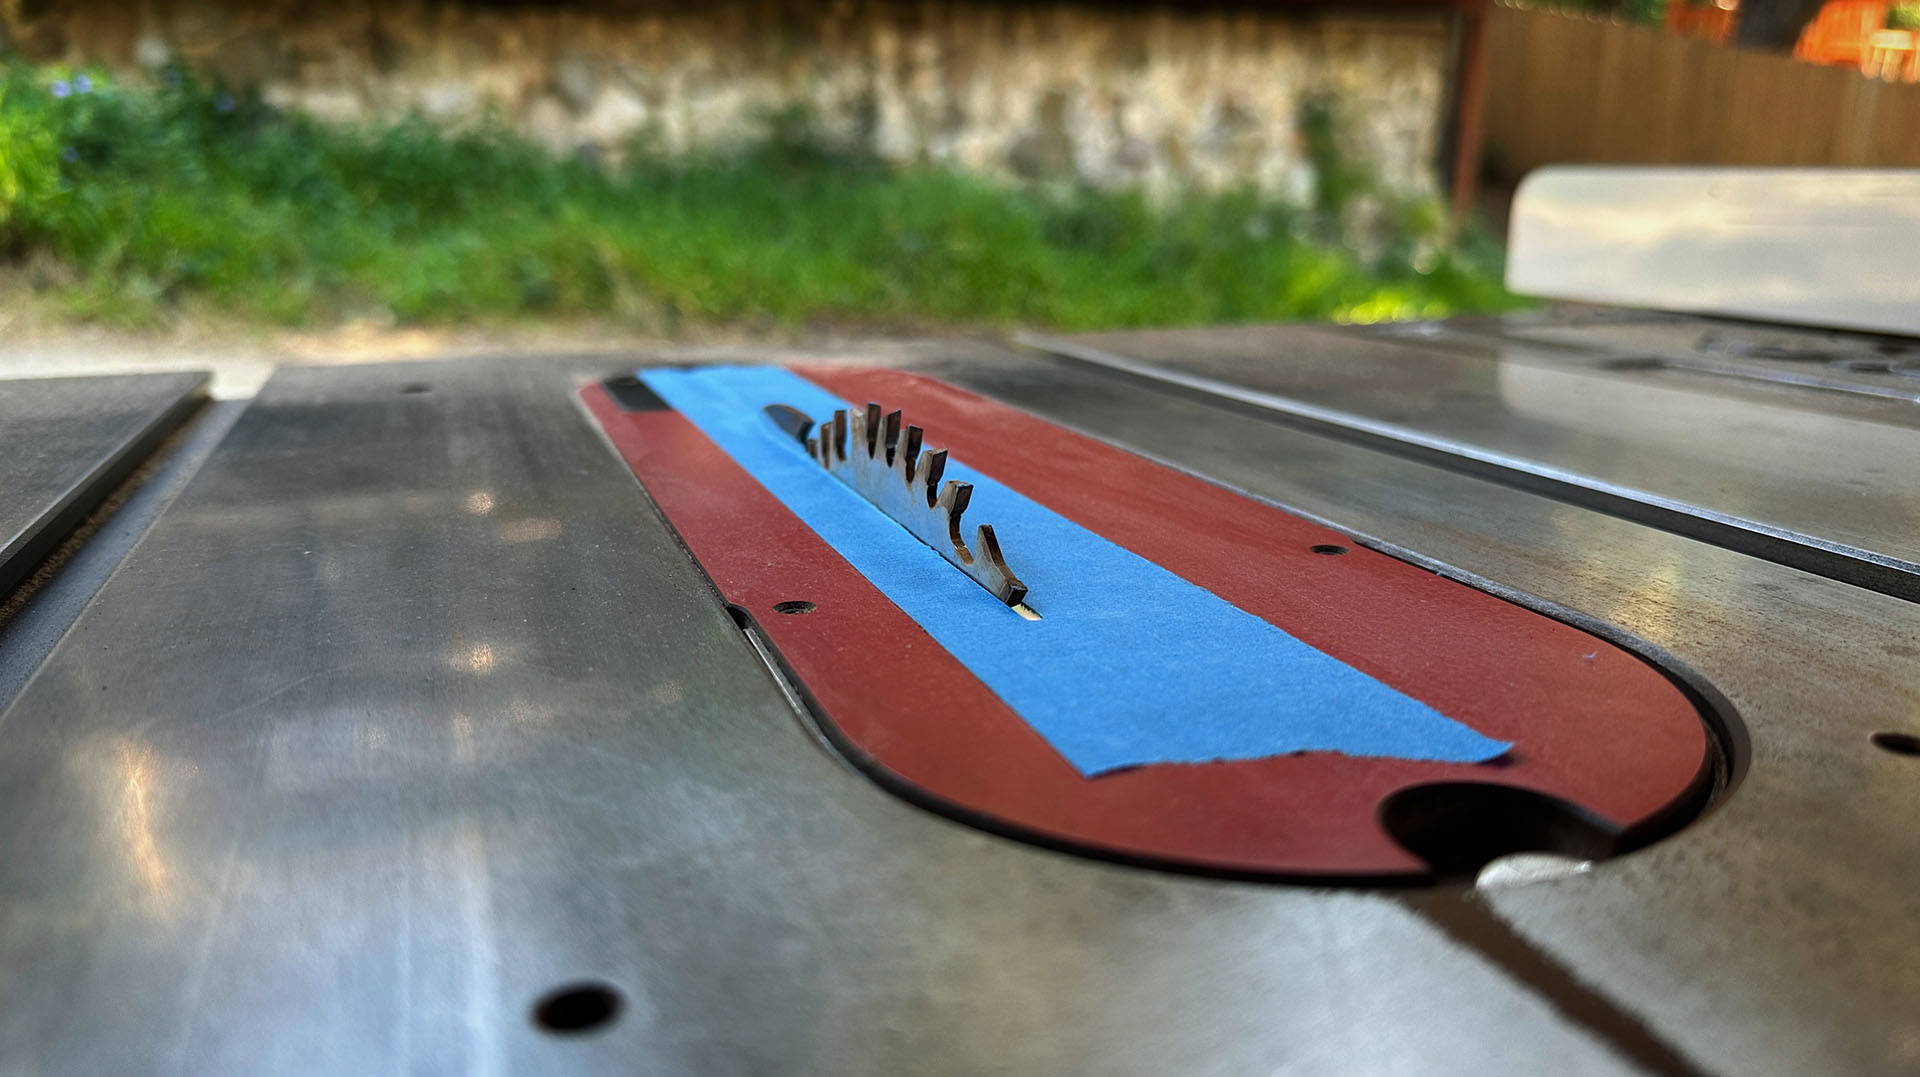
1. BLUE TAPE AND FORSTNER BITS
The first tip involves our never failing woodworking companion — blue painter’s tape.
Start by placing a strip of blue tape over one side of the hole.
Now you’ll need a bit with a centered spur that fits the diameter of that hole as closely as possible. The bit you drilled the hole with is best.
(These forstner bits we carry are ideal because of their centered spur).
Stick the bit in the opposite side of the hole from the tape. It should self center. Now carefully poke a hole in the blue tape with the spur.
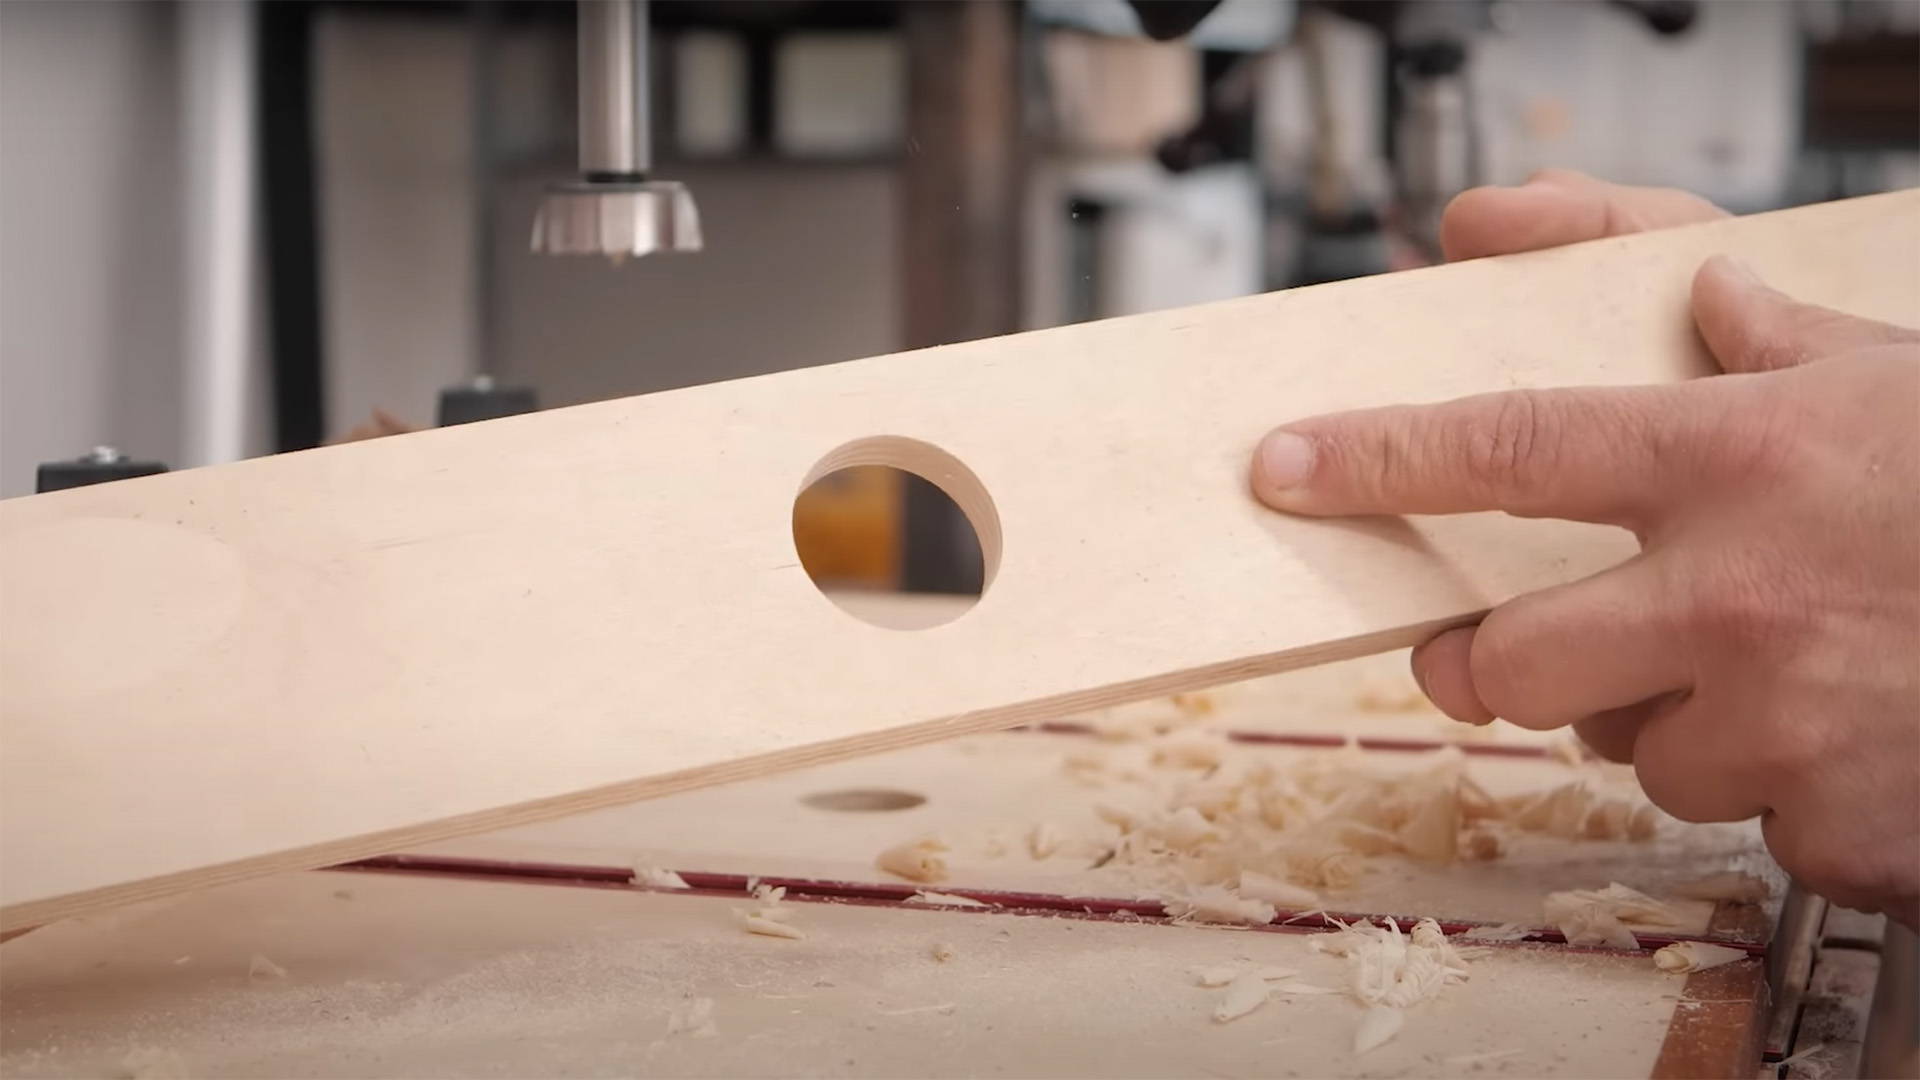
Take the workpiece and set it on your drill press with the blue tape facing up.
You can now use the hole in the blue tape to center the workpiece under your larger diameter bit.
Lower the bit without the drill press running and center the workpiece accordingly, then lock it in place with some hold-down clamps. Otherwise it’s liable to move out of position as you start the cut.
Once locked down, you’re ready to bore the larger diameter hole — still centered exactly where the original hole was.
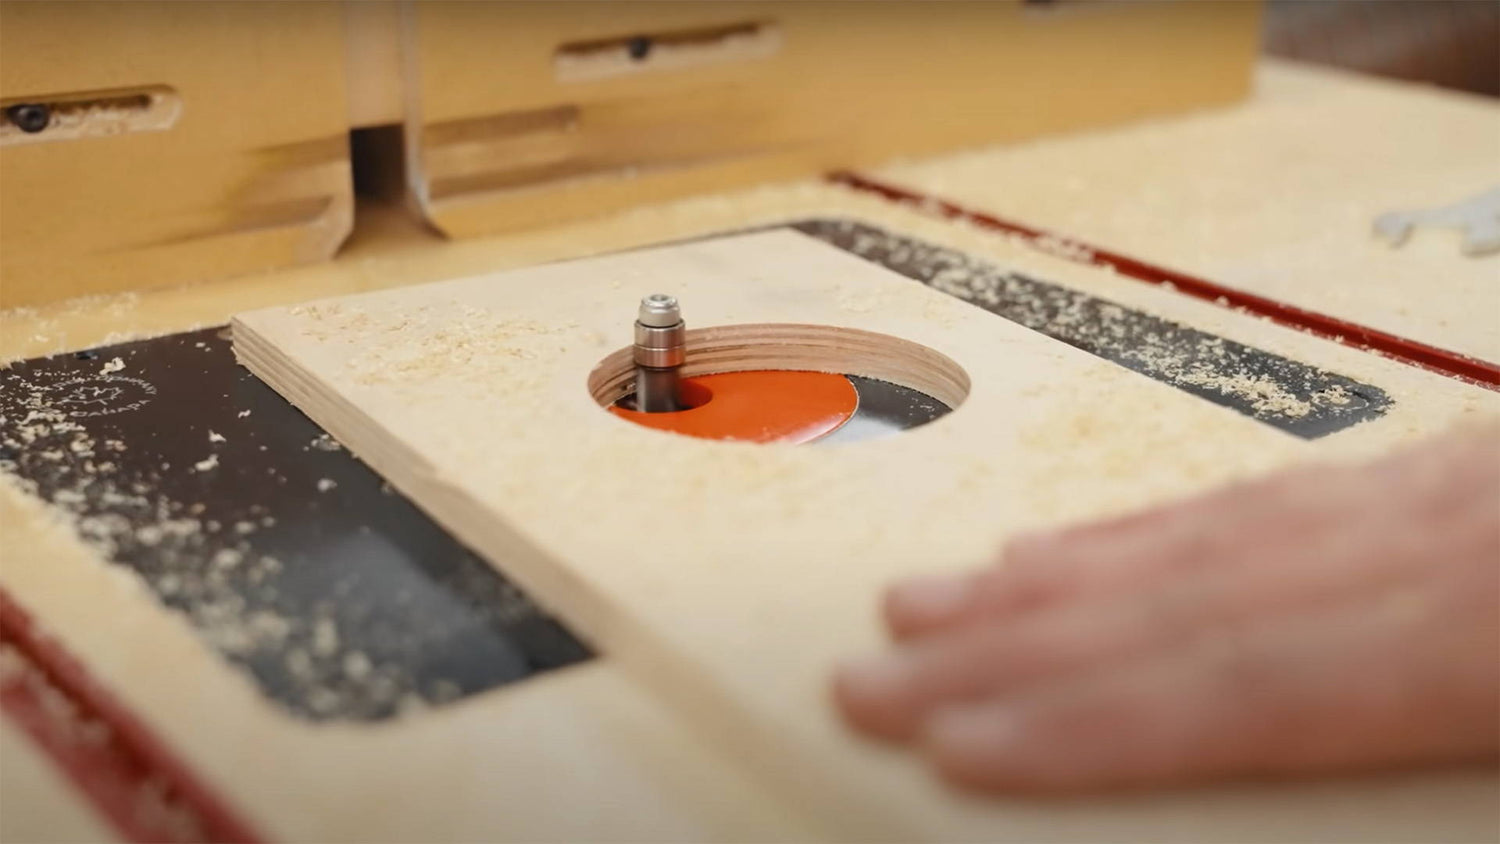
2. RABBETING AND FLUSH TRIM BITS
This second technique is actually a fantastic way to create oversized holes — but can also save you in a pinch.
You’ll need a rabbeting bit (ideally with different diameter bearing like this one) and a flush trim bit.
Start by cutting around the edge of the hole with the rabbeting bit.
Since the bearing needs to register on something, you won’t cut through the full thickness of the material.
REMEMBER: Feed direction can get confusing with “inside” cuts. With a handheld router, push the bit clockwise around the hole’s edge. On a router table, rotate the workpiece so the bit moves counterclockwise relative to the hole’s edge (here’s a couple tricks to remember).
After you’ve finished, follow up with the flush trim bit — referencing the bearing on the freshly cut rabbet.
You’ll now have an expanded and evenly edged hole. Repeat the process until you get to your desired diameter.
To expand the hole to a specific size, you’ll need to know the initial diameter of the hole and the depth of cut of the rabbeting bit.
For example, let’s say you have a 1” hole you want to expand to 1 ½” inches — and your rabbeting bit cuts a ¼” wide rabbet.
That means it’ll take two passes with the rabbeting bit (with 2 subsequent passes of the flush trim bit) to expand your hole to the desired diameter.
With these two tricks, an undersized hole is nothing to fret about. So take that palm of your face and get back to it.
Want to learn 4 other ways to cut circles and large holes? Read this.
What tricks do you have for re-drilling bigger holes? Let us know in the comments below!
Follow us on Instagram @katzmosestools, on TikTok @katzmoseswoodworking, and check out my YouTube channel for more great woodworking content...
And as always, STAY SAFE IN THE SHOP!
18 comments
Rick
I find that my too small drilled hole is between drill bit sizes I have. A reamer often takes care of the sizing quickly.
I find that my too small drilled hole is between drill bit sizes I have. A reamer often takes care of the sizing quickly.
Jim A Paschis
Here is a suggestion for holes needed beyond your biggest bit size. Select a template plywood. saw out the hole size desired then center it over the hole to be enlarged. Drill an initial hole from the edge of the template through your original piece. Route out the enlarged area as desired. I also did this using a horizonal slice through a discarded aluminum sauce pan that had the internal diameter needed as a guide to my router to cut an 8 incircle.
Here is a suggestion for holes needed beyond your biggest bit size. Select a template plywood. saw out the hole size desired then center it over the hole to be enlarged. Drill an initial hole from the edge of the template through your original piece. Route out the enlarged area as desired. I also did this using a horizonal slice through a discarded aluminum sauce pan that had the internal diameter needed as a guide to my router to cut an 8 incircle.
Dan
I agree with Wayne. Instead of using the blue tape on one side and then turning the work piece over and trying to center the larger bit with the tape, just put the original size bit in the hole, clamp the work piece to the drill table, then change to the larger size Forstner bit, and drill it out to the size needed. You’ll get as close, if not closer, to the center of the original hole than you would trying to center the spur up on a hole in a piece of tape.
I enjoy reading all your tips as well as all the reader input. Thank you.
Kurt Dietrich
I usually just plug the hole with a dowel and the re-drill it. I know it takes longer, but when I make that mistake, I’d rather cool off before proceeding anyway.
I usually just plug the hole with a dowel and the re-drill it. I know it takes longer, but when I make that mistake, I’d rather cool off before proceeding anyway.
Michael Tubman
Have to agree with Jerry and Peter on this one. A single pas with a¼ bit will take off ¼ on both sides so only one pass….. Unless you know a near truck for making a hole smaller! :-)
Mike
Have to agree with Jerry and Peter on this one. A single pas with a¼ bit will take off ¼ on both sides so only one pass….. Unless you know a near truck for making a hole smaller! :-)
Mike
Glen Freyermuth
Just remembered a third method that I’ve used.
3) Using the larger hole saw, drill a hole thru a scrap board. Then tape or hot glue that board over the original board, visually centering it over the original hole. Then drill the larger hole saw thru the scrap board, using it as a guide, and down thru the original board. Note that the pilot drill will not be an assist, so you must be sure to tape, hot glue or clamp both boards firmly enough to prevent the inevitable chatter from the larger hole saw. Enjoy!
Glen Freyermuth
I agree with Ben, and have done both methods to which he referred.
1) Double hole saw – put the larger saw on the spindle first, then the smaller saw (the originally used saw) over (and inside) the smaller. That way, the smaller saw leads and guides the larger (new) saw to cut a larger concentric hole. This will not work if the needed larger hole is only slightly larger, because the original smaller saw may not fit inside the new larger saw. OR —
2) If the difference is minimal, as noted above, then add another thin scrap backer board (1/4" ply, or masonite work perfectly) under the existing hole, using double-sided tape (or hot glue). Run the original hole saw thru again, just until the pilot drill gets thru the backer board. Then re-drill with the larger hole saw. If you cannot extend your pilot drill out far enough to reach the new pilot hole below, then flip the still attached boards over and drill the new hole from the opposite side. As always, to prevent tearout on the original top surface (now on the bottom) be sure to include a scrap board below.
This all may sound complicated, but it’s very simple. Happy woodworking!
Brian R
As several others have pointed out, that there is only one pass is required to enlarge a hole from 1" to 1 1/2" with a quarter inch rabbeting bit. you will increase the radius by 1/4" thus making the diameter increase of 1/2". In hardwoods I have used a 1/8" rabbet bit and two passes to increase a hole size by 1/2".
As several others have pointed out, that there is only one pass is required to enlarge a hole from 1" to 1 1/2" with a quarter inch rabbeting bit. you will increase the radius by 1/4" thus making the diameter increase of 1/2". In hardwoods I have used a 1/8" rabbet bit and two passes to increase a hole size by 1/2".
Dave
a method I have had to use (to my embarrassment) is to cut a block of scrap that the corners are the same size as the existing diameter of the circle, press it in, and drill the new, larger hole. This also works if the center is not where you need it.
thanks for the tips!! Keep them coming!
a method I have had to use (to my embarrassment) is to cut a block of scrap that the corners are the same size as the existing diameter of the circle, press it in, and drill the new, larger hole. This also works if the center is not where you need it.
thanks for the tips!! Keep them coming!
David
I have used the rabbeting bit method to enlarge a hole before. I was making a mounting bracket for a fire extinguisher. The hole I needed was larger than my largest hole saw. So I got close with the hole saw and opened up the diameter with a rabbeting bit and a flush trim bit. It worked great and actually cleaned up the hole left by the hole saw.
I have used the rabbeting bit method to enlarge a hole before. I was making a mounting bracket for a fire extinguisher. The hole I needed was larger than my largest hole saw. So I got close with the hole saw and opened up the diameter with a rabbeting bit and a flush trim bit. It worked great and actually cleaned up the hole left by the hole saw.
David
@Jerry – The reason it takes two passes is that you really don’t want to hog out a quarter inch all at once. Two 1/8-inch passes are easier on your router and router bits.
@Jerry – The reason it takes two passes is that you really don’t want to hog out a quarter inch all at once. Two 1/8-inch passes are easier on your router and router bits.
Wayne
Put the workpiece back on the drill press table. Take the drill bit that made the original hole and use it to position the workpiece. Clamp the workpiece. Put in a bigger hole drilling bit. Drill again with the workpiece held in place.
Put the workpiece back on the drill press table. Take the drill bit that made the original hole and use it to position the workpiece. Clamp the workpiece. Put in a bigger hole drilling bit. Drill again with the workpiece held in place.
Jerry
I’m I thinking two passes to increase hole dia. To 1 1/2 is wrong. In a hole, one pass is 1/4” on each side of a radius, equaling 1/2”. Am I crazy questioning an expert here?
I’m I thinking two passes to increase hole dia. To 1 1/2 is wrong. In a hole, one pass is 1/4” on each side of a radius, equaling 1/2”. Am I crazy questioning an expert here?
Anonymous
One way to leave an out if you cut a hole too small is to clamp the workpiece to the drill press table before drilling. After drilling, confirm that the diameter is correct. If it is not correct, you are still centered because of clamping the work. It takes a little more effort to do the clamping every time you drill, but you have no gymnastics after drilling the wrong-sized hole.
One way to leave an out if you cut a hole too small is to clamp the workpiece to the drill press table before drilling. After drilling, confirm that the diameter is correct. If it is not correct, you are still centered because of clamping the work. It takes a little more effort to do the clamping every time you drill, but you have no gymnastics after drilling the wrong-sized hole.
Ben
Peter is right ✅️
As for method: I have a set of Spyder hole saws that are just OK at boring holes, but shine in situations like these. You can stack the cups onto the arbor so that the small diameter is now your guide and the large diameter is set back enough to get the hole aligned.
Now, what to do about making holes that are too large…?
Veikko
For smaller holes I just push a wood peg in the hole and redrill with correct size. With bigger holes I have used that router trick or made a template with correct size hole and used template bit.
For smaller holes I just push a wood peg in the hole and redrill with correct size. With bigger holes I have used that router trick or made a template with correct size hole and used template bit.
Frank Dutton
Hi JONATHAN,
There is another method. Place a piece of wood and double sided tape over the hole. Make its centre with the tool to drill the existing hole, like your forstner bit method. Then drill the new hole from the additional timber side if the drill point can’t reach the bottom of the existing hole. Of it can as with a hole saw, drill from the existing hole side.
Peter
I think it is only going to take one pass of rabbeting bit to go from 1to 11/2 inches as the 1/4 inch is on both sides of the hole and that makes ½”.
I think it is only going to take one pass of rabbeting bit to go from 1to 11/2 inches as the 1/4 inch is on both sides of the hole and that makes ½”.