


If you need to cut thin strips of wood, a table saw is your best friend… once you’ve made a small modification.
You see, the insert plate that surrounds your table saw blade leaves a gap all the way around the blade.
Most of the time, this isn’t an issue.
But when you’re cutting thin strips — the thin offcuts are liable to fall into that gap.
And if they do, they can either get mangled… or fly back at you with the force of a bull whip.
This is solved by a zero clearance insert that leaves no gap around the blade.
Luckily, making a quick and dirty zero clearance “insert” is easy — and today, I’m going to show you how.
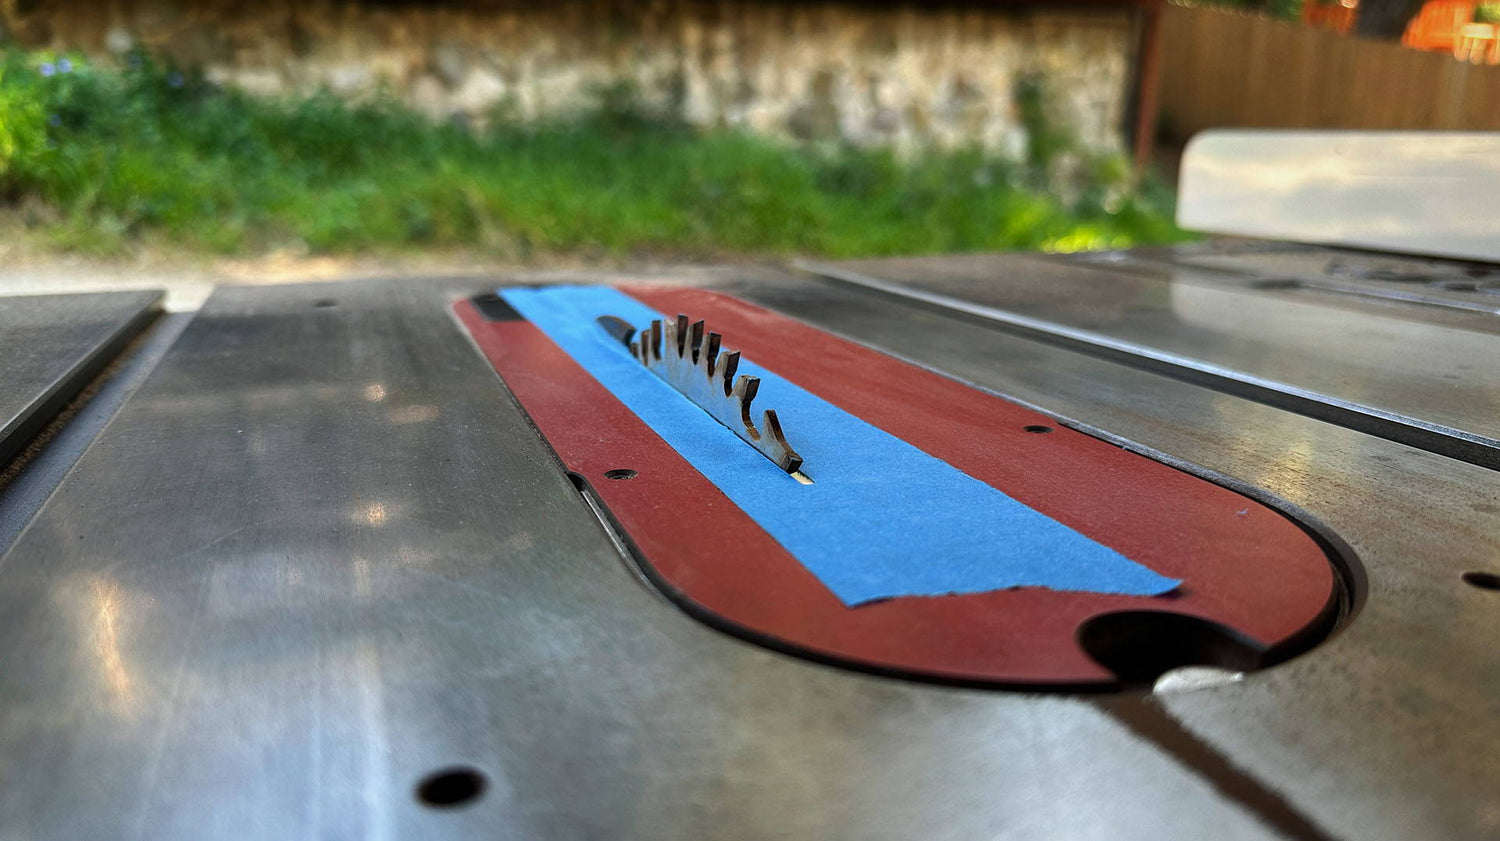
1. THE ULTRA QUICK AND DIRTY: BLUE TAPE
This trick is as easy as it gets.
Lower your table saw blade all the way down below the table. Then take a strip of blue tape and lay it over the gap of your regular insert plate.
Make an incision in the tape behind the blade to let the riving knife pass through
Now turn on the saw and slowly raise the blade to the necessary height.
(If for some reason the tape is getting ripped out of position, you can also slice the tape with a marking knife to let the blade pass through).
The blue tape will now completely cover any gaps — meaning none of your thin strips can fall in.
Yes, it’s a bit janky. But it works… and it’s ridiculously quick.
2. THE SLIGHTLY QUICK AND DIRTY: AUXILIARY TABLE
Want something a little sturdier? Here’s the method for you.
Cut a panel to the rough dimensions of your table saw top. It can be plywood, MDF, or anything of the like — just make sure it’s flat.
Lower your table saw blade all the way down then set the board on top.
You’ll have to find a way to fasten the board steady onto the table saw. This could be with regular clamps, or some MagSwitch MagJigs for more versatility.
Once it’s secured, turn on the table saw and slowly raise the blade to the necessary height.
You’ve now got an extra sturdy zero clearance table top that you can even drive screws into for more complex jig setups.
(Pro tip: Rub down the top of the board with paste wax to ensure your workpieces slide smoothly across it).
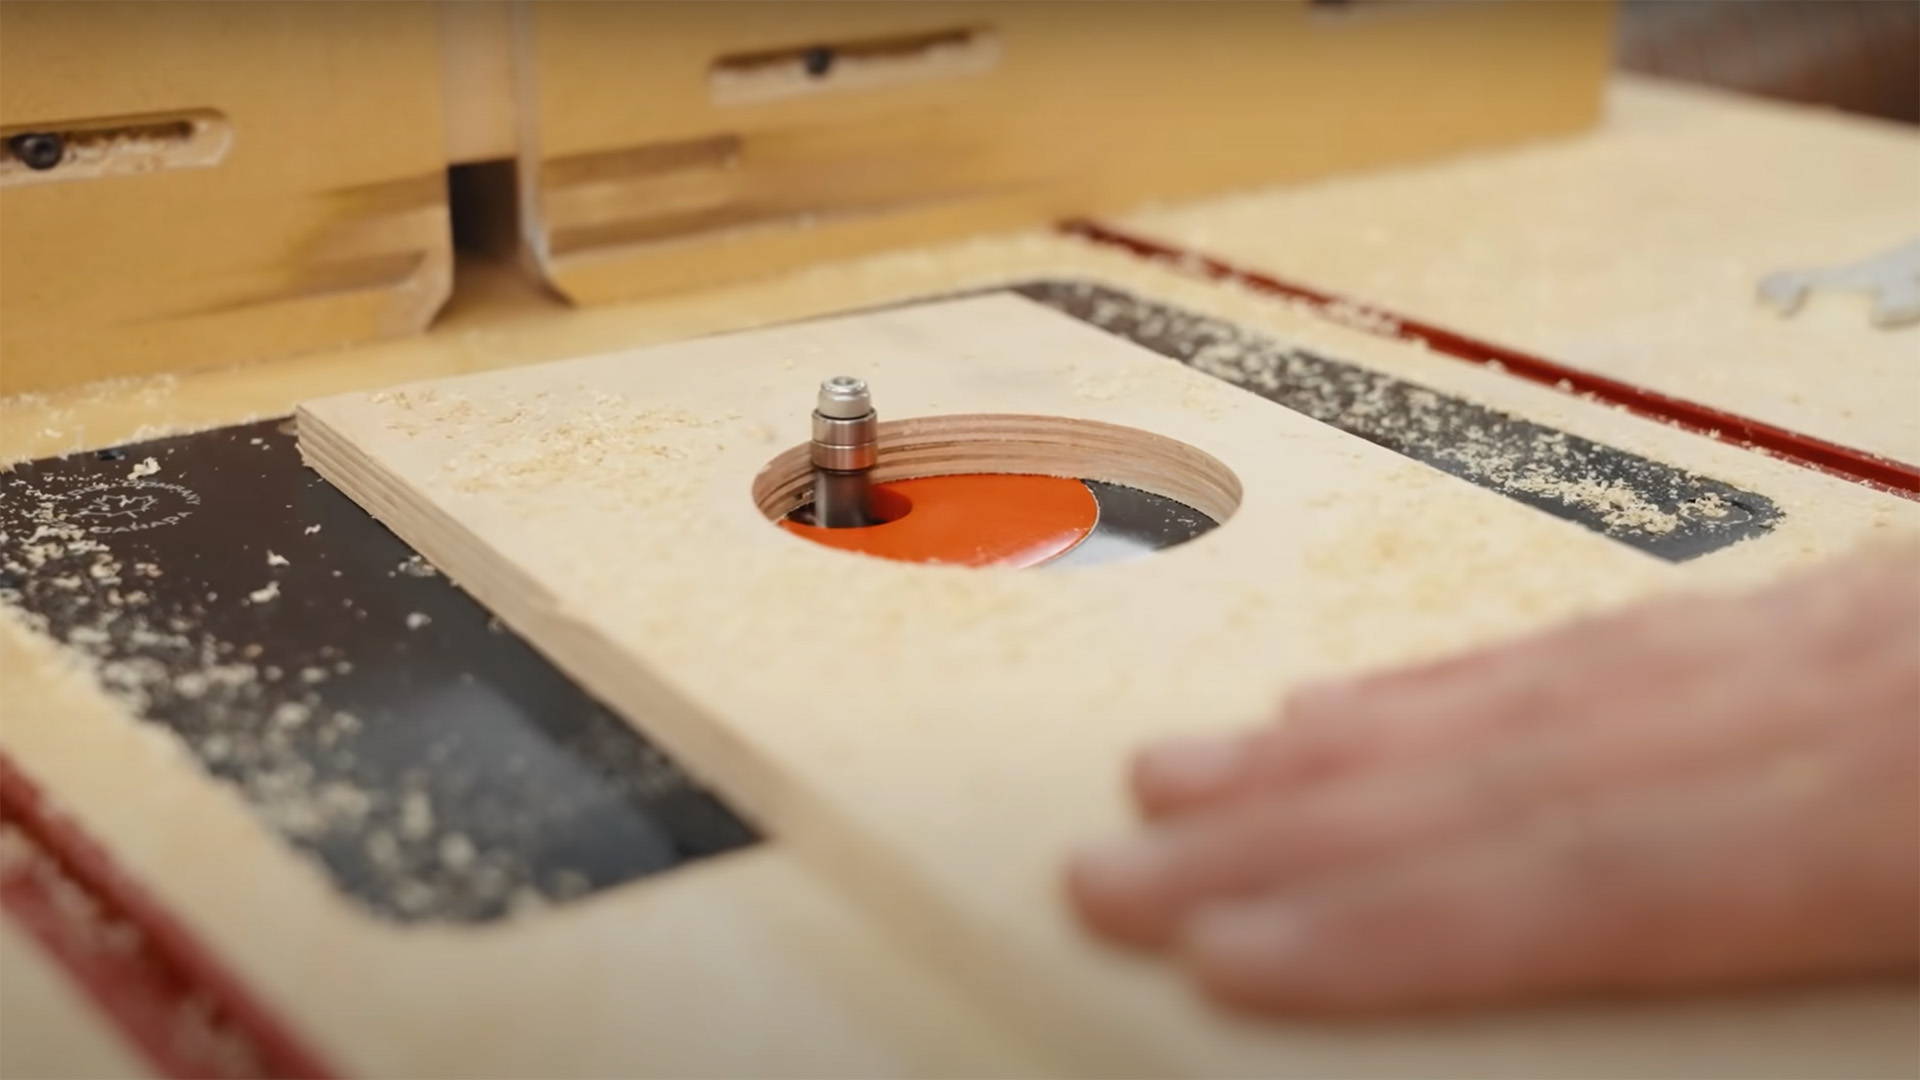
3. THE NEITHER QUICK NOR DIRTY: CUSTOM INSERT PLATE
Are you the type of woodworker who likes to do everything the right way?
First off, pick your battles.
But honestly, making a custom insert plate isn’t too difficult.
Use some double stick tape to attach your table saw's regular insert plate to a piece of plywood or MDF. Cut it roughly to shape on a bandsaw, then finish off with a flush trim bit in your router to get the dimensions exact.
(Read more about template routing here).
The tricky part is figuring out how to get the plate to lock into position — but embedding a couple magnets in the bottom might do the trick.
Once it’s secure, again slowly raise the blade with the table saw running — and you’ve got a perfectly fitted zero insert plate.
Want to learn more about cutting and using thin strips? Read this.
What’s your go-to zero clearance insert strategy? Let us know in the comments below!
Follow us on Instagram @katzmosestools, on TikTok @katzmoseswoodworking, and check out my YouTube channel for more great woodworking content...
And as always, STAY SAFE IN THE SHOP!

10 comments
John John Brown
That hot melt glue tip comes from here and I have seen it elsewhere.
https://www.woodworkweb.com/woodworking-videos-1/woodworking-jigs-projects/680-making-zero-clearance-table-saw-throat-plates.html
That hot melt glue tip comes from here and I have seen it elsewhere.
https://www.woodworkweb.com/woodworking-videos-1/woodworking-jigs-projects/680-making-zero-clearance-table-saw-throat-plates.html
John John Brown
And you can use hot melt glue on the height tabs of the throat plate to get the proper height and level with the top. Just put a dab of hot melt so the plate is above the surface, insert the plate, and press down. The other thing you can us is Bondo.
And you can use hot melt glue on the height tabs of the throat plate to get the proper height and level with the top. Just put a dab of hot melt so the plate is above the surface, insert the plate, and press down. The other thing you can us is Bondo.
Carl
One reminder when raising the saw blade through an MDF or plywood custom throat plate. I position my fence sufficiently over the plate to hold it down while bringing the blade up through. Leave enough room so you don’t hit the fence. All that being said, I bought an Infinity Tools plate with replaceable inserts for my SawStop. I have different inserts for rip, combination and dado blades. Works great. Not as cheap as making several but I’d rather be building things.
One reminder when raising the saw blade through an MDF or plywood custom throat plate. I position my fence sufficiently over the plate to hold it down while bringing the blade up through. Leave enough room so you don’t hit the fence. All that being said, I bought an Infinity Tools plate with replaceable inserts for my SawStop. I have different inserts for rip, combination and dado blades. Works great. Not as cheap as making several but I’d rather be building things.
Michael
You can also 3D print precise inserts as well using standard PLA. There are plenty of examples on the Thangs and Printables website to get you started.
You can also 3D print precise inserts as well using standard PLA. There are plenty of examples on the Thangs and Printables website to get you started.
Anonymous
I’m 65 and dabble in ‘around the home woodworking" – jack of all trades – master of none – I saw this tip several decades ago (not being mean!) and have used it successfully – until I found out about UHMW tape!!!! Fantastic stuff. I have an Old Delta contractor saw – and basically covered an extra throat plate with 3" UMHW tape and made it my zero clearance plate – about 10 mins work to clean the plate – apply the tape – drill out the little adjustment holes – an viola! Just thought I would share – buy an extra plate and set it up for when you need z-clearance! your can get it on Amazon – I’m on only my second roll over the past 25+ years – lasts forever! -
Blessings!
www.amazon.com/APT-Ultra-high-Polyethylene-Tape-Protection/dp/ B08CFYMM25?th=1
John Ford
I have an older (i.e., no longer supported) Craftsman jobsite saw with an oddly designed throat plate. Fortunately, someone developed a 3D model and put that and the corresponding STL file on-line.
I have an older (i.e., no longer supported) Craftsman jobsite saw with an oddly designed throat plate. Fortunately, someone developed a 3D model and put that and the corresponding STL file on-line.
Terrance Eby
thank for information.
thank for information.
Mike
I made a few zero clearance fences from some plywood leftovers I had after building a shop cart from it. I would have to go back and measure it, but it was exactly the same thickness as the stock insert. I cut them out on the bandsaw (never thought to use a pattern bit, just cut really carefully) and then marked the screw hole at the front and cut a notch at the back for the hold-down at that end for a 1/4" plywood shim. A bit of glue and they were done and they work like a charm. Now, if I could remember to put the right ones in when I use the dado head …
I made a few zero clearance fences from some plywood leftovers I had after building a shop cart from it. I would have to go back and measure it, but it was exactly the same thickness as the stock insert. I cut them out on the bandsaw (never thought to use a pattern bit, just cut really carefully) and then marked the screw hole at the front and cut a notch at the back for the hold-down at that end for a 1/4" plywood shim. A bit of glue and they were done and they work like a charm. Now, if I could remember to put the right ones in when I use the dado head …
David Golton
Re the woodwhisper’s tip. This is something I do periodically with my MFT table top of I’ve any unused mixed epoxy from other projects, I usually fill any track lines I’ve put in it. Just takes a few mins to sand down any over spills.
It’s particularly good if like be you forget to alter the depth of cut and end up cutting straight through it !!
Marshall Murrell
Credit the Wood Whisperer. He suggested repairing the slot on your cross-cut sled by filling it with epoxy and then re-cutting the slot. That would probably work on your stock throat plate as well, although I haven’t tried it. I just have a Bosch job-site saw, but I purchased a zero clearance throat plate for it. I just switch back to the original if I need to make a bevel cut or use my dado stack. I have used the tape method on my miter saw, however, and it worked well for quite some time. It did have to be replaced eventually.
Credit the Wood Whisperer. He suggested repairing the slot on your cross-cut sled by filling it with epoxy and then re-cutting the slot. That would probably work on your stock throat plate as well, although I haven’t tried it. I just have a Bosch job-site saw, but I purchased a zero clearance throat plate for it. I just switch back to the original if I need to make a bevel cut or use my dado stack. I have used the tape method on my miter saw, however, and it worked well for quite some time. It did have to be replaced eventually.