


Beautiful, durable, and easy to use.
No, that’s not what it says on my Tinder profile.
That's what I look for in a finish — and why shellac is my go-to for most projects.
Shellac creates a gorgeous matte finish like oil, but is way more durable.
Best of all, it’s super forgiving and simple to work with.
Where some finishes require waiting a full day between coats and sanding, you can use shellac to finish an entire project in less than an hour.
I can’t recommend it enough. So today, I’m telling you ALL about shellac…
Including when to use it, how to apply it, and the process for making your own.
WHAT IS SHELLAC?
Shellac is one of the oldest wood finishes in furniture making, going back hundreds of years.
It’s an all-natural combination of ethyl alcohol and shellac flakes — which are processed from the secretion of Lac insects found around India and Pakistan.
Shellac is a film finish. That means it builds up a thin protective layer over wood, a lot like lacquer or polyurethane.
The first layer will penetrate wood a bit, but it’s really the subsequent layers that protect it.
You’ll find different types of shellac flakes for sale, varying in color and whether they’re de-waxed or not.
The colors usually range from blonde (the lightest) to garnette (the darkest).
Blonde shellac goes on super clear without changing the color of wood much (it’s my most used). The darker colors won’t recolor wood, but just give it a richer or warmer tone.
I also recommend sticking with dewaxed flakes.
If the natural occurring waxes aren’t removed, you won’t be able to put other finishes over it — which is one of the big advantages of shellac.
FUN SHELLAC FACTS
- The color of shellac flakes is determined by the type of tree the lac insects suck the sap from
- It takes tens of thousands of lac insects to make just 1 lb of shellac flakes
- Shellac is often used as a glaze for foods like candies, gum, and coffee beans
PROS AND CONS OF SHELLAC FINISHES
Shellac is my go-to finish — but it’s not the best choice for every project.
Think about how your project will be used, and use the points below to figure out whether shellac is the right option.
PROS OF SHELLAC
- Easy to Apply: As long as your proportions of shellac flakes to alcohol is right, application only takes a few passes. You can apply it with rags, brushes, or even as a spray.
- Fast Drying: Shellac dries in minutes (if not seconds), so you can build up all your layers and be done with finishing super quick.
- Forgiving: If something gets messed up, you can reset by rubbing with pure ethyl alcohol. It takes off the finish and lets you start over.
- Solid Protection for Low-Use Builds: For decorative or low-use builds, a good shellac finish can last decades, and is easy to reapply.
- Beautiful and Fully Customizable: Shellac makes wood pop and feel silky smooth, without the plasticy feel you sometimes get with lacquer or polyurethane. Fewer layers create a matte or satin finish (like oil), and more layers can turn wood surfaces into mirrors (i.e. French Polish).
- Easy to Use with Other Finishes: Shellac can basically go under or over any other finish. Use it to add more protection over oil finishes, or as a first layer under lacquer or polyurethane.
- Relatively Inexpensive: You can buy a pound of shellac flakes for $30 or $40 — which can last you a really long time, depending on your use.
- Non-Toxic once Dried: Since shellac flakes are all natural, the finish is non-toxic as soon as the alcohol evaporates. However, I don’t recommend it for cutting boards or anything that’ll get wet. For those projects, use this.
CONS OF SHELLAC
- Not Ultra-Durable: Shellac is definitely durable, but it’s more susceptible to damage than lacquer, polyurethane, or epoxy finishes. For super high-use projects, shellac might not be up to the task.
- Not Heat Resistant: Concentrated heat can damage the finish — whether it’s a cup of hot coffee or unrelenting sunlight.
- Not Waterproof: If you set something wet on shellac, it can end up leaving a white stain — though it’s pretty easy to fix with ethyl alcohol and more finish.
- Shelf Life: Shellac flakes have a shelf life of around 2-3 years, and the liquid form less than a year. Not a big deal, but good to know. Keep it stored in a cool, dry place.
To sum up: Shellac is great for low to medium-use projects — say picture frames, decorative boxes, and the like.
But for pieces that’ll be used and abused, like dining tables, it’s best to go with either lacquer or polyurethane (or epoxy if it needs to survive the apocalypse — I’ve heard it’s coming soon).
If you want to learn how to apply lacquer and polyurethane finishes, check out this video.
HOW TO MAKE YOUR OWN SHELLAC
Before I explain how to mix your own shellac — let’s consider the why.
You can buy premixed shellac at any hardware store. And the stuff can produce a really nice finish (though you’ll still want to cut it with ethyl alcohol).
But I prefer making my own.
For one, homemade shellac doesn’t have any additives. It’s literally just the flakes dissolved in ethyl alcohol, which produces a clearer finish.
I find it creates a higher quality look and feel, and you have a lot more control over the consistency.
Plus, it’s dead simple to make. Those are my thoughts. But try out both and find what works best for you.
To make your own shellac, you’ll need shellac flakes, ethyl alcohol, and a jar.
Denatured alcohol is the solvent most people use. It’s the type of alcohol you drink — with poison added so you can’t drink it.
Some people also use Everclear, which is a super high-proof grain alcohol.
A NOTE ON DENATURED ALCOHOL:
I went to the hardware store recently to buy denatured alcohol, but they didn’t have any. I tried another. Also no.
I was pretty baffled — and then learned it’s now illegal to sell denatured alcohol in California…sort of?
It’s confusing, because a friend (definitely not me) was able to order denatured alcohol online to their home in California.
By the looks of it, a lot of states have banned it. So what can the law-abiding woodworker do?
First, know what you’re looking for. You want the highest grade ethyl alcohol (95+%) you can find.
DO NOT use methanol. That stuff is ultra toxic. Isopropyl alcohol can work (as long as it’s 95+% pure), but it’s also pretty toxic.
If you can’t get denatured alcohol, your best bet is a super high proof liquor. Everclear 190 proof is 95% ethyl alcohol and is a great solvent for shellac — but alas, it’s also not available in California.
You’re going to start by making a “1 pound cut” of shellac. Simply put, a 1:1 ratio of flakes to ethyl alcohol.
You can measure it out if you like, but here’s a quick workaround.
Pour the shellac flakes into the jar about ¾ of the way up. Then pour in the ethyl alcohol so it fills in to the top of the shellac flakes.
Give the mix a stir and close the lid.
The flakes should dissolve within 24 hours. Give it a little shake here and there to keep a gelatinous mass from forming at the bottom of the jar.
That’s all it takes to make your own shellac.
But don’t go rubbing it on furniture just yet.
This is just your base mix. You’ll want to cut it with more ethyl alcohol and thin for use.
HOW TO APPLY A SHELLAC FINISH
There’s a lot of ways to do a shellac finish — so I’ll just tell you the method that works for me.
Brushes, rags, and spray all work. But I find rags are the easiest to use (and you can just store them in your jar of 1:1 mix — they won’t spontaneously combust).
Assuming you’ve already done your final sanding of 180-240 grit, here’s the process.
1. MIX A 1:4 CUT OF LIQUID SHELLAC
Use another jar to mix a 1:4 cut of shellac to ethyl alcohol. Add 1 part of your 1:1 mix, and 3 parts alcohol.
It doesn’t need to be perfect — just close enough. If it’s going on too tacky, add more alcohol. Too thin, add more of the 1:1 mix.
2. WIPE ON THE FIRST LAYER
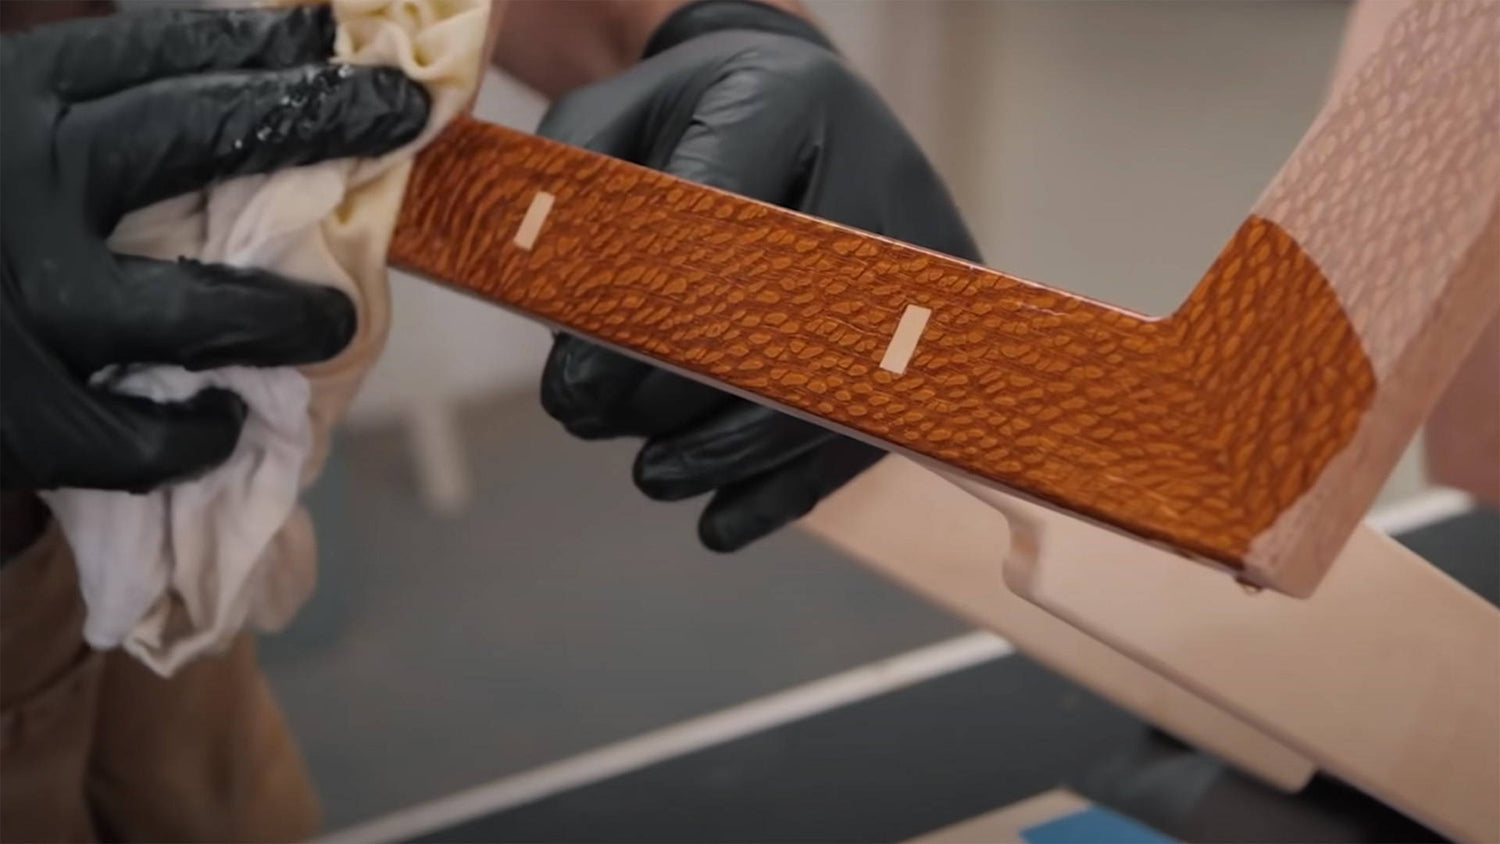
Saturate a rag in the 1:4 cut, give it a light squeeze, then wipe onto the wood.
You don’t need to worry too much about how you apply this first layer. It’s ok to go back and forth a bit to fully cover the surface.
If it sort of clumps up in one area, buff it out with the rag. Shellac is self-wetting (like lacquer) so it’ll settle itself out.
Now just let it dry. This takes only a minute or two (if not seconds). You can tell the coat’s dry once the sheen disappears.
3. DO A LIGHT SCUFF SANDING
Once the first coat is dry, hit it with some high grit sandpaper (320 or 400) by hand.
This will knock down any grain that was raised by the first coat.
TO RAISE OR NOT TO RAISE (THE GRAIN)?
Some people say you should wipe down projects with water before applying finish to raise the grain — and I fully disagree.
Your first coat of finish is going to raise the grain anyway, and you’ll sand it down — so why raise the grain twice?
And why add moisture to a project that could potentially warp boards out of shape?
Thanks for coming to my TED Talk.
4. APPLY A LIGHT SECOND LAYER
With the same 1:4 cut, apply a less aggressive second layer of shellac.
Avoid wiping back and forth over the board. Instead, do full passes from one side to the other, only slightly overlapping with each pass.
Back off and let it dry.
5. ADD A THINNER THIRD LAYER
Pour more ethyl alcohol into your 1:4 mix to make it around 1:8.
Dip in the rag, and make light, successive passes over the board.
Don’t rub back and forth. If it starts to tack up, just back off. You can alway hit it with pure ethyl alcohol to start over.
Once it dries, you’re good.
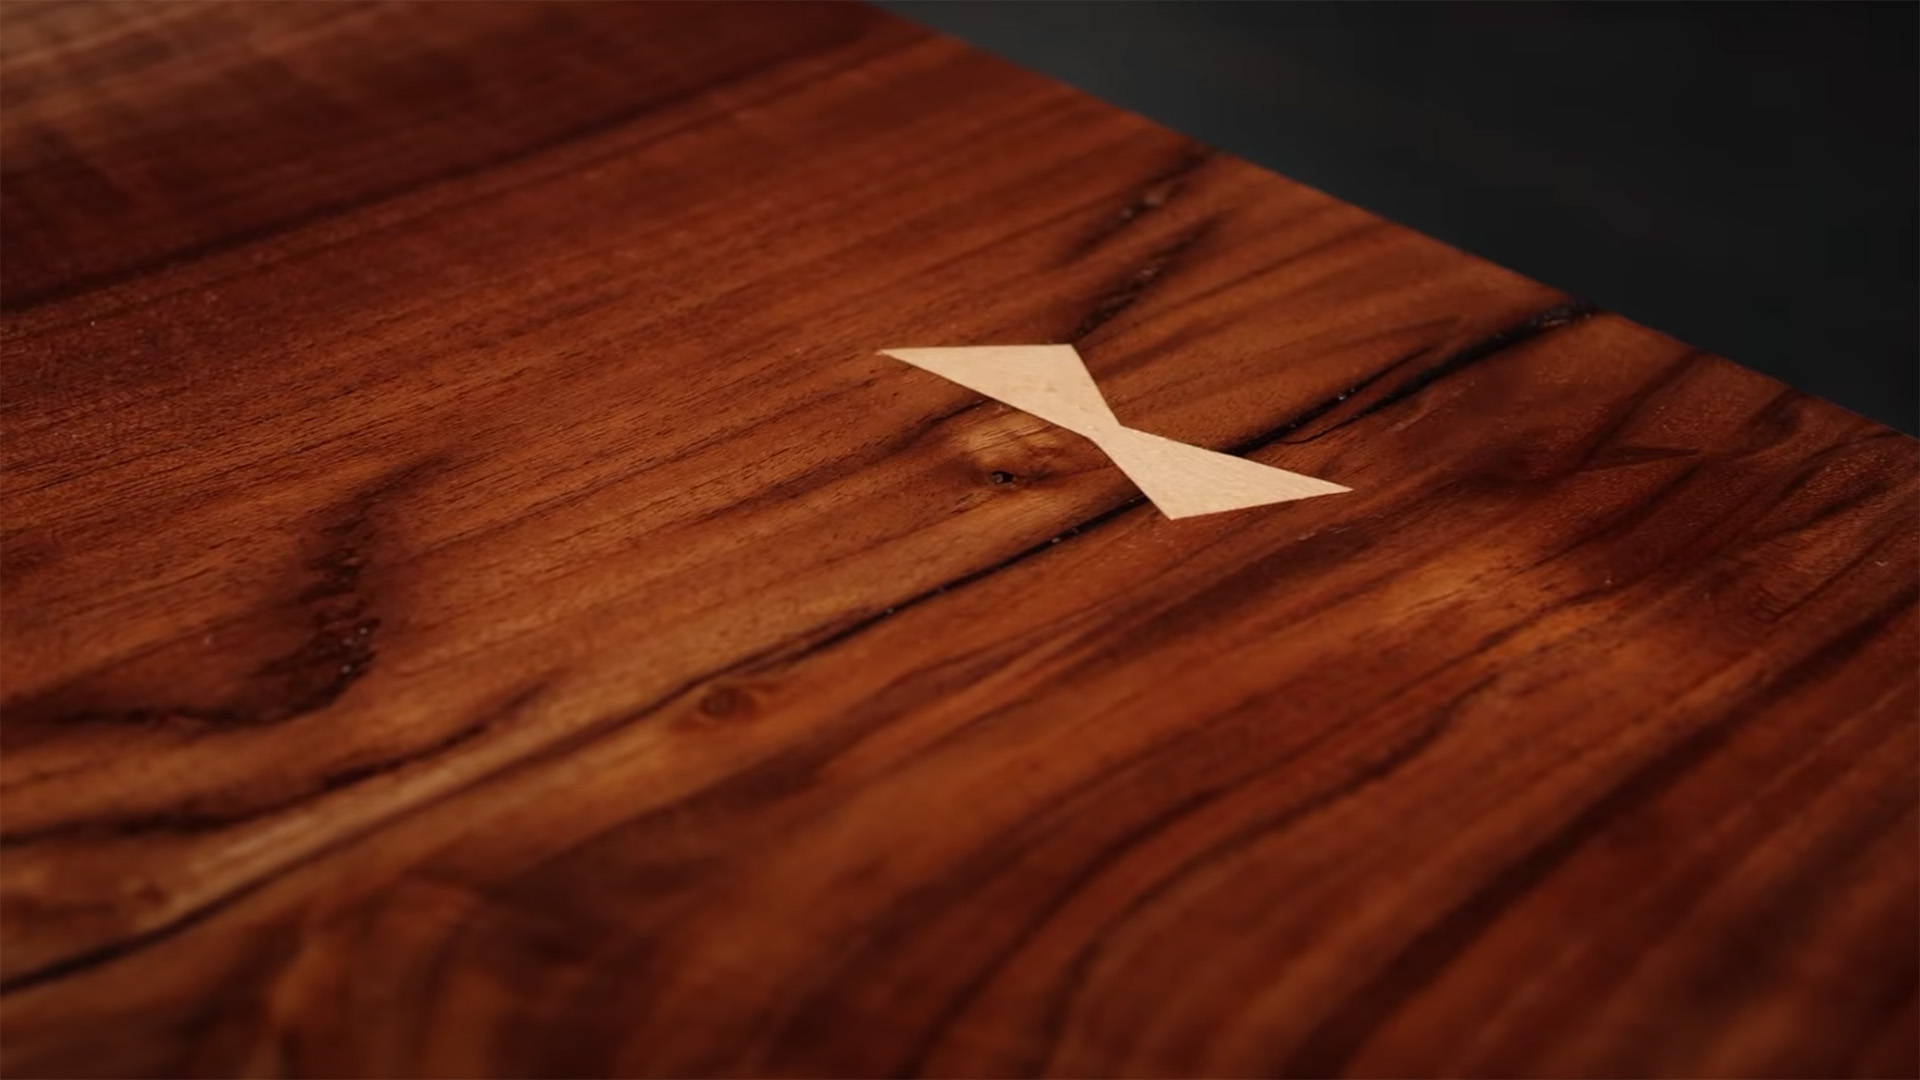
You could call it done at this point. The result will be a nice matte to satin look, a lot like an oil finish.
Sometimes, I’ll do one last super thin layer to cover up inconsistencies.
Dip your rag in the 1:8 mix, really wring it out, then give the whole surface a light buffing.
If you want a glossier finish, you can add more layers of shellac, progressively increasing the amount of alcohol with each coat.
This is part of how a French Polish is done, where wood surfaces practically get turned into mirrors. Not my taste, but to each their own.
OPTIONAL STEP: BUFF WITH PASTE WAX
I don’t do this myself, but a lot of people do to add a bit more protection.
Use super fine steel wool to buff the whole surface with paste wax. Let it sit for a few minutes, then wipe it off and buff out with a clean cloth.
MY FAVORITE FINISH
Finishing doesn’t get simpler than shellac.
There’s no waiting hours between coats, no having to sand multiple times, and you can do it all with a simple rag.
It may not suit every application. But every woodworker should know how to use shellac to get beautiful, durable, and quick finishes.
Afterall, there’s always another project to get to. And who wants to wait around watching the finish dry?
If you’re looking for a project to use shellac on, check out these plans for a mini-workbench with one-handed vise.
Not only is it an epic project — your purchase goes to supporting our charity, the Katz-Moses Woodworkers with Disabilities Fund.
What's your favorite finish? Tell us in the comments below!
Follow us on Instagram @katzmosestools and check out my YouTube channel for more great woodworking content...
And as always, STAY SAFE IN THE SHOP!

10 comments
sk shellac
Great post! I really liked how clearly you explained the topic. It was easy to understand and very helpful. Looking forward to more content like this. Visit https://skshellac.com/
Great post! I really liked how clearly you explained the topic. It was easy to understand and very helpful. Looking forward to more content like this. Visit https://skshellac.com/
Kevin
The fuel your using as denatured alcohol is not the right kind of denatured alcohol. It isn’t recommended to use with Shellac. Its highly toxic and contains to much methanol.
The fuel your using as denatured alcohol is not the right kind of denatured alcohol. It isn’t recommended to use with Shellac. Its highly toxic and contains to much methanol.
Beth
I’m wondering if I were to buy a can of shellac, would it work like your homemade? Could I delete it down like have in these recipes?
I’m wondering if I were to buy a can of shellac, would it work like your homemade? Could I delete it down like have in these recipes?
Sue B
Is the Kleen Strip Green denatured alcohol an acceptable sunstitue for the denatured alcohol I just ran out off and can’t buy more? Also, how close to black can I get using shellac? Shellac that that I make myself?
Thanks
Is the Kleen Strip Green denatured alcohol an acceptable sunstitue for the denatured alcohol I just ran out off and can’t buy more? Also, how close to black can I get using shellac? Shellac that that I make myself?
Thanks
Dudley Wireman
So I just used some Zinser clear shellac on a planer cart build. I like it, but would definitely make my own if I could. So I wasn’t great in chemistry but Kleen Strip Green has been discontinued according to their website. The current denatured alcohol product may have between 40-60% methanol according to one website I read. That contradicts “ DO NOT use methanol. That stuff is ultra toxic” comment. Any other safe stuff out there? I’m in Virginia where the politicians are almost as bad as California…
So I just used some Zinser clear shellac on a planer cart build. I like it, but would definitely make my own if I could. So I wasn’t great in chemistry but Kleen Strip Green has been discontinued according to their website. The current denatured alcohol product may have between 40-60% methanol according to one website I read. That contradicts “ DO NOT use methanol. That stuff is ultra toxic” comment. Any other safe stuff out there? I’m in Virginia where the politicians are almost as bad as California…
Dallas
So … I loved using shellac, but have moved away from it due to the unavailability of denatured alcohol in CA and the totally out-of-touch politicians that dominate CA law and pretty much ruin whatever they touch (yeah, a little soap boxing there). I’ve not had good results with using a shellac reducer to cut the blend. The blend with reducer doesn’t seem to apply as smoothly or take sanding as well. I see in the end product small pinpoint white spots (not bubbles, but fairly uniform, ever after I filtered the new finish), a little bit of gumming upon sanding light coats even after 3 hours of dry time.
So … I loved using shellac, but have moved away from it due to the unavailability of denatured alcohol in CA and the totally out-of-touch politicians that dominate CA law and pretty much ruin whatever they touch (yeah, a little soap boxing there). I’ve not had good results with using a shellac reducer to cut the blend. The blend with reducer doesn’t seem to apply as smoothly or take sanding as well. I see in the end product small pinpoint white spots (not bubbles, but fairly uniform, ever after I filtered the new finish), a little bit of gumming upon sanding light coats even after 3 hours of dry time.
Mike
Very cool. With Rubio monocoat being all the YouTube rage right now how does this compare (except for the dry time and number of coats)?
Very cool. With Rubio monocoat being all the YouTube rage right now how does this compare (except for the dry time and number of coats)?
Anonymous
Thank you. I learned a lot from this blog.
Thank you. I learned a lot from this blog.
Tombo
Concur with Drew’s comment that Behkol “Shellac Reducer” is still available in California. It is crazy expensive, but available.
Concur with Drew’s comment that Behkol “Shellac Reducer” is still available in California. It is crazy expensive, but available.
Anonymous
If you can still find Bekhol solvent it is specifically designed for shellac. Used to be sold by a Behlen it’s still available online. Home Depot sells Kleen Strip Green denatured alcohol. It’s 190 proof and very inexpensive.
If you can still find Bekhol solvent it is specifically designed for shellac. Used to be sold by a Behlen it’s still available online. Home Depot sells Kleen Strip Green denatured alcohol. It’s 190 proof and very inexpensive.