


One of the most common questions I get (not related to my hair routine) is how do you layout perfectly spaced and even dovetails?
At first glance, it might look like a matter of division. Pull out a ruler and calculator and start plugging away numbers.
But the secret to symmetrical pins and tails involves absolutely zero math.
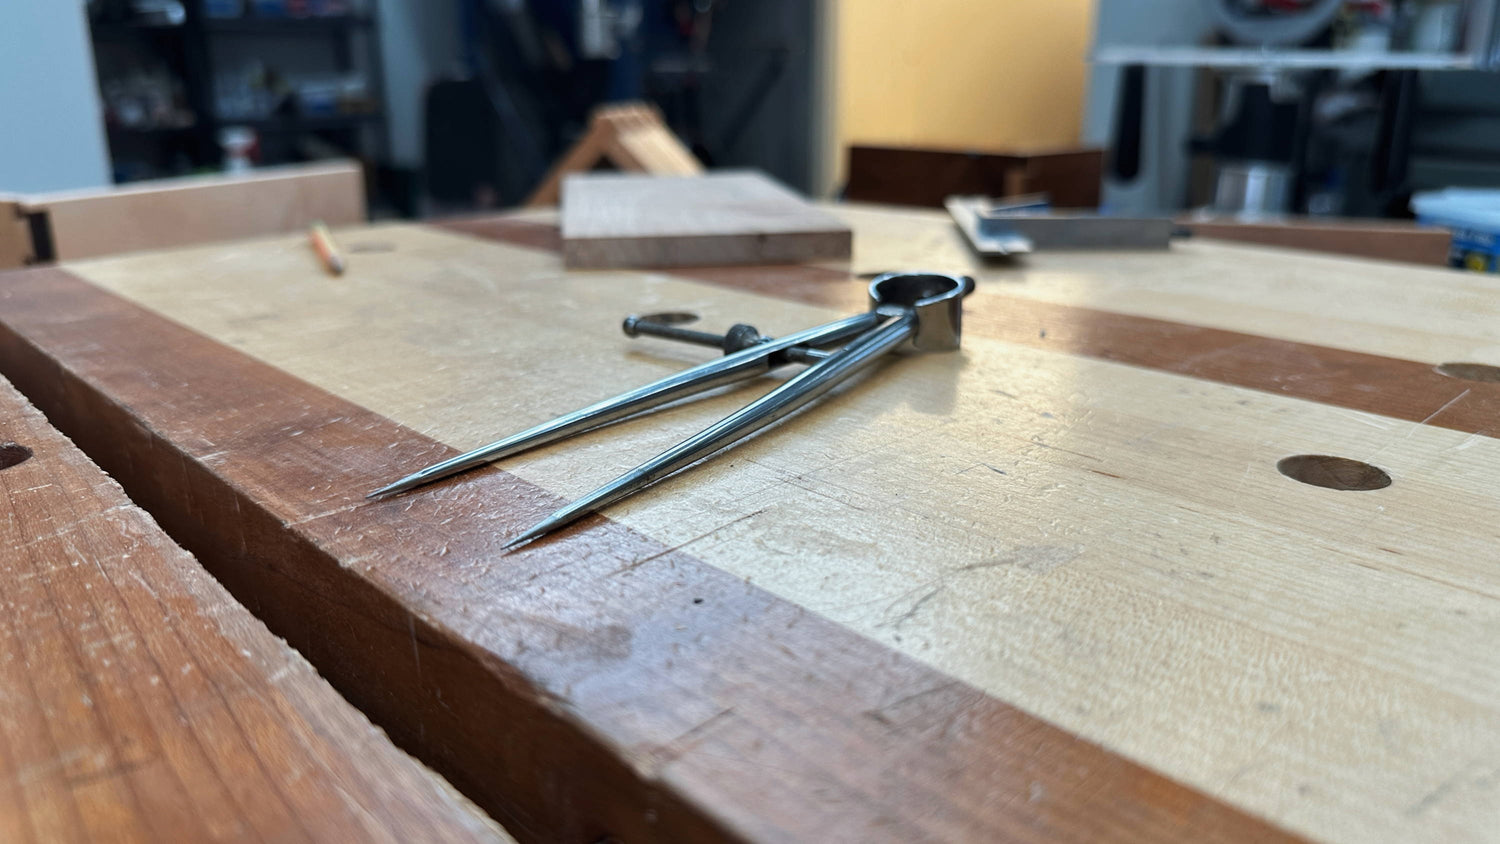
In fact, you can do it all with a pair of dividers (a.k.a. a compass) and a little trial and error. Praise the woodworking gods.
Today, I’m showing you the easiest way to lay out evenly spaced and sized dovetails with a pair of dividers — so you can leave the math to the accountants.
This method was originally popularized by the late great woodworker Alan Peters. And I promise you’re going to love it.
TOOLS FOR LAYING OUT DOVETAILS
- Dividers / compass: Dividers are a simple tool every woodworker should own. They don’t need to be fancy — they just need to hold a setting well.
- Marking knife: I prefer laying out any joinery with a marking knife because it leaves a physical reference for your tools. But you can also use a pencil or pen.
- Square: After using your dividers, you need a reliable square to mark the edges of your tails. Here’s how to test your square for accuracy.
- Pencil, pen, or marker: The best way to avoid mistakes with dovetails is to label the waste ASAP. Some people like red pens for darker woods, but pencil works well too.
1. MARK THE HALF PINS
Assuming you’ve already marked the shoulder line on the tail board, start by marking out the half pins.
The half pin lines mark the outside edges of the outermost tails. You’ll eventually cut them away to establish the shoulders on the tail board.
How far from the edge of the board you mark the half pins is up to you. It depends on aesthetics and the type of wood you’re using.
I generally mark them at least ⅛” from the edge so they’re not too frail — but thinner half pins can work with a solid hardwood and a careful hand.
Set your square to the distance you choose, set it against the edge, and use your marking knife to make an indent at that point. Repeat for both sides.
Now set the knife in the point you marked, slide up the square while referencing off the board face, and scribe a line across the end grain.
Some woodworkers like a second pair of dividers just for marking the half pins. If you need to cut another identical set of tails, they’re set up and ready to go.
Simply set one point against the edge of the board, then make an indent with the other point. Then follow up with your marking knife and square.
2. DECIDE ON THE NUMBER OF TAILS
The number of tails you choose has a little to do with strength, and a lot to do with aesthetics and personal preference.
In theory, more tails equals more gluing surface and a stronger joint. But people also argue that too many tails reduce the “true” width of a board edge and weaken the joint.
I wouldn’t worry too much about either of those concerns and just go with your gut (just know that the more tails you have, the more work you’ll have to do).
As a general guideline, here’s my usual approach:
- Drawer sized boards: 2-4 tails
- Small decorative boxes: 3-5 tails
- Bigger boxes or cabinets: 7 tails or more
I think 3 or 4 tails are a good starting point to get plenty of practice, and create nicely proportioned dovetails for smaller projects.
3. GUESS DIVIDER SPACING
You’re going to set your dividers so they equal the width of one tail and one pin. But don’t worry — I promise you still don’t need to do any math.
Let’s say you decided on three tails. Set your dividers to what looks about like a third of the board’s width.
Put down the ruler. Guesstimating is fine.
Now it’s time to walk.
4. DETERMINE PIN WIDTH
This is the fun part and where the magic happens.
Set one point of the divers in a half pin line. You’ll now rotate and walk the dividers across the edge of the board — but DO NOT leave any indents yet. This is still the testing stage.
Try to keep the points of the dividers centered on the edge of the board as you rotate and walk them.
Take a number of steps equal to the number of tails you want. For example, for three tails, take three steps with the dividers (set one point in half pin, rotate and set [1 step), rotate and set [2 steps], rotate and see where dividers land [3 steps]).
What you’re looking for is where the dividers land on the last step. However far the dividers overstep the second half pin on the last step equals the width of your pins.
If after the final step, the dividers don’t reach the second half pin line or fall right on it, you need to expand them a bit.
NOTE: Make VERY SMALL adjustments to your dividers. Any adjustment will be multiplied by the number of tails — so if you expand the dividers by 1/16” and have three tails, this will expand the width of your pins by 3/16”.
This is where personal preference comes into play. All you’re focused on is how much the final step of the dividers overhangs the second half pin.
Keep making adjustments and testing until that overhang looks like a pin width you’d like. A lot of people like thin pins — but don’t make them so thin you’ll struggle to clean them up.
If you want your pins to match the width of your half pins, adjust the dividers until they land exactly on the edge of the board with the final step.
Once you’re happy with the overhang, you’re ready to lock and load.
5. MARK OUT YOUR TAILS
Now it’s time to really walk the walk.
Like you did before, set one point of the dividers in a half pin line and walk them across (make sure you start IN one of the half pin lines, not on the edge of the board. But this time, leave indents at each step. They don’t need to be super deep — just enough for your marking knife to register.
On the final step where the dividers pass the second half pin, don’t leave an indent. Instead, start the dividers in that second half pin line and repeat the walk in the other direction.
You’ll have a series of holes in the end grain. These mark the outer edges of your tails.
Now set the tip of your marking knife in one of the indents, slide up your square, and mark a line across the end grain. Repeat for all the other indents.
This is the time to label your waste so you don’t get confused later. If you went with pins thinner than the tails, the waste will be the smaller space between the lines you marked.
With your dividers at this setting, you can now layout all your other tail boards without having to test (assuming they’re all the same width).
See? Easy — and you didn’t have to do any math.
DIVIDE AND CONQUER
One of the great ironies of woodworking is that the less math and measuring you do, the more accurate you’ll be.
The trick is to know how to use your tools to crunch the numbers for you — and laying out dovetails with a pair of dividers is a perfect example.
Got more dovetail inquiries? Check out my answers to the most common questions about dovetails.
What’s your technique for laying out dovetails? Let us know in the comments below!
Follow us on Instagram @katzmosestools, on TikTok @katzmoseswoodworking, and check out my YouTube channel for more great woodworking content...
And as always, STAY SAFE IN THE SHOP!
1 comment
Jack
A table runner, a stylish strip of fabric, adds flair to your table’s center. With diverse colors and materials, it protects while enhancing. Versatile for any setting, it’s an easy and cost-effective way to refresh your dining space. https://www.etsy.com/listing/724650907/crochet-table-runner-handmade-table
A table runner, a stylish strip of fabric, adds flair to your table’s center. With diverse colors and materials, it protects while enhancing. Versatile for any setting, it’s an easy and cost-effective way to refresh your dining space. https://www.etsy.com/listing/724650907/crochet-table-runner-handmade-table