


The magic of dado blades is you can adjust them for virtually any cutting width you like.
But what’s the best way to set the precise thickness you need?
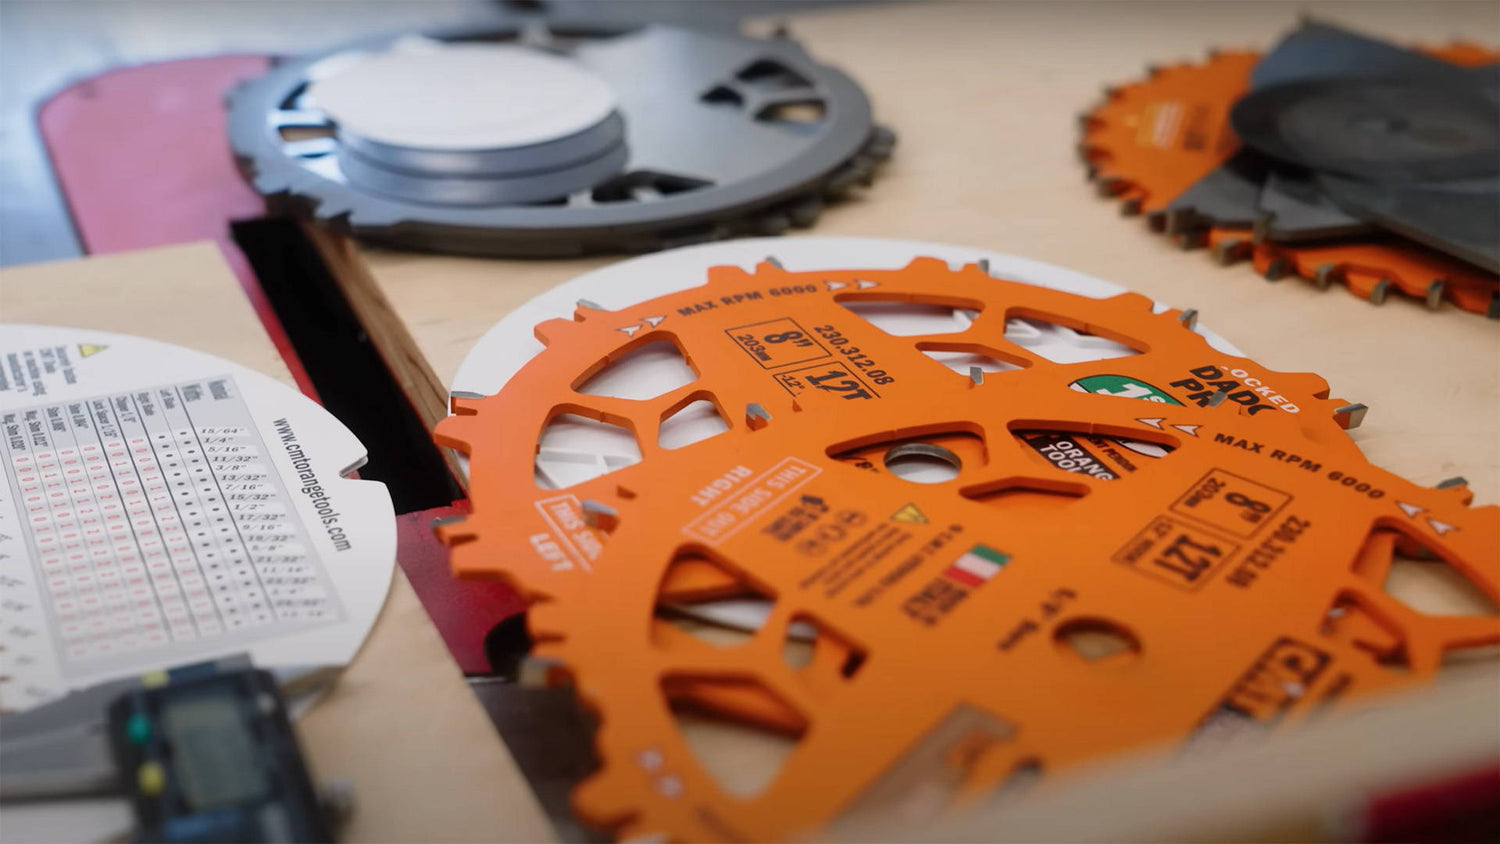
An obvious one is to use the guide that comes with your dado stack.
It tells you a precise number of chippers, spacers, and shims to place between the outer blades to add up to a specific measurement.
But there are two potential problems with this:
- You might lose the thickness guide (tape it to your forehead to avoid this).
- Even if you follow the guide, the final thickness might not be a perfect fit for your joinery. Sawdust or grime between shims can add extra thickness — or your workpiece might not be the exact measurement you think it is.
As is often the case in woodworking, I find the best solution is to reference reality.
And here’s how to do that while setting your dado stack thickness.
(Need a dado blade set? Check out our collection here).
1. STACK THE OUTSIDE BLADES ON A FLAT SURFACE
Start by stacking the outside blades of your dado set on a flat surface.
I like to do this on a flat piece of plywood so I don’t damage the teeth. If you’re careful, you could also set them on the cast iron table of your table saw.
Make sure none of the teeth from one blade are touching the teeth of the other.
You want the main bodies of the two blades to be flat against each other — otherwise, your calculations will be off.
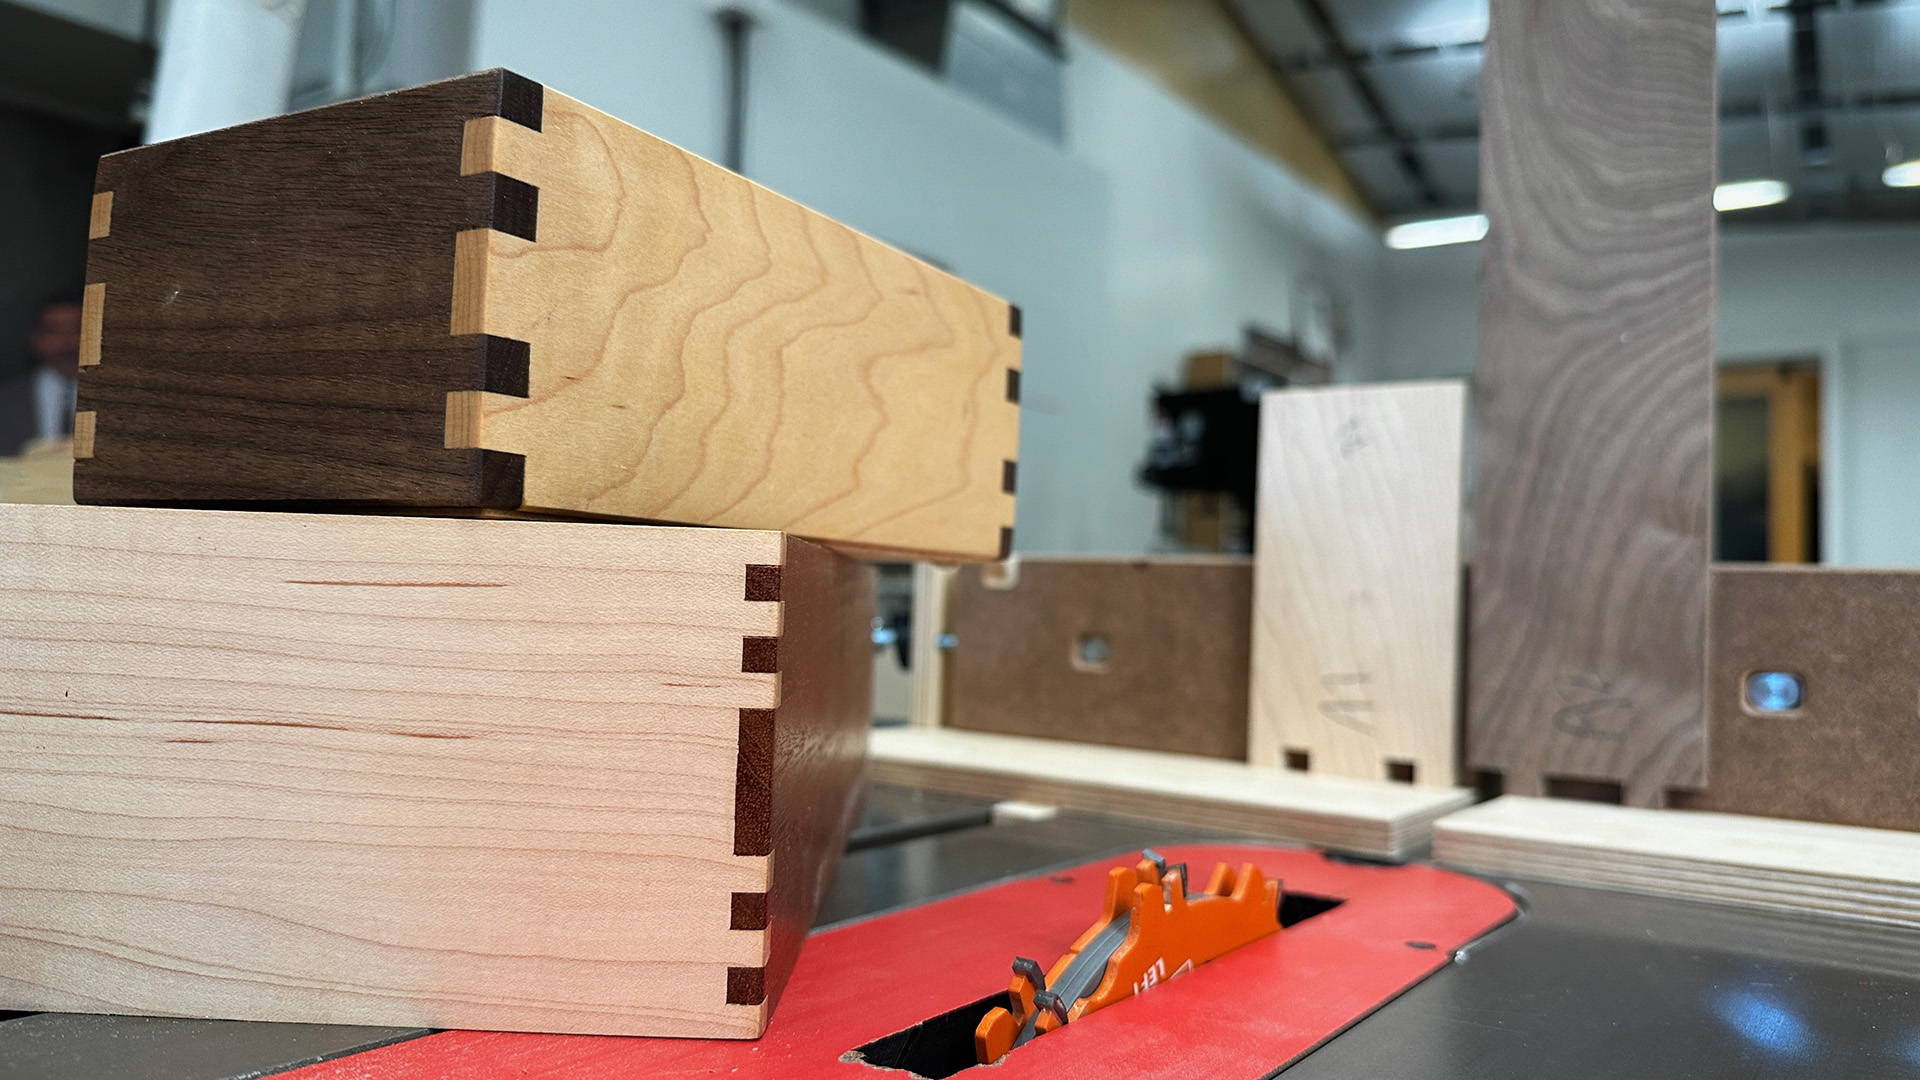
2. SET THE MATING WORKPIECE NEXT TO THE BLADES
Now grab the mating workpiece and set it next to the blades.
What’s the mating workpiece?
It’s the board that will fit into whatever groove, dado, or rabbet you end up cutting with the dado set.
Set it flat on its side next to the blades so you can compare their thicknesses.
Now it’s just a game of stacky-matchy.
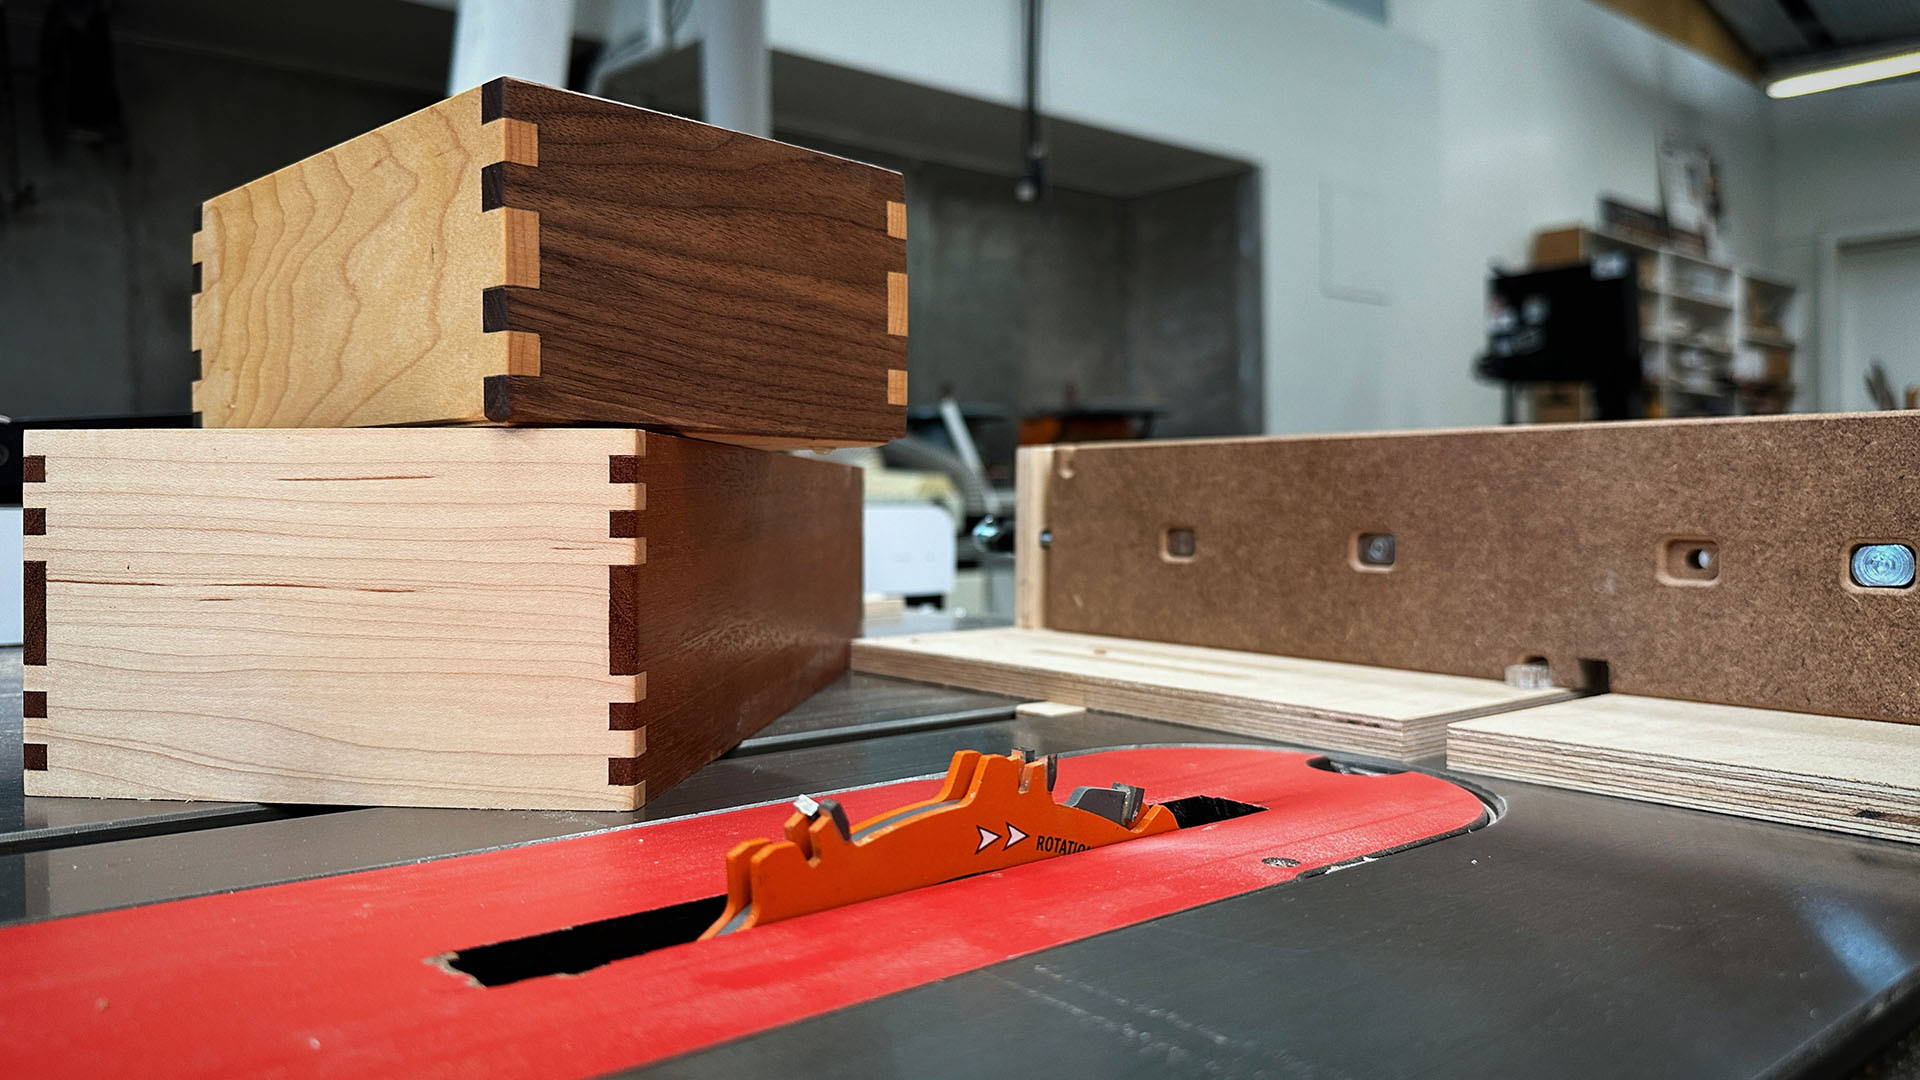
3. STACK CHIPPERS ON THE BLADE TO MATCH THE WORKPIECE
Start stacking chippers on the outside dado blades.
Again, make sure none of the teeth are touching each other so they stack flat.
You’re looking to see how the teeth on the top chipper of the stack compare to the thickness of your workpiece.
Keep adding chippers until you can’t add another without its teeth being higher than the workpiece.
Now it’s time to fine tune.
4. ADD SPACERS AND SHIMS AS NECESSARY
Now slide some spacers or shims between the chippers to reach the perfect thickness.
But here’s a common mistake to avoid:
In most cases, you don’t actually want the dado blade to be the exact thickness of your workpiece — but instead, just a hair thicker.
The stack can compress slightly when you tighten it on the table saw arbor. And the result is a cut too tight for your workpiece to fit into.
(A common misconception in woodworking is that joinery needs to be super tight before adding glue. Ideally, you should be able to seat joinery with just your hands — but it should still hold together).
You want to just barely feel the top of the tooth with your finger or a ruler compared to the workpiece.
Once it’s there, you’re ready to place the dado stack on your arbor.
5. MAKE A TEST CUT TO BE SURE
Before cutting your final joinery, make a test cut in a piece of scrap.
Then see how your workpiece fits into it.
Again, you should be able to seat the workpiece by hand without it wobbling in place.
If the joint’s too tight, add an extra shim to the dado stack. Vise versa if it’s too loose.
Once the test cut fits right, you can start moving forward with your project.
Referencing reality is often the best approach for accurate woodworking — and this dado blade set up technique is a perfect example.
Want to learn all the joinery styles dado blades can be used for? Read this.
What’s your preferred method for setting up dado stacks? Let us know in the comments below!
Follow us on Instagram @katzmosestools, on TikTok @katzmoseswoodworking, and check out my YouTube channel for more great woodworking content...
And as always, STAY SAFE IN THE SHOP!
7 comments
John
The rule of thumb I was taught is: make the hole, fill the hole. That is, make the mortise/dado/groove/rabbet with the dado stack first and then “reference reality” as you progressively dial-in / sneak up on your setup for cutting the tenon.
When you can do this (and sometimes you cannot) the dado setup is a bit less critical. When it’s actually a dado, for example you cannot do this because the “tenon” is your general material thickness which you locked in earlier.
Tom Dickman
Loved your video. I thought I’d share a jig I came up with for my dado set. Works as a setup jig and storage. I used a square of 3/4” mdf a couple of inches larger than the set. Then I drilled and ran a 5/8 carriage bolt to match the saw arbor from the bottom countersunk for the head and epoxied it in place. I cut it off so that it is about an inch longer than the full dado stack is tall. Then I made an oval knob out of 3/4” hardwood, drilled it 5/8 and chiseled out a countersink the shape and depth of a nut to fit the bolt and epoxied it in place. It’s easy to stack the parts til it matches your stock and then crank down with the knob like you would do on your saw arbor and I get a very accurate stack without having to work on the actual arbor. When finished I put everything on, tighten it down and hang it up. Keep up the good work.
Loved your video. I thought I’d share a jig I came up with for my dado set. Works as a setup jig and storage. I used a square of 3/4” mdf a couple of inches larger than the set. Then I drilled and ran a 5/8 carriage bolt to match the saw arbor from the bottom countersunk for the head and epoxied it in place. I cut it off so that it is about an inch longer than the full dado stack is tall. Then I made an oval knob out of 3/4” hardwood, drilled it 5/8 and chiseled out a countersink the shape and depth of a nut to fit the bolt and epoxied it in place. It’s easy to stack the parts til it matches your stock and then crank down with the knob like you would do on your saw arbor and I get a very accurate stack without having to work on the actual arbor. When finished I put everything on, tighten it down and hang it up. Keep up the good work.
John Aten
Mike Curtin
Paul, that’s a very clever technique. Thanks much for sharing.
Mike Curtin
Paul, that’s a very clever technique. Thanks much for sharing.
Mike Curtin
Paul Leuba
I too once struggled with multiple on and off the spindle attempts to get a stacked dado setting dialed in until finally I thought thru the process and arrived at my current technique. I measure with a dial caliper the thickness of the piece to be inserted into the dado. Then using this measurement plus about 0.010" I assemble the dado stack, including the appropriate spacers. Then, after cutting a test dado and inserting the matching piece I use a mechanic’s feeler gauge to measure the size of the overcut. For example, if the feeler gauge shows a gap of 0.008", I’ll remove the corresponding amount of spacers from the stack and recut a test groove. It’s usually right on.
Just another way to reach a desirable result and avoid a tedious repitition of trial and error.
of the piece to be matted to the dado
Gil
Great guide. Thank you!
Great guide. Thank you!
Jim Specht
It is kind of funny that you posted this method to set up dado blades on the same day I received an email from Woodpeckers Tools promoting one time tools: OneTime Tool – DADO SET-UP FIXTURE & GAP GAUGES. In the video for the tools they call your method a “repetative frustrating pursuit”. :) I thought you might find this funny, I hope. I love your helpful insights to work smarter, safer and not harder when doing woodworking. You have my respect for your attention to detail and explaining woodworking tasks to the masses. I am one of them. Yes, I have bought your products in the past and they are all of high quality and are useful to me. I have listened and watched your demonstrations of woodworking techniques and used them in my woodworking. Please keep up the good work that you do and I in turn will continue to support you by purchasing products that I need. Take care and thank you again for all that you do for us DIY types.
Sincerely,
Jim Specht