


If you've ever tried using a hand saw for precision cuts, you know it ain’t as easy as it looks.
The saw can quickly wander off the line, edges become anything but square, and your hand can start to feel like a marathon runner recovering from last night’s hangover.
All that to say, hand sawing is a skill that requires practice…
And there’s no magic technique that’ll instantly let you make square, straight cuts right on the line.
However, there are a few tips that really helped me improve my own hand saw skills — and I’m going to share my 5 favorite ones with you today.
1. USE THE REFLECTION TO START SAWING SQUARE
One of the biggest difficulties of hand saws is starting a cut straight and square.
Beginning a cut accurately is critical because it sets up the rest of your cut.
If your first few strokes are off, it can be hard to recover.
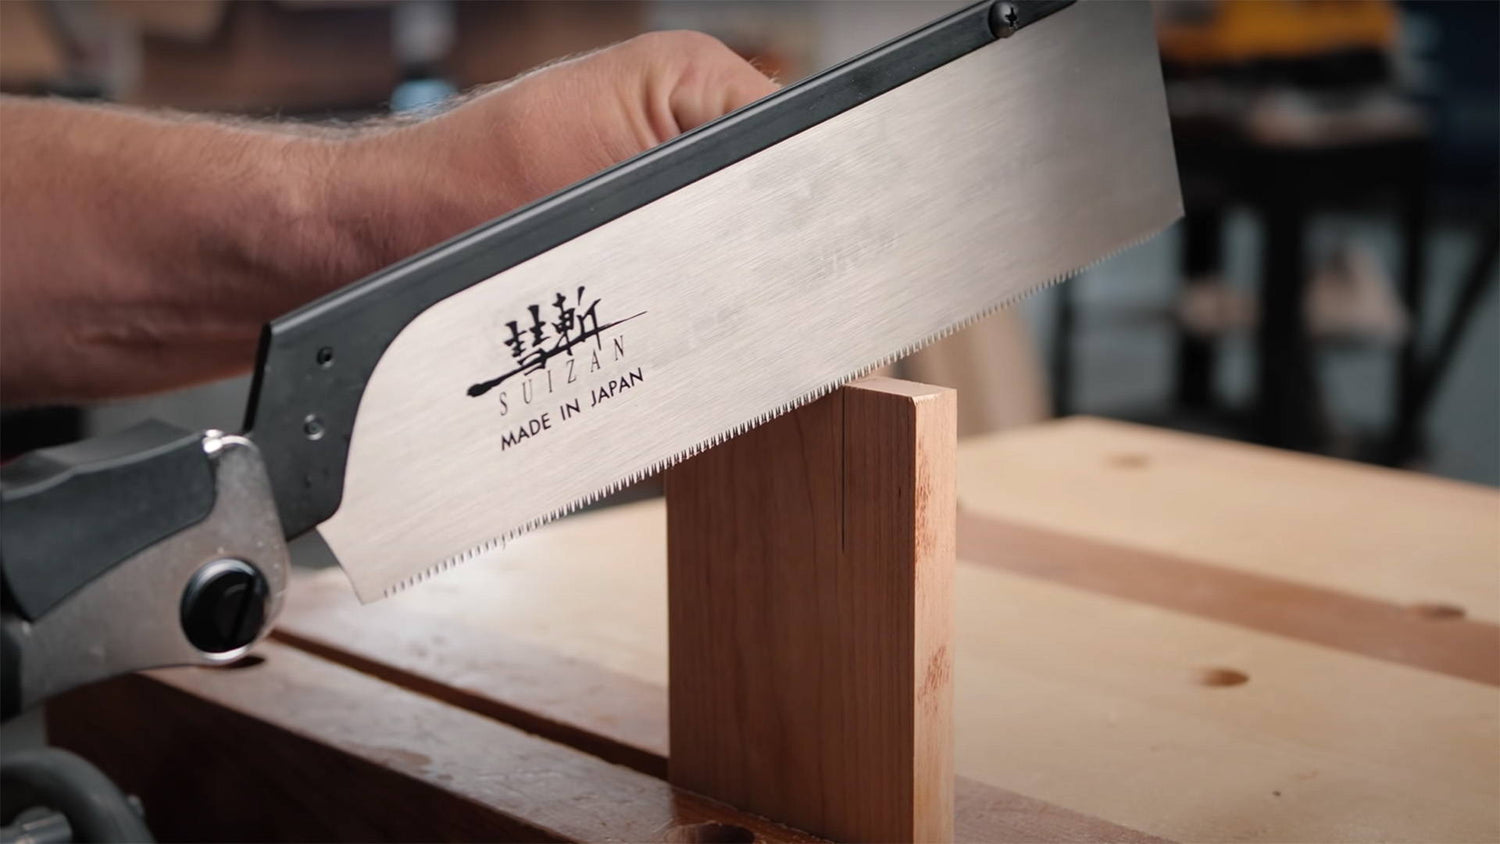
One trick I absolutely love is using the reflection in the saw as a gauge for squareness.
Set the saw on a board’s edge and look at the reflection of the board in the saw plate.
Adjust the angle of the saw until the reflection continues straight out from the board and there are no angles. It should look like a normal straight board edge.
When the reflection looks like this, you know the saw blade is square.
2. START WITH THE CROSSCUT TEETH
Another issue with starting cuts is getting the teeth to bite into the wood where you want — especially with rip saws.
Ripping saws are meant for cutting with the grain, and generally have fewer, bigger teeth.
They’re great for hogging out material… but not so easy to get started.
That’s why I like to start my cuts — whether it’s a rip or crosscut — with the crosscut teeth of my saw.
With the teeth smaller and closer together, it’s SO much easier to start cuts.
With a double-sided Ryoba that has both crosscut and ripping teeth, just flip from one side to the other.
Once you've established a kerf, switch to the rip teeth to continue the cut.
3. DROP INTO THE LINE GRADUALLY
A common beginner mistake is to try and cut across the entire edge when starting a cut.
With all those teeth and no kerf to guide them, the saw’s liable to jump out of position.
Next thing you know, you can’t even find your original marking knife line.
Instead, start sawing at the corner closest to you right next to the line.
Make a few strokes in the opposite direction of the cut until you have the beginnings of a kerf, then slowly start sawing.
As you saw, gradually and carefully lower the front of the saw into the line.
This gives you a ton more control and stability, and in unison with the two previous tips, really helps you start cuts square.
Adding a knife wall makes it even easier to begin sawing precisely on your line.
After you’ve marked a line with a marking knife, use a sharp chisel to create a v-notched groove on the waste side.
You can set the teeth of your saw against this “wall” and use it as a fail-safe for your line.
4. STOP TRYING SO HARD
If your hand cramps up while sawing — or you need to keel over and catch your breath — you’re doing it wrong.
Yes, hand saws DO require physical effort (a lot more than pushing a crosscut sled).
But they also don’t need to be a full on work out.
Hold the saw with a relaxed grip and posture, letting the saw teeth do the work.
5. USE THE BUILT-IN DEPTH STOP
Japanese-style pull saws have a useful feature many Western-style saws lack: built-in depth stops.
At both ends of the saw, you’ll see a flat, non-cutting tooth. Its flat surface is at the exact same level as the closest tooth.
That means when the saw is tilted so this depth gauge is flat, the very point of the subsequent tooth will cut any high spots down to that level.
Just tilt and pull it back until it stops cutting material.
This is SUPER useful for dovetails, where you often end up with a triangle of waste in the middle of a cut.
It’s also great for cleaning up knife walls — and even the corners of cheeked joinery, like half laps or tenons.
WE CAME, WE SAWED, WE CONQUERED
To get good at hand sawing, you’re going to need a lot of repetition, dedication, and acceptance that you won’t be good at first.
But just because something is difficult doesn’t mean it’s not worth doing (quite the opposite, actually).
And if you continue to challenge yourself, nothing feels as good as when it all starts to click.
Follow the tips above to help you get started — then figure out the rest through blood, sweat, and sawdust.
Looking for a project to put these hand saw tips to the test? Here’s how to cut traditional dovetails with hand tools.
What other hand saw tips were a game changer for you? Let us know in the comments below!
Follow us on Instagram @katzmosestools, on TikTok @katzmoseswoodworking, and check out my YouTube channel for more great woodworking content...
And as always, STAY SAFE IN THE SHOP!

3 comments
Will
Don’t understand how the Japanese saw “stops” work. Please elaborate. Thx
Don’t understand how the Japanese saw “stops” work. Please elaborate. Thx
Bill
Thanks for the tip. The Japanese style saws which operate on the pull stroke are much easier to guide. I still use the old cut on the push stroke but it is also easier to “catch” the blade and temp warp the blade, especially if using too much force on the push. The Japanese style cut on the pull or “tension” stroke which also allows them to use a thinner blade. To all keep on sawing.
Thanks for the tip. The Japanese style saws which operate on the pull stroke are much easier to guide. I still use the old cut on the push stroke but it is also easier to “catch” the blade and temp warp the blade, especially if using too much force on the push. The Japanese style cut on the pull or “tension” stroke which also allows them to use a thinner blade. To all keep on sawing.
Tom Colgrove
Love to get these tips, Jonathon. They really help.
I’ve bought a number of your tools and they all perform very well.
Keep them coming.
Love to get these tips, Jonathon. They really help.
I’ve bought a number of your tools and they all perform very well.
Keep them coming.