Router tables cut with the ferocity of a two year old who was just told they can’t watch another episode of Cocomelon.
And if you’re not careful, that can lead to two things: tearout and burnt wood (and screams… so many screams).
But getting super clean and crisp cuts on a router table isn’t rocket science. As long as you follow a few basic rules, you can stop tearout and burning before they even start.
Today, I’m giving you 6 Tips for Getting Ultra-Clean Cuts on the Router Table — so you can leave the splinters and charcoal to the campfire.
Keep these tips in mind the next time you spin some bits… and your router table might just become your favorite tool.
1. USE THE RIGHT BIT
Regular groove cutting and flush trim bits can be separated into two categories: straight and spiral.
The difference is the angle of the cutting edges — a.k.a. the flutes — and it makes a big difference in the quality of a cut (read more about straight vs. spiral bits here).
On straight bits, the flute is at exactly 90° straight up and down. This can produce clean cuts. But on boards with irregular grain, fibers on the top and bottom edges can tear out.
Spiral bits have angled flutes that wrap around the bit in a spiral. That means that by choosing the right bit, you can control and virtually eliminate tearout.
My two favorite router bits for limiting tearout are downcut and compression bits.
Let's say you’re cutting a groove down the middle of a board. A downcut bit pushes fibers into the groove as it cuts, leaving you with super crisp edges.
Compression bits have upcut flutes on the tip and downcut flutes near the shank. These are my favorite for flush trimming since they produce clean edges on both sides of the cut.
They’re also great for grooves, but you need to make sure the upcut portion is fully embedded in order to limit tearout.
Want to stock up on spiral bits? Check out our collection of router bits here.
2. USE THE RIGHT FEED AND SPEED
If your cuts are burning wood, try one of two things: lower the router RPMs or increase the feed speed — a.k.a. how quickly you make the cut.
A lot of routers are variable speed — meaning you can adjust the RPMs at which the bit spins.
There’s usually a dial that goes from 1 to 6 to adjust this. You’ll have to look at your router’s manual to figure out what RPM each setting corresponds to, but just know that the higher number is faster (higher RPMs) and the lower number is slower.
The general rule of thumb is the bigger the bit, the lower the RPMs.
Here’s a slightly more granular approach:
- >1” diameter: up to 24k RPMs
- 1 – 1 ½” diameter: 18k RPMs
- 2 – 2 ½” diameter: 16k RPMs
- 3”+ diameter: below 12k RPMs
Too high of an RPM setting — or making cuts too slowly — creates a lot of unnecessary contact between the bit and wood. This leads to heat, which leads to burning.
Experiment with feed and speed rates until you’re getting clean, burn-free cuts.
3. MAKE SMALL PASSES
The less material you remove in a single pass, the less chance you have of tearout and burning.
A general rule of thumb is to take no more than ½” with ½” shank bits or ¼” with ¼” shank bits at a time.
There’s two ways to make incremental passes on a router table: either adjust the height of the bit, or adjust the fence position.
I like to use the fence for rabbets and edge profiles because you only have to worry about setting the cutting depth once. With each pass, simply move the fence back to expose more of the bit.
To be extra careful, you can plan to cut just shy of your final depth. Then follow up with a super light final pass for an extra clean finish.
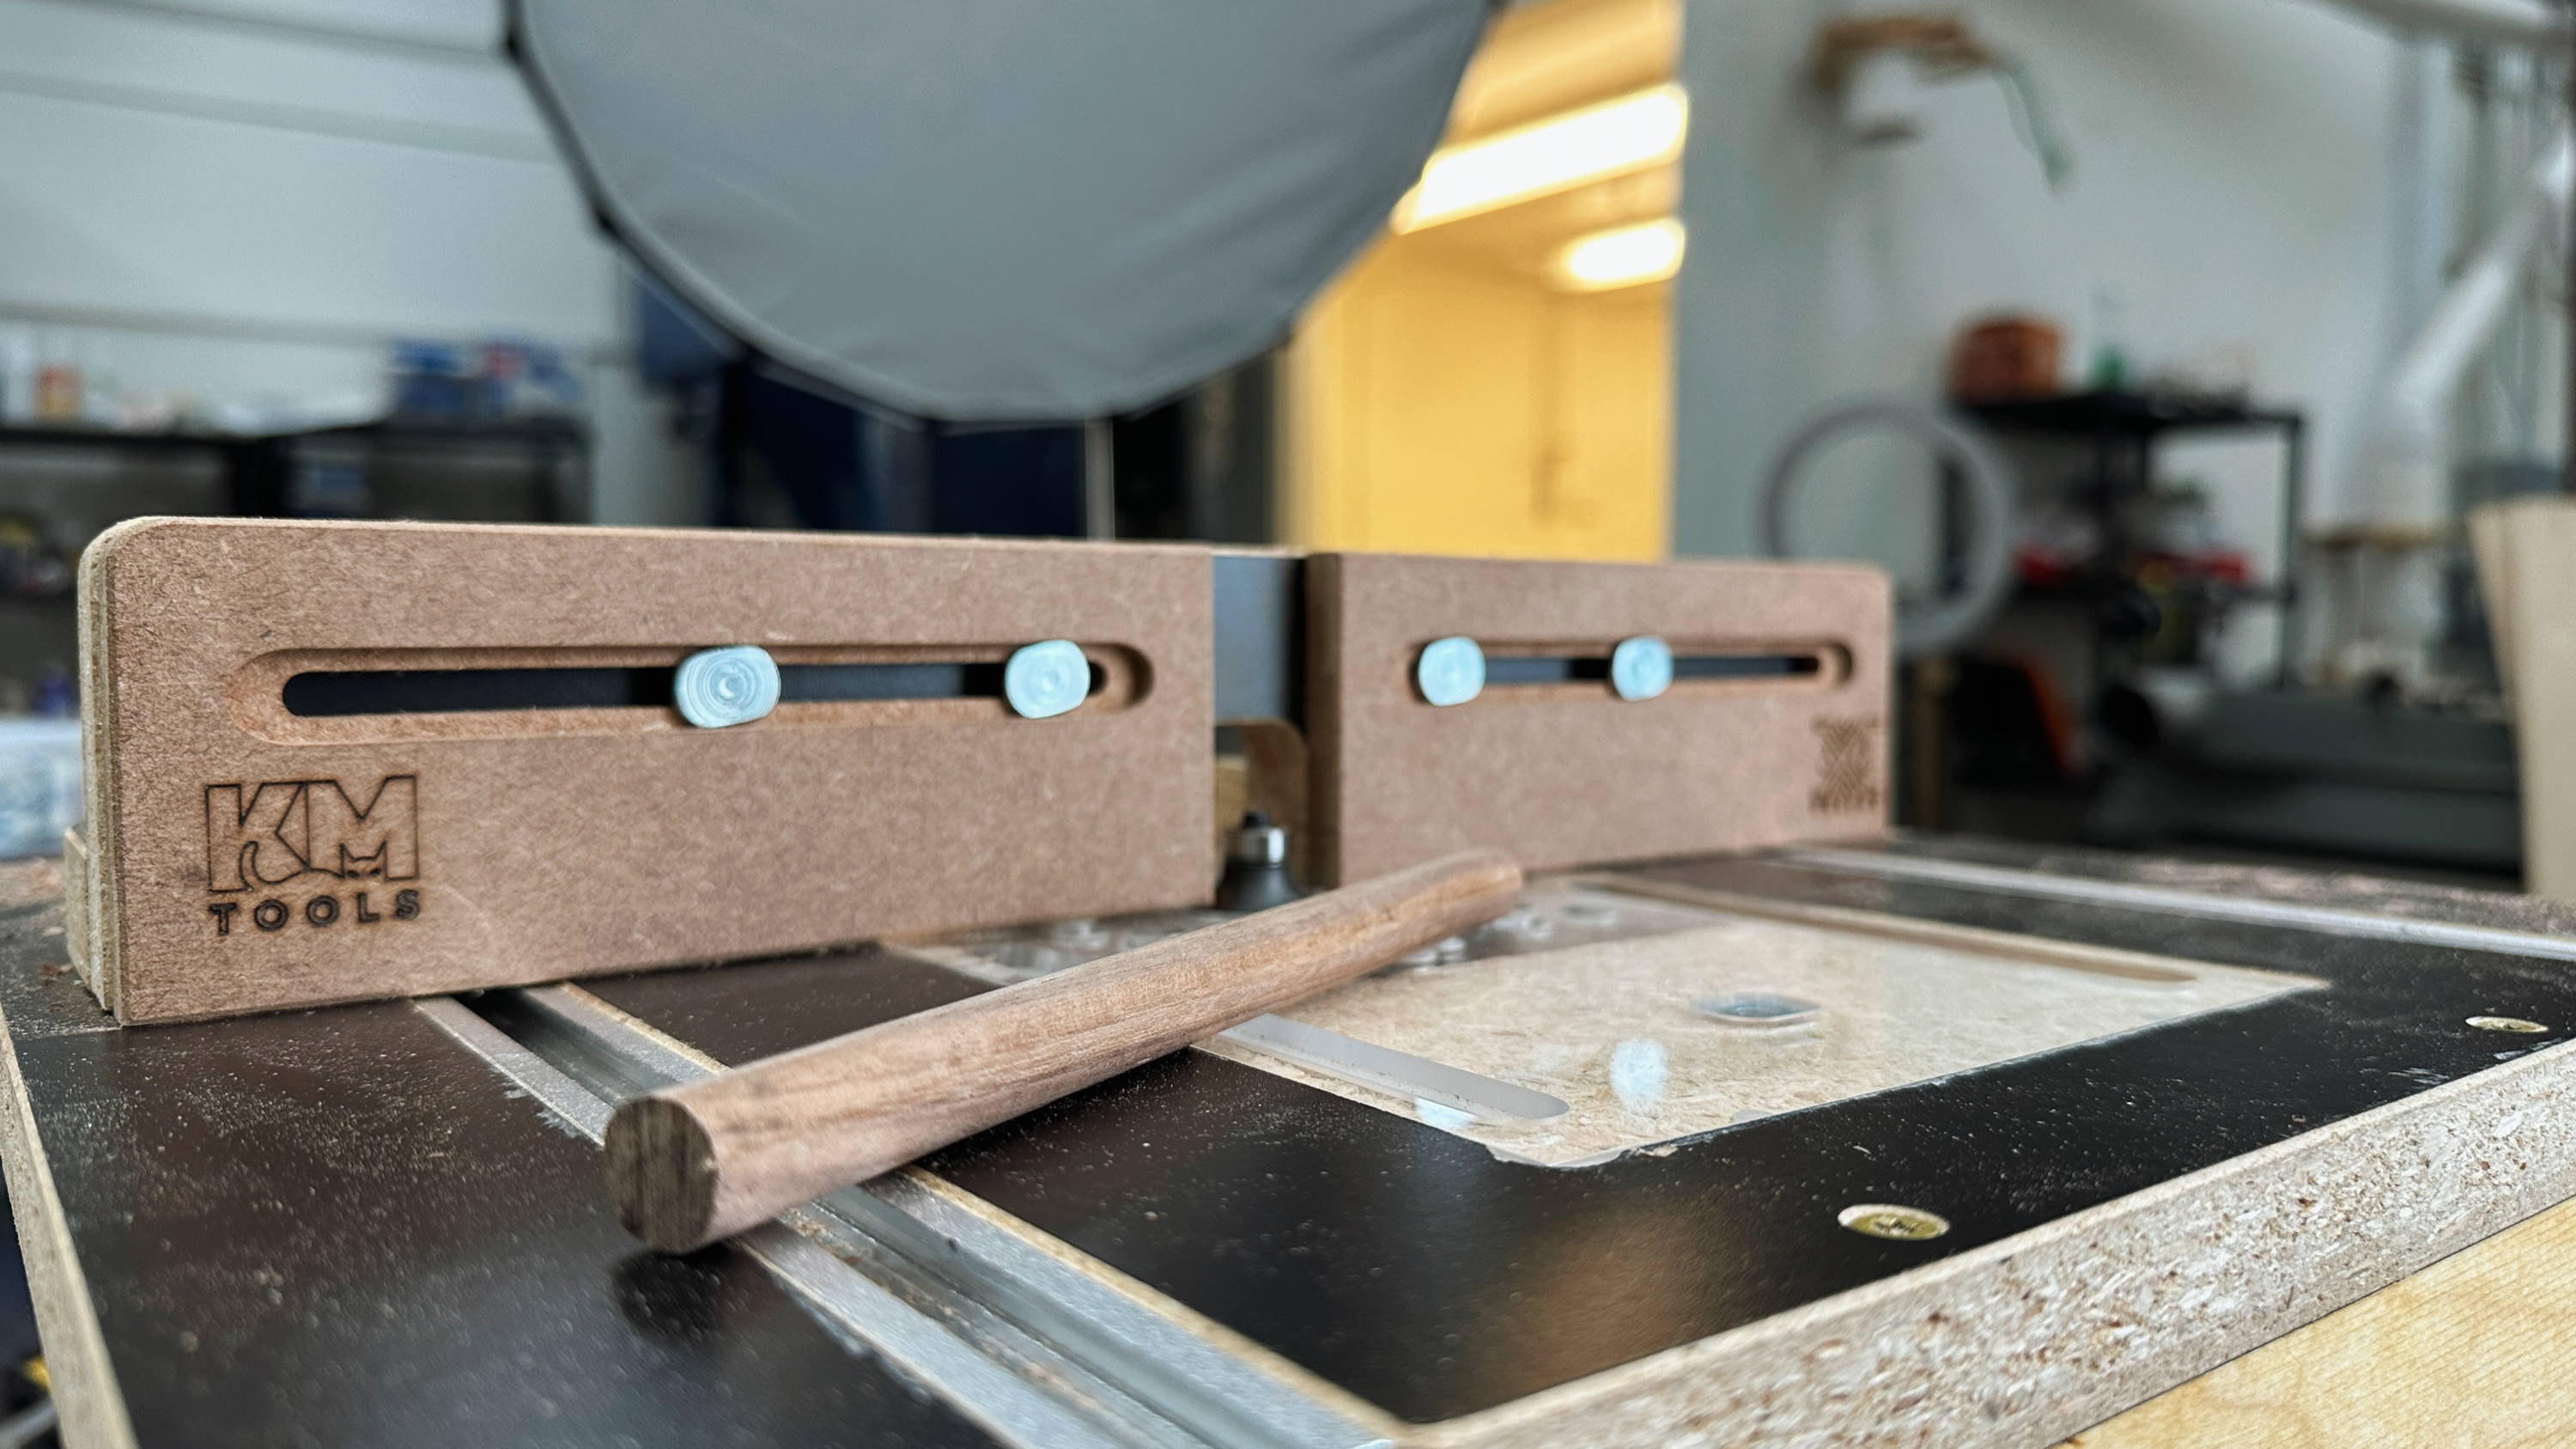
4. REDUCE FENCE OPENING
Well-designed router table fences have adjustable face pieces to reduce the opening around your router bits (including the KM Tools Benchtop Router Table).
To help reduce tearout, make this opening as small as possible by getting the adjustable faces close to the bit. Ideally, these face pieces are replaceable — so it’s no biggie if you cut into them.
The fence creates support for wood fibers. So the closer you can get, the less chance of catastrophic tearout.
It’s a little bit like adjusting the mouth on a low angle hand plane. By keeping pressure on the fibers ahead of the cut, it helps keep them in place.
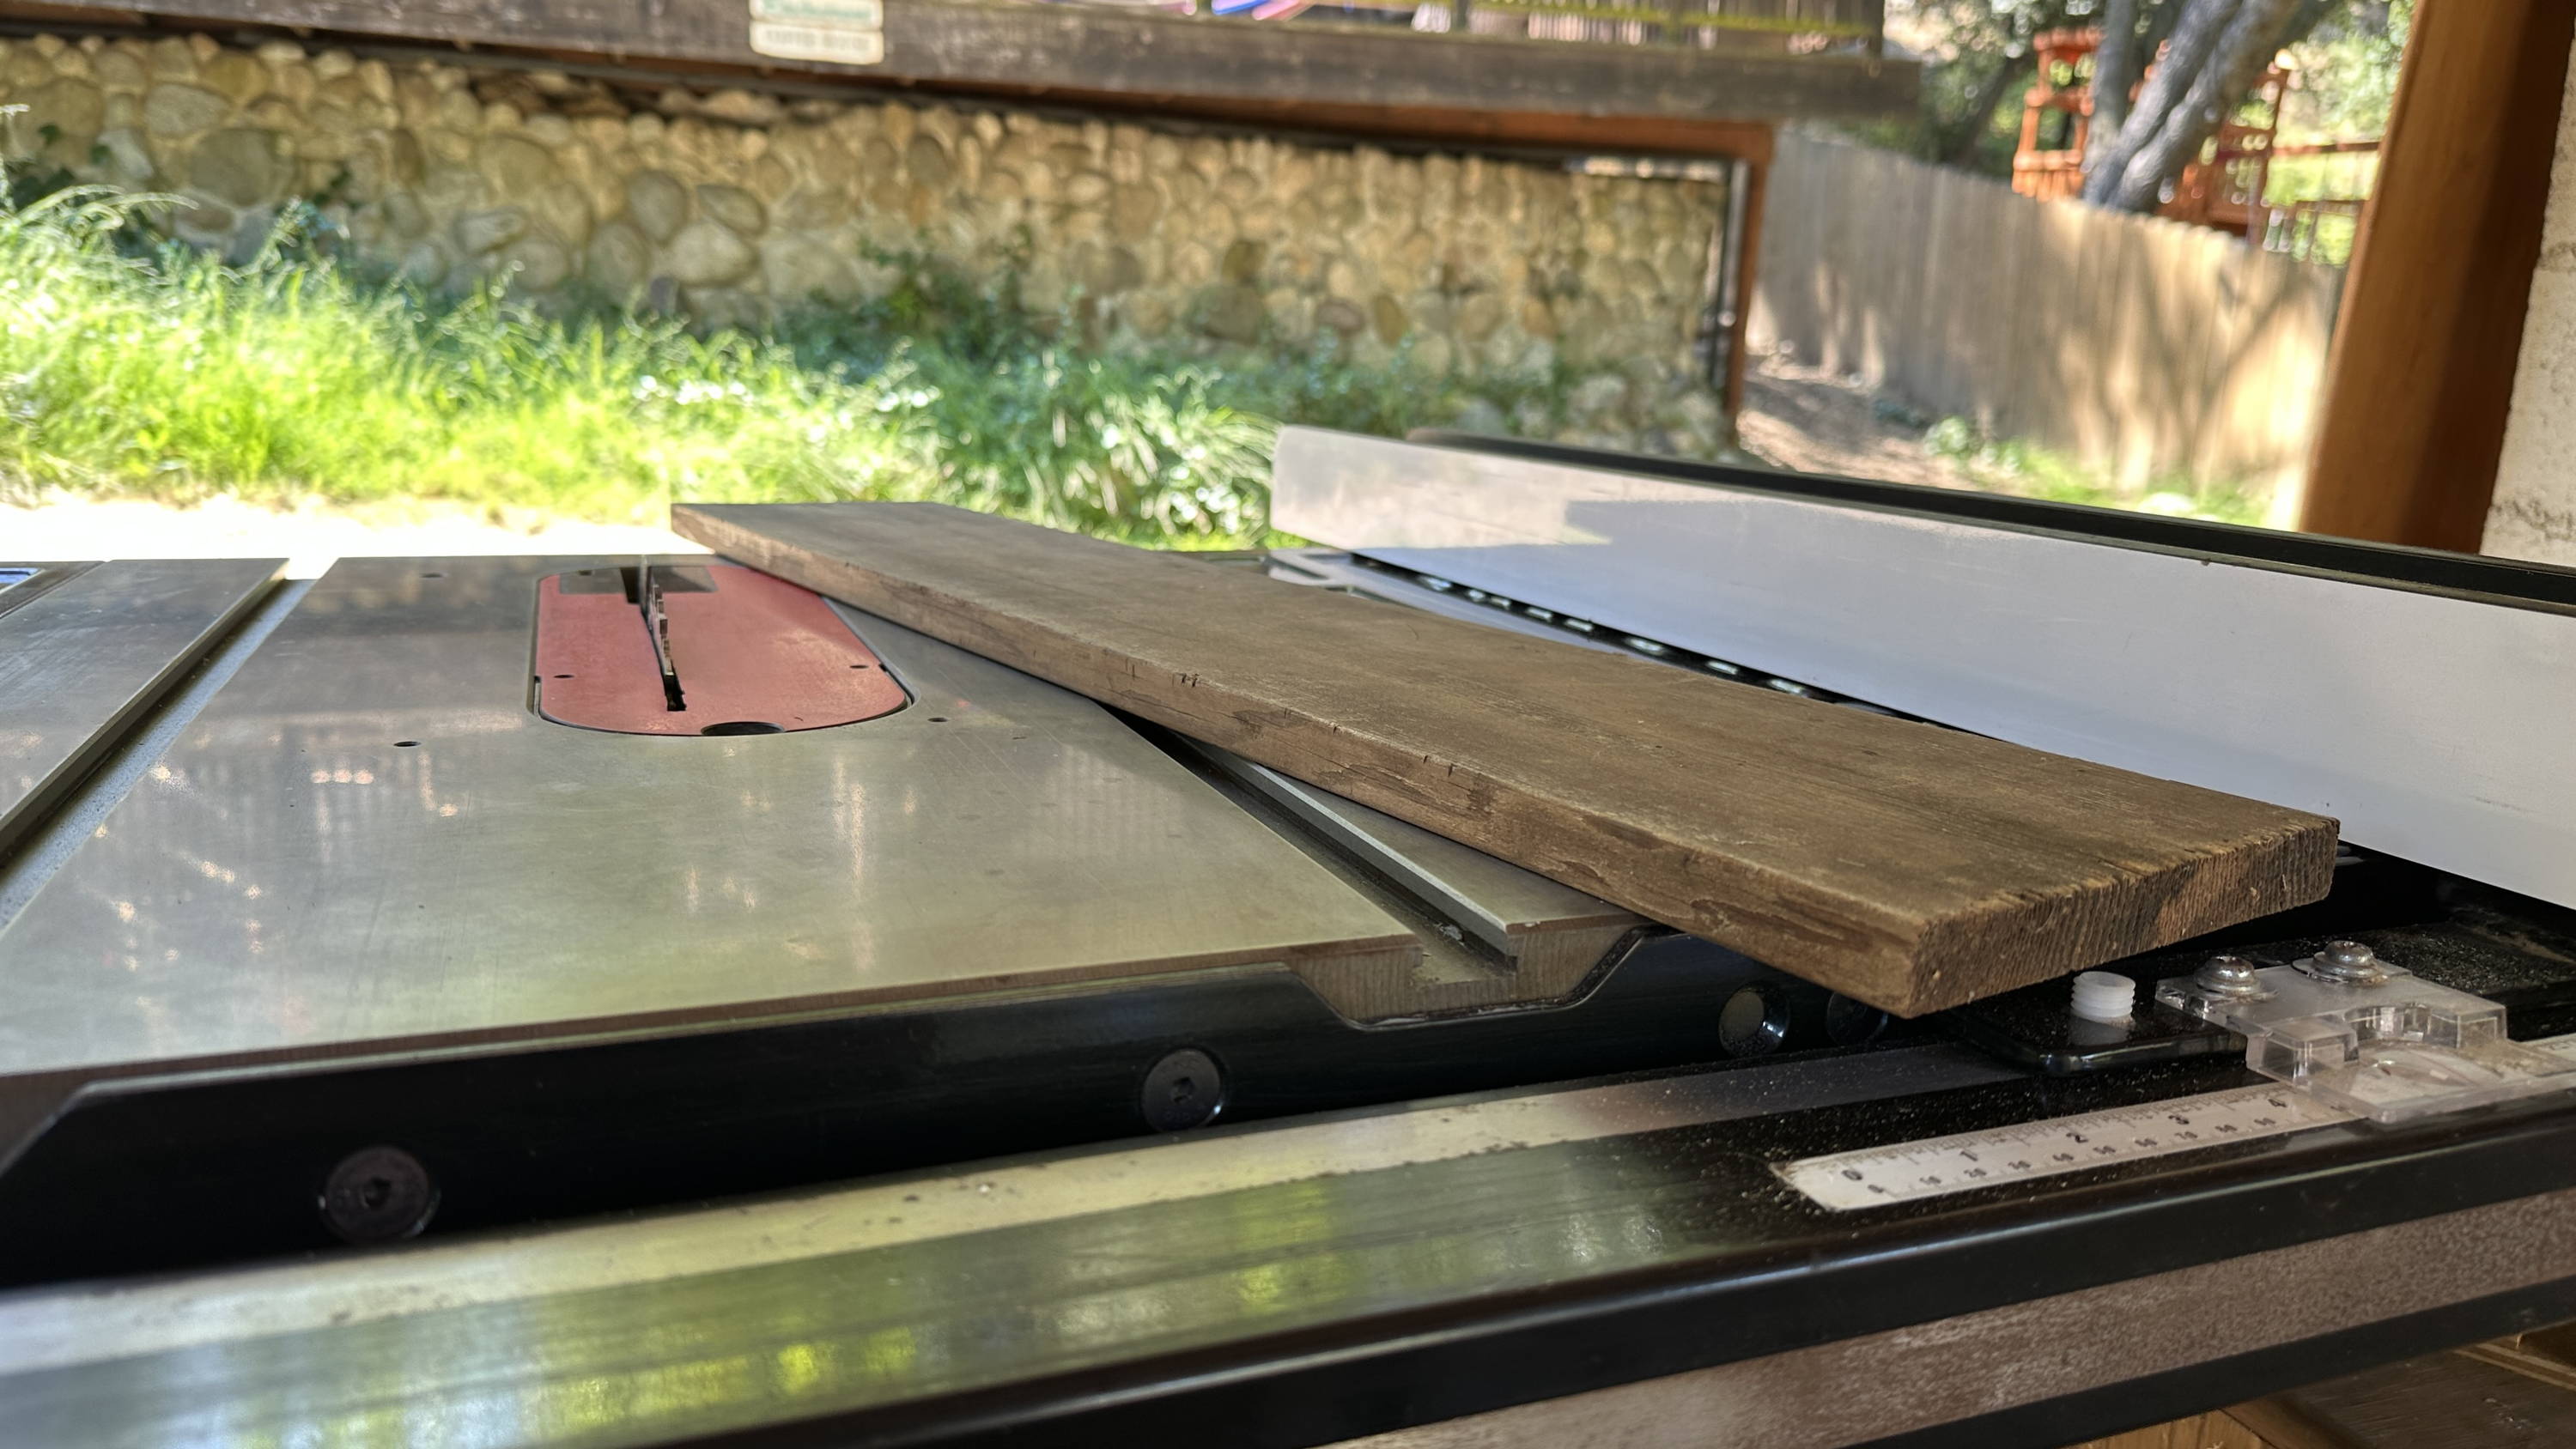
5. USE BACKER BOARDS FOR END GRAIN EDGES
If you're routing the end grain edge of a board — or cutting a dado all the way across — you’re practically guaranteed to get tearout at the exit of the cut.
That’s because the fibers are running along the length of the board. And with nothing to hold them in place at the far edge, they’ll split out.
This is easy to avoid by using a backer board — which is just a sacrificial board that helps hold those fibers in place.
As you cut your workpiece, keep this backer board against the edge where the bit will exit.
Continue the cut past your workpiece into the backer board, and you’ll save yourself from some nasty tearout.
6. PAY ATTENTION TO GRAIN DIRECTION
One of the best ways to prevent tearout on a router table is to cut WITH a board’s grain — not against it.
Learning to read grain direction is a bit of a skill. You can learn more about it here.
It matters most when you’re dealing with the edges of a board. For instance, when you’re cutting edge profiles, rabbets, or flush trimming.
Template routing can sometimes pose a challenge because in order to cut with the grain on some edges, you have to flip the workpiece over — which isn’t possible with a regular flush trim bit.
Double-bearing flush trim bits are a great solution. You can simply switch to the top or bottom bearing when flipping your workpiece over — and don’t have to worry about changing bits.
SAY CHAO TO TEAROUT AND BYE-BYE TO BURNING
Getting finish-ready cuts straight off the router table is a serious time-saver — and the tips above can save you from the scourges of tearout and burned edges.
It makes projects so much easier — and a lot more enjoyable…
Which is the whole point of woodworking, right?
Want to get the most out of your router table? Here’s 5 Uses for Router Tables You (Maybe) Didn’t Know.
What tricks do you have to prevent tearout and burning on the router table? Let us know in the comments below!
Follow us on Instagram @katzmosestools, on TikTok @katzmoseswoodworking, and check out my YouTube channel for more great woodworking content...
And as always, STAY SAFE IN THE SHOP!