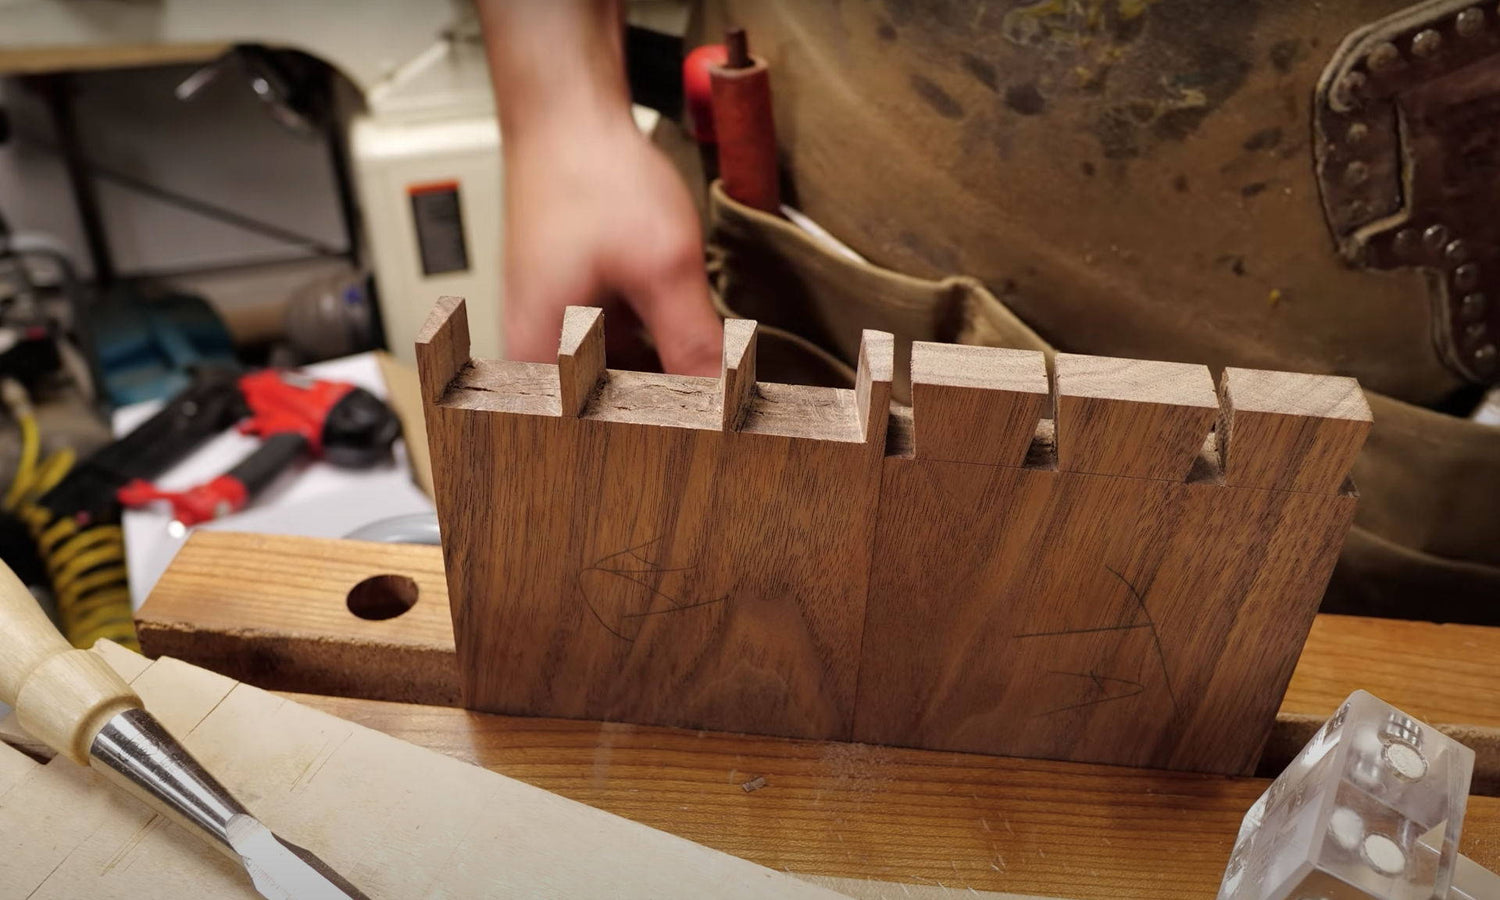
Your first time can be scary — but once you finish, you’ll want to do it again and again (I’m talking about dovetails, sicko).
Hand cut dovetail joints are like a right of passage for woodworkers.
They require a level of skill and accuracy that can be intimidating. And in all honesty, your first dovetails will NOT be perfect.
But there are steps you can take to set yourself up for the best possible results — even if it’s your first time.
Today, I’m giving you 11 tips for making your first dovetails as accurate and pain-free as possible.
Just note: This isn’t a guide for how to cut dovetails (you can read that here).
But once you understand the basics, these practical suggestions will make your dovetails a whole lot better — even if you’re a total noob.
TABLE OF CONTENTS
1. CHOOSE A FORGIVING WOOD
If you want to suffer, cut your first dovetails in inch-thick white oak.
But if you aren’t a masochist, I recommend choosing a softer hardwood for your first time.
Softer woods are easier to saw and chisel, so you won’t get slowed down by dovetail fatigue (it’s real).
Also, the “spongier” quality of softer woods gives you some leeway on precision. Even if your pins and tails are too tight, a few blows of a mallet can squish them together without splitting or cracking the boards.
On top of that, softer woods won’t dull your chisels as quickly. You’ll get a lot further with one sharpening than you would in something like hard maple.
A few good options are:
- Walnut
- Cherry
- Soft Maple
- Basswood (for the easiest cutting ever)
Pine is definitely an option, but you’re more likely to struggle with chipping and tearout.
Just know that the harder the wood, the harder cutting dovetails will be.
Use the Janka hardness scale as a guide for other easy-to-work-with species.
2. PLAN TO MAKE IT PROUD
The first step of dovetails is marking your baseline, or depth line.
The baselines determine how far into the board you’ll cut your tails and pins — and how far they’ll stick out past each other.
If you want the ends of the pins and tails to be flush, you might think to set your marking gauge to the exact thickness of the respective boards.
But this leaves zero margin of error. And if the pins or tails end up being shy of the other board's surface, you’ll have to plane down that entire face to make them flush.
Instead, set your marking gauge to the thickness of the pin or tail board, then add 1/32” to 1/16” inch of extra space.
When the joint is assembled, the ends of the pins and tails will be slightly proud. All you have to do is trim down the end grain — which is a lot easier than planing down an entire face.
3. GO EASY ON THE SHOW FACE BASELINES
First things first, decide on what will be the show faces on your pins and tails board.
When you go to mark the baseline with your marking gauge, don’t go too deep on the show face.
If you gouge in the baseline on the show face, you’re going to have to take off a lot of material to get rid of it once the joint’s assembled.
Another technique is to roughly lay out your pins and tails with pencil — drawing the edges that lead from the end grain to the penciled baseline (a dovetail guide works great for this).
Now with your marking gauge set at the correct depth, mark lines ONLY on the waste sections.
You’ll cut to this line later on with a chisel, so it’ll disappear. And now you have no knife line to contend with on the show faces of your pins or tails.
Some people leave the marking knife line because they think it lends a more hand cut look — but I prefer a clean face.
4. CUT A RABBET ON THE TAILS BOARD
I almost always cut a rabbet on the back of my tails. Why? For three reasons:
- Helps with alignment: When you go to trace the tails onto your pin board, the rabbet creates a physical reference for aligning both boards — ensuring your dovetails come out square even if you slip while tracing.
- Creates a reference for your chisels: The edge of the rabbet gives you a 90° reference for your chisels when paring down waste — and makes it easy to not go past your line.
- Makes the inside look perfect: The shoulder of the rabbet covers the inside base of your pins. Even if you screw up the non-show face of your pins and go past the baseline, it’ll be hidden by the rabbet and look immaculate.
You don’t need to cut the rabbet deep. ⅛” (3 mm) is plenty.
Just make sure it’s square and flat. I usually cut it on my crosscut sled with multiple passes, then clean it up with a router plane or rabbeting plane.
5. USE A DOVETAIL GUIDE
I swear this isn’t just self-pandering. Dovetail guides dramatically reduce the learning curve of hand cut dovetails.
They help guide your saw for perfectly square and angled cuts.
Using a hand saw is easy. But free-hand cutting to a line accurately takes years of mastery.
With a good dovetail guide, you can get those masterful cuts on your very first set of dovetails.
They also speed up and simplify the layout process.
Instead of having to mark the edges of your pins and tails, you only have to mark the top edges on the end grain. The guide does the rest.
The Katz-Moses Magnetic Dovetail Guide is an all-in-one hand saw solution, featuring:
- 2 pin-guide sides, 1 tail-guide side, and 1 90° crosscut side (for cutting the shoulders on your tails board)
- Ultra-strong neodymium magnets that hold your saw steady so you don’t go off your line
- An 8:1 version (recommended for hardwoods) and 6:1 version (recommended for softwoods) accurately manufactured to precise ratios
Plus, you can even use it as a chisel guide when paring down waste.
Ok, self-pandering over.
6. DON’T STRESS ABOUT THE TAILS
Here’s the thing about tails: It doesn’t matter where you cut them as long as they’re square and have flat edges.
You’re going to cut the pins to fit the tails anyway — so don't get hung up on cutting the tails exactly on your layout lines.
You want to get close for an even look. But no one’s going to notice if you’re off by 1/32” inch.
The important part is that the edges of your tails be square to the end grain and as flat as possible. This ensures the best results when tracing them onto the pins board.
Again, a dovetail guide makes it easy. I recommend that once you start the cut, just follow through and get it done.
7. USE A DOVETAIL ALIGNMENT BOARD
This might be the most important step when it comes to the final accuracy of your dovetails.
“Transferring the tails” means tracing the outsides of the tails onto the end grain of your pins board, marking the top edges of your pins.
For everything to fit together tightly, it needs to be right on the money.
The problem is finding a way to trace the tails without either of the boards shifting in the process.
It can be hard to realign the boards in the exact same position if you slip — and even a slight shift can mess up your accuracy.
That’s where dovetail alignment boards come into play.
They’re simply two boards attached at 90° with a coplanar fence on both faces.
That coplanar fence allows you to perfectly align the two boards with zero finagling. And if you cut the rabbet on your tails board, it’s literally fool proof.
You could slip on a banana half-way through tracing the tails and huck the board across your shop — and still have no problem realigning your boards to the exact same position.
Here’s a video on how to use a dovetail alignment board.
We also have CNC-cut dovetail alignment boards in our store that take only one step to assemble.
8. LEAVE EXTRA MEAT ON THE PINS
If you’re after absolute perfection the first time, here’s a little tip.
When you go to cut your pins, cut a little off your line on the waste. The closer the better.
After you clear out the waste in the middle, use a super sharp chisel to pare the pins down to the line.
Pay the most attention to the show face of the pins. The back edges are going to be hidden in the joint anyway.
A TIP ON TOOTH SET:
If you decide to saw right to your line, you’ll need to pay attention to tooth set.
Every dovetail saw — whether Japanese or western style — has teeth that splay out one way or another (this is called tooth set).
When you set the saw in your layout line, make sure you set in the row of teeth that lean away from your waste side.
That way, the kerf gets cut in the waste and not where your pin is supposed to be.
9. UNDERCUT THE WASTE
After clearing most of the waste between the pins and tails, it’s time to pare down to your baseline with a chisel.
Here’s a little cheater trick: The end grain between your pins and tails doesn't need to be exactly 90°.
As long as your baseline edges stay clean, slightly undercutting the inside guarantees no humps will prevent the joint from fitting together flush.
Don’t overdo it — and don’t undercut so close to your baseline that the edges get frail.
But a slight undercut can save you from spending forever trying to get everything flat.
10. HIDE THE GAPS
You’d have to be the chosen one to get gap-free dovetails on your first try.
And besides — filling gaps is dead simple.
For small gaps (1/32” or less), use the glue and sawdust trick.
Rub a bit of glue in the gaps around your dovetails, then give the whole area a light sanding. You’re not trying to smooth the area — just create some sawdust.
The sawdust will mix with the glue in the gaps and create an on-the-fly wood filler. Sprinkle a bit more sawdust over the gaps, pack it in, and let it dry.
It might look a bit darker than the rest of the wood when you add finish, but only the nitpickiest of woodworkers will say anything (and who wants to hang out with those guys anyway?).
I use this trick on all my dovetails — even if I don’t notice any visible gaps. It’s like an insurance policy for a seamless looking joint.
If you’re dealing with some big Grand Canyon level gaps, glue and sawdust might not cut it.
Instead, make a small wedge out of the same species of wood as your project. Sand it so the end fits into the gap, and lightly mallet it in with some glue.
Pay attention to the grain so you can match end grain to end grain and vice versa.
Once the wedge is in place, trim it flush. Done correctly, the wedge will hardly be noticeable.
11. AVOID TEAROUT WHEN FLUSH TRIMMING
If your pins and tails are slightly proud (like suggested in tip 2), one of your final steps will be flush trimming them to the show faces.
My favorite tool for this is a low angle block plane or jack plane. But a regular bench plane can work great too.
What really matters is the direction you cut.
Whenever planing pins and tails flush, always cut from the outside in — coming from the outer edge towards the rest of the board.
Since the pins and tails are supported from behind, you won’t get any tearout.
If you were to plane outward, the unsupported fibers on the backs of the pins and tails are liable to tearout (here’s more about avoiding tearout).
And after putting all the time into making your dovetails look perfect, tearout is a slap to the face you want to avoid.
NOW GET TO SAWING
Dovetails can be intimidating to someone who’s never cut them. And your first set isn't going to win any beauty contests.
But by using the tips above, you can get more than adequate results on your first go.
Just remember that every new challenge makes you a better woodworker — and don’t forget to have fun along the way.
Want better dovetails right off the bat? The Katz-Moses Magnetic Dovetail Guide cuts the learning curve down big time.
What tips would you give to someone cutting their first dovetails? Tell us in the comments below!
Follow us on Instagram @katzmosestools, on TikTok @katzmoseswoodworking, and check out my YouTube channel for more great woodworking content...
And as always, STAY SAFE IN THE SHOP!


5 comments
Jim A. Paschis
Since the title of your dovetail presentation was for beginners, it could help to illustrate and label the components on one of you dovetail joints.
Since the title of your dovetail presentation was for beginners, it could help to illustrate and label the components on one of you dovetail joints.
Lee Fossett
I’m about two drawer boxes past rank beginner status, but the lesson that was hardest to learn for me was to cut (saw) TO the line, not ON the line. This is a really good post. Thanks.
I’m about two drawer boxes past rank beginner status, but the lesson that was hardest to learn for me was to cut (saw) TO the line, not ON the line. This is a really good post. Thanks.
Tim Higgins
Good blog post! I can attest to the efficacy of using an alignment guide. Coincidentally I had made one from a friend’s advice a couple of weeks before reading this blog, and it really made a difference. Also, I started viewing your videos on YouTube and they are helpful, and a hoot! I just used the KM dovetail guide for the first time. I found it to be easy to use and a great help.
I found I had difficulty making dovetails because I concentrated on completing one JOINT at a time. Then I realized I wasn’t constructing a JOINT, but a BOX or DRAWER. Now I cut all my tails first, then I concentrate on the pins individually to fit the joint. Rather than handling four pieces of wood multiple times, I handle only two at a time. And a well marked piece of tape showing the inside face, up from down, and numbering the joints lessens the confusion.
Scott
The photo in step seven is unclear to me. Not sure how you are lining things up and securing them for marking. Can you show more angles for this example?
Thanks
The photo in step seven is unclear to me. Not sure how you are lining things up and securing them for marking. Can you show more angles for this example?
Thanks
David Hunter
Hi from over the pond.
For me it’s always crucial to mark the waste on both the Tails and Pins before starting the cuts. And not on just the end grain but on the face and rear f the boards. Can’t tell you how many times I have started a cut on the wrong side f the knife mark, or even worse cut out the wrong section f the pin by not paying attention, or tired after a long session.
Great article through Katz